Description
About This Video
Transcript
Read Full Transcript
Welcome to Palladio's anytime. I'm Elizabeth Larkam and I'm so delighted to be back with you at this beautiful studio. Today's program, one of my favorites on the reformer is inspired by a book from handspring publishing. The book is edited by Robert Schlei. It's called Fascia in sport and movement. As we go along, I'll make references to that book and also feel free to check the reference list that we've provided. When we get started. You'll need to have your props assembled. We'll use a magic circle or [inaudible] ring and one of the exercise sequences.
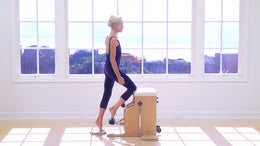
Clearly you'll be using a box along box and I'm going to start this first exercise with the yellow spring. It will be helpful for you to have a reformer that has a light spring. I prefer the yellow spring. You see the yellow spring on the heavy setting. Sometimes on a lighter setting. I'll let you know so when you get started you'll have the box placed asymmetrically long box on the side of the carriage where you're standing, standing with your foot close to the foot bar, place your other leg on top of the box. Yes, it looks as if you're mounting the fire hydrant.
Now bending both elbows as you exhale, lower your pelvis in the direction of the ground and then you show your hand to slide the carriage back and come forth lower and slaw and come back gently. Now because this is an unusual move that gives some length to the tissues from the pubic bone to the side of the femur. Now as you lower and use your hand to slide back, turn your pelvis, Ridge, shoulders, neck, head and eyes as if you could look over your shoulder. Okay, lower slot, rotate turning your pelvis away from your femur. Exhale, lower slide and rotate, which is relative internal rotation of the right femur. Lower internally, rotate.
Now come out of this. Use your arms to help drag your heavy leg off the box. Let your leg plummet to earth and go, wow, that's different. Walk around to the other side. Reset the box. Now there always have been differences between sides are always will be differences between sides and pilates. Instructors will always have work.
All right. On the second side, lower your pelvis as if you could lower your hip joint below sea level before, below the level of the box you share arm to slide the box back, elongating this distance at the top of the Femur, lower and come forth. Exhale. Inhale to come forth twice more here. Coaxing gently, but not pushing too far before bef be yawned your limits. Slide back now. Turning pelvis, ribs, shoulders, head, neck and eyes and come back. On this side we'll add a, uh, the idea that you're bringing your heel in the direction of the same side.
Shoulder blade, lower turning, pelvis, ribs, shoulders, head, neck, and eyes.
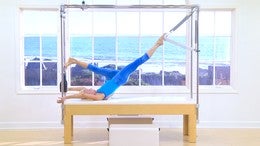
And now you'll set to three red springs, three red springs on the heavy setting. And I use the I leave the yellow spring on as well. These loops are now going to go on the back of your knees. Roll from your side onto your back and place these loops around the back of your knees.
Both knees open. Why did the side toes touch briefly? And then keeping your knees bent, your feet separate as you exhale, aim the heavy corners of your pubic bone down in the direction of the carriage. As you inhale, let the back of your lungs settle into your rib basket on the carriage. Twice more here, driving your heels down in the direction of the ground. Heels close to your sitting bones.
Inhaling shoulder blades resting on the carriage. It's internal rotation, sitting bones wide, toning your abdominals from pubic bone to chess bone. Inhale, did I say inhale or exhale? What? One of the two, but it would be wise to exhale here. Okay. Exhale now and inhale to open. Reverse the direction as you exhale, all the abdominal layers. Tone in a neutral pelvis, neutral spine. Inhaling, anchoring your [inaudible], your sacrum down into the carriage. Exhale, collecting from pubic bone to chest bone in hailing twice more here as you exhale. In this case, the sitting bones would draw towards each other and as you inhale, the sitting bones would widen.
Now bring your shins parallel to the ceiling and your palms together. Your fingers interlaced. Now your shins are parallel to the ceiling and you're in more of a tabletop position. Flex the foot that opens as you inhale. Aim your navel towards the steady side leg, pressing your back hand into your front hand or the right hand into the left hand. Exhale to close. Inhale to open. Exhale to close. When this leg opens, flex your foot.
That will strengthen your abdominals and aim your navel towards the vertical femur. That will help to keep your pelvis level and steady here using your leg as a weight to challenge the ability of your pelvis to stay steady when you turn your head, neck and eyes away from the opening leg. That helps to counterbalance the weight of the leg and helps to keep your torso more stable. But wait, there's more. Oh heavens. Now press your when the this leg opens, press this side hand that way. And that will awaken the anterior OIC leak slink system or something.
And then this palm presses this way for the Anterior Oblique sling system. And finally, if you just don't have enough to do yet, you can press your tongue into the cheek of the steady side leg. So let's say that this leg is staying steady. Press your tongue to that side and turn your head to that side. And of course you can't talk, but you can still breathe and you can notice the con, the connection of your, the use of your tongue to the use of your abdominals.
Onward. Now to the next event. You've had some focus on your hip joints and focused on the internal rotation and the medial glide of your hip joint. Now we'll focus on a thoracic rotation for that. You'll need no springs at all, so take off the yellow and take off the three red. Now depending on your height of the reformer, you can either use a box, a four kneeling or you can kneel on a mat on the ground. Um, I'll use the box.
If you have a reformer without legs, then of course you won't need a box. You can just use a mat next to the reformer, lining up the box in line with the carriage and having the carriage all the way home. Have your knees say shoulder with the part. Give yourself a wide and sturdy base. The foot bar hand reaches across and pulls the carriage steady and the other hand is going to go on this shoulder rest. Launch your head well, don't want your head, but put your head in the far corner of the carriage so that your shoulders can be down. Now pulling towards you with the lower hand. And pushing away with the upper hand.
Push with the knee that's closest to the springs and then push with the knee closest to the risers. Inhale to glide. Exhale to return. Inhale to glide. Moving your eyes opposite the direction in which the carriage is moving. Inhale to glide. Change the top hand to the new shoe. Older rest. Inhale Clod. Exhale.
To return, this would be turning your lungs or a spiral. Spiraling your lungs around your heart, turning towards the risers and turning more towards the risers. Eyes go opposite the direction. Now come onto your forearms. Bend both elbows and as you inhale, slide so far to the side that even though your chest bone is between your hands, you have a long distance from your elbow to your opposite knee. Exhale to pull back. Inhale to hover.
Let's see. Maybe it should be exhale. That's better and inhale because we'd like abdominal control as you go a long way from your supporting side. Now having been at this perpendicular angle with the perpendicular arrangement, with respect to the resistance, change your angle now. That's so important to do. Change your angle so that your hands are in the direction of the shoulder rest and the light of your chest bone is still between your arms.
So now this will be a different angle rocking over the head of your femur. Meanwhile, back at the shoulders, collarbones are wide scapular or down twice more here and hover uni off the carriage. Inhale to slide. Exhale to huffer. One new angle deserves exploring another. This time you aim your head towards the foot bar and your hands towards this corner of the carriage. This will be sliding backwards, a little bit unusual, but um, beneficial. So important to explore all different angles of um, movement of your hip joints of your knees.
And of course this accesses the pelvic floor and the deep abdominals. When you change up your angle, now relocate the box. This time the box will be further down the carriage so that when you're kneeling, your, the light from your chest bone is between these shoulder rests. And just in case you'd like, it's Polato is for golf. Okay. Keeping your elbows straight. Inhaling, aiming your nose directly down in the direction of the carriage.
Exhale to return. Now this time, turn your head, neck and eyes as if your ear could listen to the carriage and your gaze will be at the top of the risers. As you inhale, send your sitting bones up and back, broad and between your sitting bones, keeping both elbows straight in order to encourage the rassic rotation and your ear listens to the carriage.
That's closest to the foot bar closest to the springs. Insists that you take a nosedive in the direction of the carriage.
Exhale to return. Surely the new side will be different. So let's set this up on the new side. Now you'll place the box parallel to the frame. Bring your knee close to the edge of the carriage and this time reach across this time as before, reach across and hold onto the shoulder rest closest to you. Place your head far into the corner of the carriage and your opposite.
Your only hand that's left will be on top of the new shoulder rests. When you pull with the lower hand and push with the upper hand, keeping your elbow straight, it will encourage rotation. Yes,
Inhale slide far m the exhale. Draw this elbow towards this knee. Stand on this knee and turn your pelvis around the head of the femur. Exhaling. Inhale to come back and hover. You know you could either XL here or Xcel here.
I suggest exhaling as you go far as a safety belt and then inhale to return so that you create a neutral pelvis neutral spine rather than a posterior pelvic tilt. Change your angle now. Inhale to slide. Exhaling drawing your elbows towards your knees. See the elbows function, the ground force through your elbows will function as a handle for scapular depression, for shoulders coming down.
Collarbones wide here.
Inhale to slide lips. Exhale to return. You can alternate head, neck, and eyes aiming straight down and turning around your central axes. Now get rid of the box for the moment and stand with your feet where your knees used to be sitting bones wide. [inaudible]. Inhaling, the thoracic spine starts to rotate and it continues to rotate as you bend your knees. Appreciating
Moving your pelvis over the head of your femurs as all of the abdominal layers snug up into your spine and then straightening both knees and bringing your ankle bones together. Tipping your pelvis over the head of your pubic, over the head of your femurs as all the abdominal
Now we could celebrate that good feeling or we could just move on. We focused on thoracic rotation and now it's time to focus on the rotation of the pelvis and the lumbar spine. Turning the pelvis around the head of the femurs. Change the springs. For this, you'll need to have two red springs, so make sure that you take the other additional springs off and you can have the bar high or you can have the bar low. The my preference is to have the bar high because that will make more demands on the rotation of the pelvis and the lumbar spine. Um, when you're new to this and are more restricted in terms of hip flection or knee flection, then by all means, start with the foot bar lower. Come to life from your side onto your back.
Have the front of your heels in contact with the foot bar and have your heels in line with your sitting bones, legs, their hip joints are in parallel. Now Cross your right leg behind your left. So this right foot is going to go behind the left foot and rest on the uh, the fifth metatarsal on the side of your foot. Not to push back because that fifth metatarsal isn't made for weightbearing, but just to rest there. As you inhale, open your right knee, stand firmly, throw your through your left foot. And as you exhale, this open right knee provides the invitation for your pelvis and your lumbar spine to rotate. Inhale and rotate more to the right.
Exhale to close and land. Again. Inhale to open your right leg. As you exhale, anchor your left leg and turn your pelvis, your lumbar spine to the right and bring the back of your left shoulder blade. The back of your upper left lung onto the carriage, close and land. Now we start with the second variation, which starts the same as the first inhale to open. Exhale, anchor and turn to the right while you are up.
Translate your pelvis rhythmically to the right and to the left and to the right and left to the right and left. Create a ground force through the back of your left shoulder so that your pelvis and lumbar spine continues its rotation to the right and also a translation to the right. Giving more of an opportunity for a medial hip glide on the left side. Inhale to close. Exhale to land. We'll take those two variations on the next side.
Anchoring the front of your right in line with your right sitting bone. Inhale, the left knee opens. As you exhale, your right shoulder stands its ground and you turn rotating your pelvis and lumbar spine towards the left. Creating an access of your right femur around which your pelvis turns. Close your left leg towards your right and land and neutral sacrum. Inhale to open. As you exhale, reach your right knee away from your right ear and turn your pelvis and your lumbar spine. Meanwhile, back at the lower ribs rather than letting them flare forward into hyper extension at the Thoracolumbar junction. Don't do that.
Settle down here with the front ribs towards your spine and close again. Inhale to open. This left leg provides the invitation. Exhale, turn towards the left, settling your low front ribs now while you're up, translate your pelvis in a rhythmic fashion. Left right, left, right pulsing gently pulsing, coaxing a little bit more length into a myriad of tissues while your pelvis is rotating to the left. What's implied here is that the light from your chest bone is aiming slightly to the right, creating a diagonal from the anterior oblique sling system. Can you tell I like that move [inaudible].
Close this left thigh and land third variation on the first side. Make sure that this left heel is in line with its same side sitting bone, not in the center, not in the right lane. Inhale to open starts the same as the first exhale. Turn lift to the right while you are up. Adjust this foot so that you're standing on the sole of your toes on your Metta.
Tarsals doesn't have to be the first ray. The big toe can be the middle toes. Slide back and forth. As you slide back, rotate to the right as you slide forward, rotate more to the right. So what's to keep you from just road rolling into the ocean? Well, the back of your left shoulder blade, the lobe of your upper left long. They are staying here in the room on the carriage and the rest of you is spiraling towards the ocean. As you slide back, remember that the lower front ribs collect to your pelvis.
We're not going here. That would be too much compression at the Thoracolumbar junction. Close your right leg d. Rotate in land. Anchor the front of your right heel in line with the same sitting bone.
The left Femur is providing the invitation. Adjust while you're up your left foot onto the ball of your left foot. Push and close, rotating to a spiraling to the left and spiraling more to the left. Inhale to slide back. I know it's Peloton one oh one isn't it? Don't turn your head during a bridge unless you're on Pele's anytime.
It's my preference to leave the foot bar high. If you are new to the, uh, coming up exercise, you'll leave your foot bar low. So you'll be standing and standing with your foot. Your standing foot aiming to the shoulder rests and this foot is going to go up onto the bar. Now it could be in line with your sitting bone. It could be at the middle of the bar, it could be far forward at the bar. When you practice this, you'll start with your heel back and then you'll work your way forward and you can have your hands on the carriage if you prefer.
You can use the long box for your forearms rather than having to reach to the carriage. As you inhale, anchor the sole of your heel and your first dre and slide out. Exhale to return. Inhaling, exhale to return. Now the carriage is moving because this knee is extending. Inhale to slide. Exhale to return, keeping the light from your chest bone forward towards the frame rather than sitting back over your supporting leg. Each time that you push out, you're lengthening the distance from hip joint to sole of big toe and when you come, when you slide back in, this is the pelvis moving over the femur and the femur nestling into the hip joint.
Externally rotate now slide and return in to slide and return twice more in a rhythmic fashion. Next comes internal rotation. Pigeon Toe your thighs so that your heel is above the bar and your big toe is pillow. Inhale to push. Exhale to return. Now there will be a tendency to aim your pelvis this direction in order to reduce the amount of uh, focus on the hip joint.
Instead, aim your tailbone, your sitting bone towards the left, towards your supporting leg. Push pelvis of sitting bone aims to the left as your pelvis nestles over the head of your femur. Easy. Now make your way to standing. Say, well, that's different, but what were you expecting? It's Polonius anytime. Come on. Okay, so you're supporting foot is in line with the shoulder rest approximately. I know one side doesn't fit all. One size doesn't fit all. So you'll need to make an adjustment according to your height and your limb length. This foot can go back if you're starting forward.
If you are progressing, transferring the motion of your leg from your arms into the carriage slide and your left sitting bone towards the right in the hailing x hail to return drawing your knee cap up in the direction of your hip joint, keeping your pelvis forward over the carriage. If you were to sit back, that would encourage, um, knee hyper extension, which is not something we're here to encourage.
Now your knees will be lined up on the central axis of the carriage. You would draw a line from the center of the head rest down to the middle spring, and that shows you where your knees will be. Your shins will be partly off the carriage and your feet off the carriage as well. Um, use the cord from the back and put the loop around your, let's get the logo. Line that properly. Shall We? Okay. Put the loop around the handle and put the handle of the ring on your lower ribs. Make sure that the handle of the ring is on. Make sure that the handle of the ring is on bone and not on belly. Now your knees will stay steady and your pelvis, ribs, shoulders, neck, head and eyes. Turn to see, uh, beyond the riser at the back or where the cord comes from. The back, creating a ground force through your left knee. Inhaling, turn your pelvis, rib, shoulders, neck, head and eyes.
Exhale to return. Inhale to rotate. Exhale to return. Now bring some attention to your shoulder blades. Slide your shoulder blades down. Your left shoulder blade in the back is relating to your right pelvis and your right shoulder blade in the back is relating to your left pelvis, pushing.
Go and return turning your head, neck, and eyes in the direction that you're going. Next, variation. Keep your head, neck and eyes steady. Straight ahead. Collarbones are wide
So far we've practiced this sequence in this relationship to the resistance. Change the angle of you're kneeling on the carriage so that you are now on a diagonal with respect to the carriage. Your knees will be right up against the line from the shoulder rest to the corner of the carriage. We'll keep the same chord from the back. Rotate turning pelvis, search, shoulders, neck, head and eyes. Lengthening the back of your next slide your shoulders down and turn on this diagonal to see over your new shoulder.
And the third variation is that you move, turn your head, neck and eyes opposite the direction in which the carriage is going. Rotate and rotate and rotate. It's true that many of you will find this yellow spring rather light for this exercise. If so, of course, you're welcome to use a blue Springer to make it heavier. I find that this variation, the sequence on your knees is a very good preparation for what we'll do standing in terms of feeling the connections. So that's why I chose not to do a heavier spring this time.
Okay. Now change to the new side for this, you'll use the loop from the back and puts your knees shoulder with the part in line with the central axis of the carriage. Put the loop around the ring and the ring goes at the bottom of your chest, bone on your ribs, turning pelvis, ribs, shoulders, neck, head and eyes. Seeing beyond the riser. As you exhale, anchor your back knee. Slide your shoulder blades down. This foot is I'm flexing the left foot in order to give more abdominal strength on the left side. Inhale to turn. Exhale to return. If you use or when you use an inhalation that will facilitate a small amount of spine extension. Keep your head, neck and eyes straight ahead.
Now the exhalation is going to tend to bring your shoulders forward so you can decide which feels better to you. The inhalation on the rotation or the exhale. Both are possible turning your head, neck and eyes opposite the direction in which the ring is turning. Making a diagonal connection from your right ribs to your left pelvis in the front and your right shoulder blade to your left pelvis in the back. Change to the new diagonal. Now turning slightly upstream, turning slightly towards the risers, turning head, neck and eyes in the same direction that your pelvis is turning.
Shoulders descent and you're well prepared for thoracic rotation from what we did before. Head, neck and eyes
We'll use it for standing in a moment and now you will be lying on your left, the long box on your front. Change to a blue spring off with the yellow and bring the foot bar down to the middle level or perhaps the lower level, the higher the foot bar, the more demanding this exercise will be on your spine extensors. So we'll put the box long box on the carriage this time. Place the long box symmetrically on the carriage, and if you've been using a yellow spring, a lighter spring change to a slightly heavier spring, a blue spring, now you have options with the foot bar. You always have options. If you are fairly confident of your spine extensors, your lumbar extensors, then leave the bar on high. If, however, you would like to have a less demand on your lumbar extensors than bring the foot bar to its middle level or even the lower level, it will be helpful to use a Non-skid Mat, a pad at the corner of the box to keep your hip joints anchored here.
Push back, climb into the frame and climate board, placing your hip joints right at the curved padded edge of the box. Nessa on down there and placed the balls of your feet, the soles of your toes in contact with the foot bar. If you prefer, you can place the front of your heels there. It's slightly more demanding to place the ball of your foot and the sole of your toes. Place one hand on top of the other and then the center of your forehead goes on the back of your hand as you can. She push out into Dorsey fluxion.
Slide your forehead along your forearm as if your right ear could listen towards your right elbow and then as the carriage returns, you bring your forehead back to center. Alternate sides. Inhale laterally. Translate to the left. Exhale to rise. Inhale to lower. Exhale to return translating to the right. It's as if your right ear could listen past your right elbow.
Inhaling, fill up your left lung. It's as if your left ear could listen past your left elbow. Now as you do this lateral translation of your head, your neck, and your upper thoracic spine, you are preparing the way for an honest extension extension of the thoracic spine, which is coming now,
Lateral translation and extend lower and return. Inhale to slide. However, lower and return laterally. Translation, extension, lower and inhaling. Exhale to return.
Use Your eyes as the advanced time team. Eyes Up, eyes to the right, lower and
Otherwise you'll compromise your shoulder girdle that you've worked so hard to address. I'm going to take a moment now just to lengthen the courts. Now that you've lengthened the chords and made sure that you're on a lighter spring, a yellow spring, it's time to discuss safety when you stand onto the carriage. Okay, this is a, it's a moving surface and unstable surface, so be quite thoughtful, quite conscientious and mindful. When you stand up on the carriage, you're going to plant one foot, plant the other foot. Take the back loop and come to standing. Now refine your positions so that your feet are, say shoulder with the part. Give yourself a comfortable distance apart here, a wide base and have your feet, the center of your foot right over the central axis of the carriage.
Bend both knees and tracking your knees forward over your toes. Turn and put the loop around the ring and this ring goes on the bottom of your chest bone. This ring goes on bone. Now throughout this motion, your knees will track forward over your toes while your ribs, shoulders, head, neck, and eyes rotate in the direction of the back riser planting your left foot. There's your ground force activating your left lateral pelvic stabilizers. Sure, I'll get right on it. Turn to your right pelvis, ribs, shoulders, head, neck and eyes.
Sliding your right shoulder blade back towards your left pelvis. Tracking your knees forward over your toes as you inhale, slide your right shoulder down. Plant your left foot, engage the lateral pelvic stabilizers and rotate. Turn to the right and come back. You might ask yourself, why are we doing this? Well, yes, because we can because we're interested in it and the reason I'm interested in this exercise is that I created this exercise as a way of activating the spiral line. The spiral mile fashional meridian that's described by Thomas Myers in his book, anatomy trains. That's on your reference list.
The spiral line is responsible for tracking the knees with respect to the hips and the ankles, and you can tell that I need a lot of practice in that. Now turning your head, neck and eyes opposite your pelvis. Anchor your left foot. Turn in your pelvis and your head mechanize look opposite the direction in which the ring is turning. The spiral mile fashional Meridian is responsible for balancing the rotational forces through the left and right sides, and it's also responsible for balancing or integrating many of the other mile fashional Meridians, the superficial front line, the superficial back line, the lateral lines, and the deep front line.
Now we could engage in a dissertation on this topic, but you'll be happy to know that's not now. Okay, take the second variation here. Turn on the diagonal so that your center ankle is right over the dog in the line from the shoulder rest to the corner of the carriage bending both knees last, so the ring with the back loop and place the ring on bone on ribs on the bottom of your chest bone. Inhaling, tracking your knees directly forward, turning your pelvis around the head of the femurs as if the light from your pubic bone and the light from your chest bone. We're going to aim back to the corner of the risers. Create a ground force with your left foot, your left lateral pelvic stabilizers, and as your shoulder blades slide down your ribs, have the idea that your collarbones widen and your chest bone, your maneuver IOM lifts just slightly to catch the light. It would be as if you were climbing up your very own spiral staircase around your central access. Inhale to rotate.
Exhale to return. Second variation your head, neck, and eyes look directly forward, forward defined by the aiming of your toes. Here you are differentiating your cervical rotation in to rotate, exhaling, tracking your knees directly forward over your second toes. And I've been so fascinated about delivering a lecture that I have not been going into as much knee bend and Ankle Dorsi flection as would be beneficial. Keeping your heels anchored, steer your knees forward over your toes so it's Dorsey flection of your ankles. Inhale to turn. Exhale to return.
Shoulders descending head, neck and eyes rotating, turning your pelvis, ribs, shoulders around the head of your femurs. When it's time for the dismount, caution moving walkways nearing its end. Bring this loop down and you're going to need a different loop. Now for the different diagonal turn to face the new corner this time, yes, it's the forward loop. However it's about behind you.
The other loop would be too extreme even for me. Okay. Bending your knees loop around the ring and place this ring at the bottom of your chest bone. Now there'll be quite a tug for you to lean back. Don't do that. Use the previous exercises to remind yourself that you connect your lower ribs to your pelvis, turning pelvis, ribs, shoulders, neck, head and eyes.
You're focusing beyond the forward riser. Inhale to turn. Exhale to return. Everything turns in the same direction, not exactly at the same time because there's a sequential, a wave of sequencing, a wave of activation that connects the souls of your feet with your shoulder girdle. Keeping your eyes straight ahead, rotating and straight ahead being defined by the direction of your toes.
The right shoulder blades, slides towards the left pelvis connecting the Leticia, Ms. Dorsey with the Gluteus maximus through the [inaudible] Lumbar Fascia in the Hale Thoraco Dorsal Fascia. Now turn your head, neck and eyes opposite railroad and road. Plant the souls of your big toes firmly. That will help to give an anchor for your adductors, which are a necessary contribution to the tracking of your knees over a year or two. So there we have three expressions of the spiral line. Spiral Mal fashional meridian in a standing at three different angles with respect to the resistance channeling the moving sidewalk at O'Hare.
Careful moving walkways nearing its end. Please watch your step. Thank you. Turn around to the new side and to get yourself arranged on the central axis of the carriage. Take the loop from the back last so the ring and put the ring at the bottom of your chest bone. Steering your knees forward over your toes. Your pelvis rotates when you turn your pelvis to the right. Don't let your left knee follow your pelvis. Uh, we're not skiing today, frankly, I don't ski any day, but keep your knees directly forward. Okay.
Inhale to rotate. Climbing up your spiral staircase. Exhale to return this time. Plant your right foot, your right gluteus media's Maximus, minimus, all of your lateral pelvic stabilizers and your obliques. The anterior and Posterior Oblique sling system will be very active to keep the ring and pelvis connected. Had neck and eyes look straight ahead at the ocean. I show my punisher.
You can probably see better from this shot here. The importance of scapular depression.
Change carefully to the next day. The next position, which is on the diagonal
When you do inhale to rotate, be careful that you don't hyperextend at the Thoracolumbar junction and go backwards. Balance the volume of your thorax, the volume of your ribs over the volume of your pelvis, and the third variation in this second standing position. Be thoughtful also about steering sitting bones directly down to your heels. This is not, the time could be fun, but it wouldn't be accurate to aim your pelvis away from your base. Caution. Now it's time to change diagonals and change courts. We'll put this one down.
Pick up the new court and make your way around to the new diagonal. Now your toes, your pubic bone and your chest bone are aiming in the same direction. Placing the ring at the bottom in this case that there would be a tendency for your right knee to drift to the right laterally to the right. Don't do that. Easy for me to say to stay in your knee over your big toe in the hail to turn and return going up your own spiral staircase up your central axis, eyes and nose. Aim where your toes are pointing. This right shoulder blade comes down so that the serratus anterior gets its money's worth here and finally, head, neck and eyes look opposite.
It's likely that it will be the more difficult to keep your central axis alignment when you're differentiating the rotation of your cervical spine.
Let's connect these all these slings systems with a festival of semicircles. It's my preference to use a blue spring, so we're going to start with a blue spring here and the head rest will be up so that the carriage won't run into the frame. Now slide down, bring your sitting bones off the edge and come to lie on your back. For this first
Pour in your pelvis into the springs and slide in. Collecting your ribs to your pelvis. It's opposed here. Your pelvic tilt in spine fluxion. Inhale to come up. Exhale to push back. Push the shoulder rests away. Pour your ribs into your pelvis and your pelvis into the springs.
Exhale, spine flection and oppose. Steer your pelvic tilt in the hangout to push back. Exhale, push the shoulder rests away. Slide your ribs to your pelvis, your pelvis into the spring's reverse. It's an anterior pelvic tilt.
Quoting Dov Cohen of pulse star spring painting, spring cleaning. Inhale to come up and forward. Exhale, push that shoulder rests away. Pour your ribs into your pelvis, your pelvis into the springs. Slide your pubic bone towards your chest. Bone, your chest bone towards your pubic bone forward and up and pour down. Now onto this, we're going to layer rotation. Push with your left hand. Turn your pelvis to the right.
Easy for you to do now because we've already practiced the previous exercises. Pour your pelvis into the springs. Push back. Now it's opposed. Steer your pelvic tilt and spine flection to come forward. Inhale to turn. Exhale to return or exhale to turn in. Hail to return. Rotate and dive into the springs.
Rotate step ball change. Go the other way, this way and this way. Rotate to your left pushing with your right hand, turning your pelvis around the head of your femurs, pouring your pelvis, collect the ribs to the pelvis, the intercostal. Send the ope leaks. Push with your right hand. Rotate your pelvis and lumbar spine to the left. Push with your left hand. Rotate your pelvis and lumbar spine to the right, pushing with your left hand. Rotate to the right, pushing your right hand.
Rotate to the left, creating a long connection, a and all from your left heel to your right hand and your right heel to your left hand while you're up, let's said internal and external rotation. Internal rotation of the hip joints. Sit your pelvis, your sacrum into the springs external rotation to come forward. Knees together. Push Away with your hands. Inhale to come forward. Exhale, pour your ribs into your pelvis, your pelvis into the springs. Reverse push back and implying a post your pelvic tilt and slide forward implying an anterior pelvic tilt.
Swivel out external rotation of the hip Jones internal rotation of the hip joints, external rotation of the hip joints and internal rotation of the hip joints. Now make your way back onto the carriage. Okay, slide on in and to come up from there,
Now you'll be kneeling on the carriage with your toes tucked under the shoulder rests, or if there's not really room under the shoulder rests, you can do your best to nudge your toes there between the carriage and the shoulder rest. Here's why that is. You can create a ground force with your toes. Your toes will do this moving into plantar flection and when your toes push up into the shoulder rest that will pardon me. That will activate the entire, um, mild fascicle sling system from the sole of your foot to your sitting bone up along your spine and that will make your trunk more stable. This is a, a collective wrist trunk stability.
Here is a collective responsibility as it often is with all the abdominal layers and all. Also your spine extensors. Give yourself a wide base with your knees. Knees are shoulder width apart and crouch down. Well, this is not crouching is it? Crunching would be this. This is a long spine with the um, in neutral pelvis, neutral spine with the heels of your hands and contact with the foot bar, pressing your toes up against the shoulder. Rest, push and land. Suspend and land.
You've done a wonderful job preparing your shoulder blades for weight bearing. Now turn your arms, palms up. Collarbones wide suspend and land. Having the idea of keeping your chest bone parallel to the ground. Now you'll have both hands to the right and both hands to the left.
When your hands go to the left. Extra action from your right toes. When your hands go to the right extra action on your left toes turning your arms, palms up. Collarbones wide, palms up collarbones wide. If you have a foot connection going on with your abdominals and your spine, crossing your arms, one on top of the other, one form on top and push and land. Push and land. Now we could go on, but really I have already.
It's time to to go onto some side arm jumps with trunk rotation. Here you are seated. We'll keep the same spring and have a seat [inaudible] so that your sitting bone, we'll aim in the direction of the carriage. You know it's not going to stay planted there but at least it's aiming in the direction of so both hands will be on the foot bar turning your chest bone, which you're well prepared to do because we focus so much on thoracic rotation. Take off turn, turn land, land with both hands to the left, turn, turn, land, turn, turn Lan, rotate pelvis, ribs, shoulders, head mechanize. You've heard that before in this class last to the new site of weights and we established fairly early on that there always have been differences between sides.
There always will be differences between sides and pilates. Instructors will always have work rotate as if your chest bone could shine light above the foot bar. Slide your shoulders down, rotate and turn, turn, turn, turn both hands land simultaneously on the heels of your hands without letting your shoulders slide up or without letting your collarbones short last two coming up time. Now to finish off with the some foot jumps, please pause and let's install the foot plate now. Now that you've installed the jump platform, let's change this spring to a blue spring. That's what I suggest for this first round of jumps. We're going to start in Quadra pad now, so come with onto your knees, onto the carriage and bring your knees to the very, very close to the edge of the carriage, not off the edge, just close to the edge and the heels of your hands will be in contact with the shoulder rests.
If you're new to this and prefer to have a short box on the carriage with your forms on the box, that would be a good place to start and then you would graduate to having your hands here. Also, if you're taking good care of your risks and prefer not to have this much risk compression, then you could have your forearms. On the box. Your toes will be very close to the bottom right on the bottom of the foot plate with this good stability through your shoulder, shoulder blades, your shoulder girdle, which you're well prepared for. By now, the soles of your feet are going to have the feeling of striking a match, kicking your heels up to your sitting bones. Every time your feet jump, your abdominals jump in and up to your spine. Alternate land on one foot and land on the other. Suspend, suspend, suspend, suspend thing, thoughtful, mindful of your ankle alignment which you have finessed in standing previously. Now each leg gets its own turn as if the sole of your foot could strike a match.
A reminder to keep your thoracic spine with its integrity. Don't sag here. Pick it up other side as if this sole of your heel could come up to your sitting bone abdominals. Jump Up. Don't let your eyebrows jump up. That's my bad habit. Sorry. Now that you've prepared the connection between the sole of your foot and your abdominals, you'll come to sideline for sideline.
Jumps in sideline. Put the head rest down. You can help yourself to a cushion or a pillow if you would like and slide both sitting bones off the edge. Come on down to lie onto your side and your ceiling leg is going to be in the center of the carriage. Your other leg is tucked up out of the way. Lift up your ribs and lift. Lift up your ribs and lift up your waist. Don't sag here.
Pick it up. Activate the lateral line. We'll have eight jumps in parallel. Suspend in land. Tuck this arm out of Tuck your left arm, your lower arm out of the way so that it doesn't get hit in the frame. External rotation, keeping your top Asi s at the top of your pelvis, your ilium forward. You will be well-prepared around your hip joint to connect pelvis, knee and ankle. Internal rotation comes next.
Lift up your ribs and waist each time you land.
That's the lower elbow and lift your ribs and waist up off the carriage. Okay, here we go. Push and land listening to the rhythm of your jump, suspend and land, suspend and land suspend external rotation drive your left [inaudible] the left Anterior Superior Iliac spine forward in order to activate your external rotators and the lateral pelvic stabilizers. Sure, I'll get right on it. Internal rotation now and you've done such wonderful work. She said, complimenting you and myself of connecting pelvis, hip, joint, knee, ankle and foot that this is possible.
Connecting the souls of the feet with your deep abdominals are great. Activation for the deep front line in a with knees extended push land.
End Lots of east centric control to make us quiet. Landing external rotation. This is, it is as if you could draw the tops of your inner thighs together internally. Rotate all of the deep abdominal sir active. Let the back of your ribs and lungs onto the carriage. One leg at a time. Four jumps in parallel, four jumps in external rotation crossing over the mid line and four jumps in internal rotation. Change. Suspend, crossing over the midline, add ducting with external rotation back in line with your own hip joint for internal rotation.
Now you're prepared for corner jumps with your knees, bending, knees, inflection, and we're going to jump to each corner with the hip joints in parallel. Going upright. First up, right up, left down, right down, left up, left up, right down, left down, right all toes to the outside. Up, right up, left steady your pelvis down right down. Left all toes to the outside. Up. Left up right down. Left down, right heels to the outside. Up, right up, left down, right down. Left heels to the outside, up, left up right down, left down right. Feel free to continue this. I'm practicing on your own with the single leg to the corner.
I however, have to move it along and we're going to finish with a a new set of jumps in quad repaired, which will bring us to the end of his jumping chapter. Change the spring back to blew off with the red and on with the blue. As we started in jumping, come to quadro pit with your knees near the edge of the carriage. Unlike where we started. Your right heel is going to be on the top of the, at the very top edge of the jump platform.
This will require much more a stability through your shoulder girdle and activation through your deep abdominals. Here we go, push and land in parallel two and three and four. As your foot brushes up all of the abdominals, jump up to your spine externally. Rotate aiming your right Asi es towards your inner left knee. Suspend and land internally. Rotate pigeon toe your thigh, aiming your right knee towards your inner left knee pressing strongly with your left, the heel of your left hand finish and change to the new side. Your right knee, your stable knee is near the spring edge of the carriage. The other heel that's the left heel is going to be at the top of the foot plate.
The jump board in parallel, eight of these
You sure arms to help drag your leg off the carriage. It will plummet to Earth. Easier to breathe. Now here we go to the new side.
Use Your hands, your arms to slide the carriage back.
It will encourage them to lengthen a bit, rotate towards your supporting leg. That's the right leg, rotate and GLAAD for the dismount. You share arms to help drag your leg off the carriage. Thank you so much for being with me during this program. Thanks for being with us at Pilati is any anytime I look forward to our next time together. I know.
The Teacher's Corner: Focus on Fascia


Comments


 Zoya, a designer/seamstress from Odessa, Russia Ballet/Opera now in San Francisco, created 4 new unitards for me. Look for them in my upcoming classes on the Chair, Trapeze Table and Mat. I love all aspects of Pilates including comfortable, colorful, sensual clothes.


You need to be a subscriber to post a comment.
Please Log In or Create an Account to start your free trial.
