Description
About This Video
Transcript
Read Full Transcript
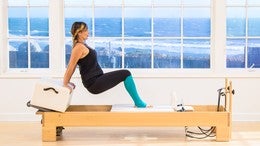
Hello I'm Courtney Miller and I'm here on Pilates Anytime with a special surprise or maybe it's not a surprise you may have already known but I am expecting my first baby and I'm almost six months pregnant and I couldn't be more exciting to be here and take this journey with you. The workout that I'll be teaching today is prenatal appropriate and it's designed to help the pregnant client throughout their pregnancy and set them up post-pardon as well. But if you currently do not have a baby ;in your stomach you are welcome to join me on this workout. I think you'll really enjoy it as well. Also for those of you who are Pilates instructors hopefully you'll be able to see some of these movements so you can incorporate them into the classes that you're currently teaching.
I've had a pretty smooth pregnancy so far. I wanna say so far, I don't wanna jinx myself. But I will say that one of the major changes that I felt is not actually physical but emotional. And I've definitely felt a lot more connected to my body than I ever have before. And that's maybe kinda funny to hear from somebody who's a Pilates instructor and a Pilates educator but more so to my emotional state and how it affects my body.
And I would say over the last six months I've been very interested in how my exercise routine is gonna help enhance the way I feel deep down inside. I've also been thinking a lot about what kind of person I wanna be, what kinda parent I wanna be and this connects to my workout in so many ways. So this class the theme is flow. And this about movement and on a physical level it's about consistent movement. So we're gonna keep moving, there's really not gonna be any formal breaks or rests unless you wanna pause the video and take one, in which case I encourage you to do that.
Pee breaks are also allowed whenever you need them. But for me the emotional aspect of this class is about going with the flow and not being too attached to a particular outcome which I think all of us need to work on that a little bit. So going with the flow and keeping consistent movement and I'll talk more about this as we start the class. So let's get started. I'm using a resistance band.
You can omit the band for some of the exercises if you don't have one. You can use light weights instead. This is a light tension though and I have it folded in half so it's doubled up. Stand with your legs in parallel position about hip distance apart with your shoulders over your hips. Taking the arms straight out in front of you the band is coming through your thumb, fingers are reaching long, wrists are long, shoulders are engaged, abs are in.
We're gonna do a postural march starting with the right leg. Right leg lifts, knee is soft. Left leg lifts, knee is soft but that's not the tempo, we go up and up and up and up. So as I do this postural march a couple of things I'm thinking about one is staying vertical shoulders over hips. So I have to drop my tailbone, I have to engage my upper abdominals and I have to think about drawing my shoulders a little further forward so I'm not leaning back.
Good, let's lift the arms up. I'm also thinking about articulation through my foot, up and up and as I land it's toe, ball, heel, press, press awesome. Taking the arms side to side up and over, up and over. Now I also have to think about using my abdominals in an anticipatory nature (breathes heavily) to find that balance. Four more here, three, two, one, nice.
In addition to all the work I just mentioned it's a little bit of cardio but it's also a load of transfer exercise which is great for strengthening your seat and your hips. Taking the band long and the feet wide so I'm in my second position. I want just a little bit of tension when my hands are shoulder width apart. So that's good for me. Breathe in reach the arms up, bend the knees, get low.
Exhale pull on the band, pull the elbows down to your side, lift, so I'm going for thoracic extension. Drop the tailbone a little bit, maybe you can deepen your Pilate. Take the arms back overhead and lift the body, so I go down, and pull. Reach up and squeeze my feet to come back up. Reach up when you go down, elbows to the sides, arms over head, close those ribs again.
Squeeze to come up two more times. Lower down, lift, extend, think about the thoracic movement here, not just the low back. Reach up when you go down, lift, extend. That link and that opening through the front body feels so good. This one reach up when you go down, laterally flex to one side, pull elbow to hips, stretch.
Reaching the arms long, use the obliques to come back up. Lengthen, pull, stretch and come back up. Let's do that again. Find length as you bend, knees over toes, laterally flex. Pull elbow to hip, press, use the obliques to come back up.
Think about being on your short box, on your reformer doing your bow and arrow or side bend and come back up, we have one more each side to do. As I laterally flex I'm trying to keep my bicep by my ear. Chest is open wide, press reach, lengthen to go over, pull. Cinch to come back, one more time. Reach up to go down, laterally flex creating space.
So creating length and space in the torso, specifically the thoracic cavity is so important through out your pregnancy and come all the way up, lowering the arms down, nicely done. Take the band behind you. So right around your bra strap line and bring your feet in so your heels are together and your toes are apart, in your Pilates V position. Taking an underhand grip, elbows into the side, heels will lift up as the arms open. Maintain your balance taking the arms out.
Tighten the abdominals, naval to spine as the arms come forward and resist to go down. So a little bit of balance work, lift up, open, squeeze and down. So let's really focus on co-contracting those deep ab muscles as the arms move in space, naval to spine. Lift, reach, pull, squeeze and lower. Two more here, press, reach, open, squeeze close.
One more time really tone and tighten the front of the thighs. Press down evenly through big toe and baby toe and done. Find your parallel position make strong arms, you're going to be doing a forward press. Right leg will lunge back so make sure there's nothing behind you. Right leg goes back as the arms reach forward.
Resist to come in. (breathes heavily) And resist to come in. So again we've got this load to transfer sensation. Going from a bilateral stance to a split or lunge position. See if you can keep your weight centered over your pelvis. Three more here, reach, when you step back.
Two, and together hold it for one. Open the arms, now think about drawing your ribs back into the band. As you close your arms tuck your tailbone under you. You'll feel an opening through the front of your hip on your back leg. Inhale, release the tailbone back but keep the thoracic spine drawing into the band.
Again (breathes heavily) tuck and open, think of this as standing abdominal work. Two more here, keep the collar bones wide as the arms come to center and one. (breathes heavily) And release coming all the way in. Let's see how we do on the other side. So shifting the weight to the right leg so you're anticipating that challenge. Arms are in palms are open, reach forward as you step back reach and pull.
So keeping that connection with the rib cage into the band. Press and bend. Make sure your lunges are nice and wide so that your knees travel over your mid-feet. Again keeping your shoulders right over your pelvis. We'll do two more here reach and pull and hold.
Draw the navel in and back, open the arms. Tucking the tail using the abdominal muscles, specifically thinking about the fibers of the low belly the ones that are getting very elongated right now. Exhale, scoop and inhale. The lower you can hold your lunge the more challenging this will be. Last two (breathes heavily) and last one. (breathes heavily) Open it up and bring it home.
Good work, hopefully, you're feeling warm. That was your warm up. Now don't get rid of that band yet. You wanna have the hands towards the outer part of your band so there's lots of stuff in the middle. Place the band onto the ground and step on it so the feet are about hip distance apart.
Now I like to have the balls of my feet on but my toes off. For me that's where I feel most stable. If your balance is compromised maybe you're later in your pregnancy or you're just working on improving your balance take a wider stance, I'm gonna go hip distance apart. If you want more resistance in your upper body then maybe you can choke up on the band. Now we're gonna come into a squatting position.
So the hips go back, the chest will come forward. The knees travel right over the mid-feet, the abdominals are in. Now especially in pregnancy we have to be mindful of this hyper lordotic position or sending the tail bone too far back behind us. So try to find your neutral and even though it might be hard to feel your abdominal muscles think about naval to spine, bicep curls, we've got eight of them (breathes heavily) and resist, exhale. So when I think about working my arms throughout my pregnancy I think about all the upper body work I'm gonna have to do when I'm playing with my toddler later on right?
Picking up babies and a newborn as well, all the gear that goes with it. I've been looking at strollers and they're about 25 to 35 pounds a stroller. So I need strong arms to be able to lift. Two more here, (breathes heavily) one more (breathes). Little combo when you curl you come up, squeeze your seat and press into the four points of your feet.
Resist to come back down maintaining the position of your spine, eight of these. (breathes) and resist, pressing into the heels, exhale up, inhale down, four more, four, three, two and one. Stay up, release the arms down and take one foot out from the band. Now notice how one side is longer now. That's good, that's how you want it. So the shorter side place it onto your hip, the longer side let's just put it on the hip for a second so you can feel what's going on.
It is going to be doing something though okay. So bend both of your knees. The leg that has the band in it will abduct, will move away from your midline and then it will come back in hip (mumbles). As the leg moves away from your midline your standing leg is gonna have to work harder. Now that you've got it, let's add the arm.
So we go down, when we come up extend the opposite arm. Internally rotate lower the elbow, lower the foot, bend the knees. Exhale up, inhale down, this should remind you of a reformer exercise that you know and love it goes by several names. One of my favorite is the Travolta. And up (breathes heavily) and down, three more and down.
Two more and down, last one, hold it, leg pulses eight, seven, six, five, four, three, two, one and take it all the way down. Now before we get rid of this band I want you to pivot turn so you're standing in a lunge position. The foot that has the band is forward, the one that doesn't is back. Choke up on the band and change your grip so the band is now coming through the pinky side of my hand. If this is confusing to you and you're not sure how to hold onto the band what you're trying to avoid is the band wrapping and pulling your wrists out of alignment.
So we're trying to find the position that has the least amount of pressure on the wrists where you're able to maintain strong alignment and straight lines. Tip your body forward, draw the abdominals in and up and pull your elbows up by your side. Exhale tricep extensions, inhale bend. We'll do eight of them. To increase the tension choke up on the band.
To decrease the tension slide your hands towards the edges of the band, exhale press. With each arm extension thinking about reaching long through the crown of the head and again creating space. Last two and last one, holding the arms straight. Think about your chest expansion exercise. Pulse, pulse, pulse, resist to come forward.
Exhale, press (breathes heavily) and come forward. Strong back here, two, press, press, one more. (breathes heavily) And come forward and you're ready for the other side. So what I need to do is place the band down put my opposite foot in and take the other one out so the band is not even. If you're a little OCD like a lot of Pilates enthusiast and instructors are this is very uncomfortable, but just for a second.
So hands on the hips so you can find your alignment bend both of your knees, go wider for more stability, exhale the legs moves away from your midline. It stays in parallel, the foot is flexed. Inhale to come back in. It's the longer band that's gonna be doing the movement. Down, exhale, press, internally rotate, exhale punch when the leg kicks, (breathes heavily) and in feeling that standing hip working to stabilize you, three more.
Three, two, and hold it for one, just the leg. Eight, seven, six, five, four, three, two, one and take it all the way down. Awesome, so we'll leave the foot in, we'll do our turn again, coming to our lunge position. Foot steps back, arms go forward. Slightly different exercise taking the arms out like an airplane.
I'm hinged forward, hips are squared, abdominals engaged. Arms go out to the side and back in. So throughout our pregnancy working our posterior chain or our back body is extremely important as our posture changes the muscles behind us get weak and elongated. So this is an exercise that's gonna help eliminate neck and shoulder pain throughout your pregnancy but also help you during those first few months of breastfeeding, hopefully to alleviate some of that shoulder, neck and back pain that's so common. Exhale, press on the next one hold the arms out to a T three pulses up, one, two, three and down.
We'll do three more sets of these. (breathes heavily) Think about leading with your pinky finger side of your hand as you pulse, two, three. Last time, lift, lift, lift, bring it all the way down and come all the way up. That's our standing warm up and our standing upper body sequence. Grab your mat and let's continue.
Welcome back so we have a comfy mat. I'll be putting the band down beside me, I will be using it again shortly but for the next series I don't need anything. Coming into a seated position onto your bottom towards the center of your mat. Now working on abdominals through our pregnancy is a very important thing to do but there are certain things that we don't do well pregnant and there are certain things we want to focus on while pregnant. So let's talk about those a little bit as we move through them.
One of the things that we don't do in our second and third trimester for long periods of time anyways is exercise in a supine position or laying down onto your back. So I'm gonna be up onto my elbows and my forearms so that my shoulders are higher than my hips. Now we know throughout pregnancy that this curve in the low back becomes a little more exaggerated or the lower dorsi in our lower back becomes a little more towards that hyper side. So in this series I'm gonna think about curling my pubic bone towards my sternum or towards my chest. In other words shorten the distance from your hips to your ribs.
Pressing down into the forearms, lifting one leg up. Get rid of that and then the other leg comes up to meet it. So in this position just holding I do feel my abdominals starting to work I also feel a little bit through the front of my hips. And because of the position the pelvis is in during pregnancy especially in your second and third trimester those hips become a little on a tighter side. So to combat that we're gonna open the knees a little bit wider.
Doesn't mean we're not gonna work in parallel we still will a little bit. This is our toe tap and turn out so one leg moves away from the body, exhale the leg comes back up. Inhale, (breathes heavily) as the leg stretches away from the body it's my challenge to keep the pubic bone pulling towards my chest. That's how my abdominals are working. Inhale the whole shape of the leg goes down and up.
Instead of thinking about the foot moving try to think about the angle of the femur at the pelvis. Angle increases when the leg moves away and angle decreases as the leg comes back up. Last time inhale and exhale, the leg comes up. Take a break as soon as you need to. Double legs, so both legs go down exhale both legs come up.
Now limit how low your legs go by how stable you can keep your lower back and pelvis. Inhale, exhale. Now right about now you may have forgotten about your upper upper body position so press into your elbows and forearms keep your collar bones wide. Two more like this, (breathes heavily) one more and lower the feet down, well done. If you need a break extend the legs, shake them out whatever you need to do.
What you should be feeling in this series is a nice toning around the tummy. What you shouldn't be feeling is pain in the lower back. So if you are feeling the latter of the two why don't you try keeping one leg on the mat and just going into the single leg series and then switch legs. Moving on, so I exhale to find my C-curve taking the legs up one at a time and finding my frog position extending one leg straight and connecting the shape of the legs. Now lowering the whole shape of the leg here is heavier because I have one straight lever.
Exhale, lift the whole shape up again. We'll do four more here, three and four. Switch legs, I connect my toe to the inside of the knee so I feel like I've got one unit because my leg is extended the lever is heavier gravity has more of an impact on this movement. Exhale, lift, (breathes heavily) two more, (breathes heavily) last time (breathes heavily) and bring it down, excellent. Do whatever your body needs, stretch it out, take a break.
But we're not done so continue if you can. Legs come back up after you find a strong position finding your froggies or your V's. This time connect the heels together so before it was the toes now it's the heels. Both legs press out, point as the legs are straight flex and bend the knees, think about doing your footwork on the reformer or your feet and strap work. (breathes heavily) And in and we're only doing five reps of each variation so we only have one more to do.
And bring it in and down. Now feel free to continue with more repetitions as you get stronger. One more part to this series. Strong position in the pelvis and low back strong position in the upper body, finding our V. Pressing the legs out, holding five, four, three, two one and bring it in.
And we're gonna do that two more times. The lower you send your legs the harder it's gonna be on your middle to support the position. Press (breathes heavily) and in. Think about really pumping blood and oxygen into your calf muscles, it'll help with cramping. Press, (breathes heavily) bring it in and take the legs down, excellent work.
Come on up, grab ahold of your band again and come to a four point kneeling position. That means onto your hands and knees. Now this may also be a delivering position for you too. If you haven't looked at all different ways to deliver it's like the sky is the limit. (laughs) So four point kneeling position functional for very many things taking the band into the hands. Now notice the band is around my shoulder blades a little bit higher from the tips of my shoulder blades, the hands go down underneath my shoulders.
My knees are underneath my hips, tailbone is released. So if I were just to give into the band and give into gravity this is what I would look like. And this is actually a really common look for the spine of a prenatal client in their later third trimester. So let's see if we can create some strength against the position that gravity is pulling us into. I'm gonna sequentially move my spine.
So starting from your tail, exhale tuck the tail. Now if you can see the difference in my belly when I do that I have to engage my abdominals to pull my pubic bone towards my chest just like I was doing in the last series. Now that my tail is tucked I'll be pressing down through my hands pulling my rib cage up. Widening my shoulders and the last thing I do in this series is drop my head. Inhale here, exhale unravel from the tail first through the middle second and the head last.
Two more this direction, tail, abs, ribs and head, inhale think about width and expansion through the back body, unravel tail to head. Last time this direction, tail, ribs and I can really feel how my body moves against the band. Exhale unravel, tail to head. Now we're gonna do it three times flexing from the center. So I lift my ribs, tail and head come in.
Inhale finding neutral, don't sink. Find a strong neutral line, push the ribs up, tilt the head and lengthen out one more time. Ribs up flex and lengthen to come out, very good. Sit back roll out your wrist if you need to. It is common during pregnancy to start to get a little more sensitive in our wrists.
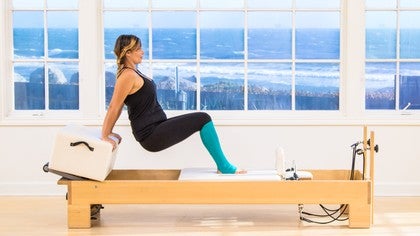
So if you're feeling that roll your mat over once or twice so the heel of your hand is a little higher than your fingers, that'll help. Keeping the knees hip distance apart and the band right where it was choke up on it. From here we're going into what's called the seated squat. So start by moving the pelvis under, not unlike what we were just doing. On an exhale imagine your feet are on fire and so not to burn your bottom you lift your hips.
Now notice I'm in my thigh stretch position. So I am leaning back, I'm thinking about drawing my ribs back into the band, I lead with my seat and I come home. So I have to tuck because of my abdominal contraction, lift from my glutes, hold eccentric quadriceps and release, two more times. (breathes heavily) And down, one more time, and take it all the way down. Awesome, keep the band behind you. We'll be coming back to four point kneeling position but what we need to do is thread the band around so that it's around the arch of one foot.
The hands are back down exactly how they were in the very beginning of this series. Okay so I'm stabilizing the band with my hands. If I want more tension I walk up, if I want less tension, I just walk down. So finding my shoulders over wrist alignment. So come back to that place where we just were here.
Imagine the band against your ribs, pull your ribs up. Find length from the crown of the head to your tail. Feel your stabilizing leg in a strong position. Flex your foot on your adjust your leg and extend the leg back behind you. The leg can lift only as high as the lower back can stay stable.
So if the leg comes up and the back drops down you've gone too high. Inhale bend, exhale press. Inhale in, exhale press. So not only am I thinking about working my seat but I'm really trying to create length and space. That space that I'm creating is from my crown of the head through my tailbone but specifically I'm thinking about creating as much openness as possible in my ribcage and thoracic spine so that I've got room for all of my shifting organs and my growing baby, exhale press.
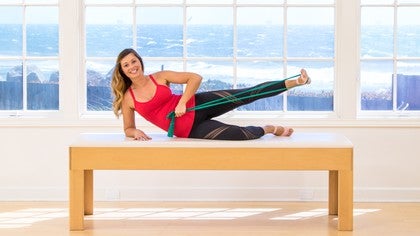
On the next one keep the legs straight, tap your toes down, lift the leg up, five, four, three, two, one and take it down. Now you're gonna keep the band around the arch of the foot. You'll just pivot onto your side. I'm gonna do a little bit of dancing here so that I can face you the whole time, okay. So hopefully that looks smoother at home than what I just did.
Ta-da, you're up onto your elbow, you've got the band, it's towards your belly button. Elbow is underneath your shoulder, shoulders are square, hips are square, bottom knee is bent. You're comfortable here, it's not too bad. Inhale the leg goes forward, exhale the leg moves back. If you want more resistance choke up on the band.
You'll also feel some great upper body work here. Now here we go with creating that length and space again. So think about your pubic bone, think about your chest bone. And keeping that distance between the two very long. Especially as the leg comes forward.
(breathes heavily) Two more like this, one more. When the leg gets beside you circle it down, up and around, small circles, five in each direction. Pelvis stays steady, neck is long, glutes are burning. Reverse, back and around. Back and around, back and around, last two and one.
Now before we take the band out of this foot there's one more position that we're gonna come into and we've already been here before. So this is our position where we're supporting ourselves on our elbows and forearms okay. Adjust your leg, that's the one that's doing all the work, is going to extend straight up. The stabilizing leg can be knee bent or in a leg down position. Draw your abdominals in and up and stabilize the band for one leg circles.
Cross the leg across the body ax heel circle it down around and up. My foot is in a flex position to help keep the band stable. If you have the band wider and over your toes you can probably plant or flex your foot. Exhale, inhale cross and exhale, reverse the direction. The nice thing about the being propped up onto your elbows and forearms is you can see what's happening in the leg, you can see what's happening in the hips and you can self correct if there's any movement going on where there shouldn't be.
Keep your leg in parallel and your hips heavy. Last time like this bend the knee in and help yourself come up to a seated position. Let's start the whole thing from the other side. So finding your four point kneeling position taking the band from behind, so that it wraps around the arch of your foot, you're gonna stand on the band with the heels of your hands. You'll have to push down otherwise the band goes goodbye.
(laughs) Spread your fingers, point your middle finger straight ahead. Soften your elbows a little bit and see if you can feel like your holding yourself up more from your back and less from you wrists. Your stabilizing knee's in a strong position. And we exhale press back. Now let's do that little test again.
So drawing the abs in, finding length through the spine if the leg comes too high and the belly drops then we need to find that correction. Inhale the leg comes in, exhale press back using the seat. And hamstrings to extend at the hip. Inhale to bend, exhale to press. So this should be a great, great time to visualize something on your lower back, okay.
Usually it would be a lemon or a martini. But let's visualize a pacifier or a bubba, don't spill it keep it stable on your low back. Two more, keeping the legs straight, tapping the toes down, lifting up. Focus on the up here, (breathes heavily) three, when the leg kicks the tummy tightens, two, one and bring it in. Now keep the band around the foot if you can and pivot turned sideline.
Come onto your elbow and forearm, top hand has the band in it. Bottom hand is stabilizing you, bottom knee is bent in. Leg is extended long, band towards the belly. So you're getting a little bit of upper body work as well. The leg sweeps forward, the leg sweeps back.
Now let's talk a little bit about disassociation. That means I should be able to sweep or move my leg without feeling that movement transfer up into my pelvis. Now it's a really important thing to understand in everyday life, pregnant or not. But when we're pregnant because of hormones like relaxing which we need, we want the pelvis is less stable than it is when we don't have those hormones. Which means it's even more important to understand how to keep your pelvis stable while you move your leg.
This is a very functional movement. Every step you take, every stair you climb this is what you're gonna have to feel, stabilizing through your center and moving your leg through the muscles of the hip. Circle down and around and outside at times. Three, two, one, reverse and around and around two and one and bring it in. Now something I'm not talking about but we are doing a lot in this class is creating symmetry and balance as well.
And that will be a whole other class theme though, creating balance in our life aye, aye, aye. Coming down onto the elbows and the forearms so the leg that's working will be extended. The leg that's stabilizing could be in a bent position or in a straight position. Stay heavy in your hips, find that C-curve, stay strong through your upper body and extend the leg to the sky. So we start these circles by coming in towards the mid-line.
We circle only as big as we can maintain stability in our lower back and our hips in the heel cross, exhale, circle. It is rare in life that we get to make the circular motion at the hip joint. So when we have the opportunity to do it it feels so good but it's so beneficial as well. Inhale and one more time. Reverse, try to keep the leg in parallel.
Inhale, self correct, so if you're seeing the hips move tighten tummy a little bit more or limit your range of motion. Bend the knee, use the band or a little bit of momentum and come up to a seated position. Good news we don't need the band anymore. Bad news we're gonna do pushups. So come onto your elbows forearms.
For a modified plank to start let's talk about the pushup alignment. So pay attention to what's happening in your neck during these pushups and what's happening in your back. You're gonna feel the arms no matter what so let's really think about that strong shoulder girdle position coming onto the elbows and forearms. Now let's just keep the knees down for a moment. Feel your shoulder blades come together.
And often when they come together they also come up. And now exhale feel your shoulder blades widen behind you. And it's not that we're trying to push the shoulders down into our back pockets necessarily it's that we're trying to keep a wide shoulder blade in a strong neutral alignment. So the shoulders are neither up nor pressing down towards the ears. Now this is the position that the back should stay in during a pushup.
Let's see if we can do it. Spread the fingers, middle finger points straight ahead, we'll be modifying knees are down, abs are in. We've got a little extra weight we can keep our knees down, it's okay bending the elbows three times, one but are your shoulders still wide, two, three, (breathes heavily) push up. Just notice that that's happening readjust, pull the belly in three more sets, one, two, three, push up. I'm only gonna go as low as I think I can keep my shoulders wide behind me.
One, two, three push up. One more time, one, two, three, push up and sit back, excellent. If you're having issues with that exercise and you feel like your shoulders are just not staying wide and flat then I'd like you to do your pushups on a wall instead. Coming into a high plank position, spreading the fingers, curling the toes underneath, let's do a preparatory movement first. Remember this is the direction gravity wants us to go.
And it's okay to stretch here but exhale finding our neutral alignment. And the belly's drawing in towards the body. Curl the knee or curl the toes, lift the knees. Breathe and hold. I think about pushing down onto all 10 fingertip pads and pushing my chest up to find that alignment.
If that felt right for you then stay there if you'd like to move on, follow me, abdominals engaged, lift up. One foot steps back, the other foot meets it, one foot steps in, the other meets it, knees come down. Again working that disassociation, can you straighten the leg without shifting or changing in the back and pelvis? Lift, step, step, in, in. (breathes heavily) In, in, one more (breathes heavily) in, in and lower down, very good, roll out the wrists. Take breaks as you need to.
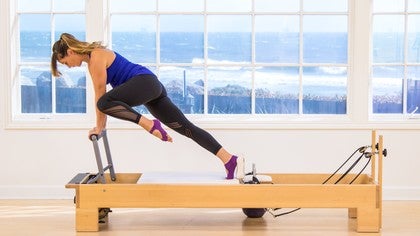
Just a couple more exercises stay with me you'll like these ones. Coming back to our high plank position. Shoulders in a strong position, elbows slightly soft, one leg draws back, so does the other. Now this one instead of just stepping to here we're actually gonna step as far forward as we can. It'll get easier the more we do, kind of loosen up everything.
So I call this a lizard position. You are in a little bit of external rotation at the hip, shoulders are square. Feeling a nice stretch through my inner thighs and groin. Feel free to lower your back and knee down to modify. What's getting the leg to come up is the power of your abdominals and your hip flexers.
So you will have to think strength to get that leg to come forward. Step back (breathes heavily) forward. Sync into it, lower the back knee to modify and back. Little bit quicker, forward, open, back to your plank. Forward, (breathes heavily) back.
Forward and back, forward and back. Lower the knees good. We're gonna add onto that if you can. We'll step both feet forward, we'll be in a little squat. Squatting's good, you'll like it.
Taking your legs back, one foot comes forward, the other foot comes forward. Ah, just kind of sit into it. So if you are a strong Pilates enthusiast which I'm sure you are if you're a Pilates Anytime member having this sense of opening through the inner thighs, widening through the hips, through the sit bones, and releasing through the pelvic floor probably doesn't come natural to you. But it's important especially throughout pregnancy to be able to release these deep muscles as well. So in your squat that's what we're thinking.
It's a sense of relaxation through the pelvic floor. It's a sense of relaxation and widening through the sit bones. Maybe you can get a little lift through your chest, again finding that length. Hands go down, stepping back. Let's try it again, forward, forward, squat hands down, back, back.
Again, forward, forward, hips low, chest up and back, back, last time. Forward, forward, chest up hips down, back, back, lower the knees, open the knees and child's pose position. Now since I've been pregnant the child's pose variation that I like is more about opening my pecks. It's also known as puppies pose. So I actually like to walk my fingers forward, let my chest feel heavy, chin goes to the mat, hips go up.
The more your hips come forward in space the bigger the stretch and the pecks. So it just opens up that front body. If there's another variation that you prefer maybe your traditional child's pose go there now. But here's what I encourage you to do and I don't always do this in my classes. So I encourage you to stay for about five minutes and breathe, focus on how your breath facilitates movement in your body, let your breathe sort of settle down again.
And during these five minutes of breathe I want you to think about relaxation. Start from your toes, work your way all the way up to the crown of your head, don't forget about feeling relaxed through the abdominal wall and feeling relaxed through the pelvic floor. It's equally as important to be strong as it is flexible. Strength with rigidity is not going to do you any favors in life and it's certainly not gonna help you during labor and delivery. So just let it go for five minutes, hydrate and then just be overjoyed with what your body's capable of doing and keep joining me throughout your pregnancy.
I have several more classes I'll be filming for Pilates Anytime so I will see you in a few months. Thank you.

Prenatal Pilates: Second Trimester Reformer Workouts
Mention
 |
Courtney Miller (Teacher) |
 |
Patricia Leonte |
 |
Lacey |
 |
Chanda Hinman |
|
|
Natalia G |
|
|
Lysette P |
 |
Dorthe V |
 |
Laura Maria |
 |
Taganas F |
 |
Cheryl Z |
 |
Viola A |
 |
Nicole C |
 |
Kathleen Fitzgerald Henry |
|
|
Imogen M |
 |
Cheryl H |
|
|
Teresa L |
|
|
Thuy L |
 |
Caroline Close |
 |
Katie R |
 |
Margie N |
|
|
Maggie M |
 |
Olga S |
 |
Michelle M |
 |
Julie M |
 |
Jennifer S |
 |
Laura M |
 |
Lydia M |
 |
Trisha K |
 |
Joni N |
 |
Sugulaya L |
|
|
Lisa P |
|
|
Assya L |
 |
Shelby Z |
|
|
Stacy L |
 |
Kerry H |
 |
Monika P |
|
|
Mila K |
|
|
Mary O |
 |
Pilatesbycharlotte |
|
|
Natalie I |
|
|
Lauren A |
 |
Kim W |
 |
Galina G |
 |
Maria Poggioli |
 |
Grainne ODriscoll |
|
|
Sook Wern C |
 |
Rachel B |
 |
Jennifer A |
|
|
Dilek T |
 |
Jen Wende |
Comments


I like your red top!! Please write me the brand from your top!
Many thanks !
You need to be a subscriber to post a comment.
Please Log In or Create an Account to start your free trial.
