Description
About This Video
Transcript
Read Full Transcript
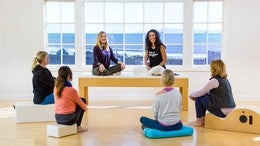
Okay, hi everyone, thanks for being here, so we're gonna do a little mat routine that is really going to focus on releasing trigger points, releasing the mind and starting to move into a space where we can observe and notice a little bit more about what's going on down there and really everywhere in general. So we're gonna use a squat as our measure, just to kind of see how we feel squatting before we do our releasing routine and then after, okay? So let's just bring our feet about hip width apart, a little bit wider than that, and we're just gonna go straight down and you're totally allowed to do it however your body does it, so without thinking or trying to control too much, so we're just gonna lower all the way down, and notice how much the body leans forward, how high the heels come away from the ground, and then press down and start to rise back up, and now, this time, we're gonna do it in a way where we can keep our heels down, so that's gonna mean we're gonna have to turn out a little bit wider feet and then again, we're just gonna sink down into our hips, and try and bring the feet as close together while still maintaining the heels on the ground, so just try to find your edge there, and notice that the more that happens, the more your torso probably wants to lean, right? And so we're gonna stay here. You can kind of use your elbows a little bit to roll the shoulders back and lift the chest up a bit, so not to the point where you feel like you are straining, which, you might already feel like you are there and that's okay.
Take a deep inhale, (inhales), and exhale, and just do that three more times. Notice where the breath moves. The hands can come together, fingertips pressing, hands can go to the floor, do it your own way, the way you feel like you can be, and when you are inhaling, notice if you can allow your belly to drop if you feel any movement or sense of opening between your sitting bones. You might feel your ankles are on fire at this point instead, right, and now we're gonna come back up, all right. (participant giggles) So we notice that without judging.
Now, this time, roll up your mat, so just like roll up half of it to create a cushion for your ankles. And then you will pinch the rolled up part of your mat with your heels so that the balls of the feet are on the ground, heels are on the mat, and let's do that same thing again. So once we're all there, again, so bring your feet to start, hip width apart, and then you guys lower all the way down and notice if that makes life a little bit easier, isn't that something? It's the magic of the ankle, all we did was change in the angle of the ankle, everything else starts to feel like it changes. Come back up, and then again, we'll do the wide one where we take our feet wide apart, still on the mat, yeah, and if you found like, okay, I could've been a little more comfortable than that, maybe make it a little thicker, make the roll a little thicker, and now again, lower back down.
And is that enough height for your heel to get in to a longer spine, a little more extended thoracic spine and now again here, go ahead and take a deeper, slower, fuller inhale, and notice if that changes your ability to perceive things or space between your sitting bones. Inhaling slowly, can you feel when you inhale, it kind of expands and gets wider, and then exhale, and if you don't feel the difference, that's okay, that's what you notice, it's totally okay, and then again, come right back up. Did that change things a bit? You notice so, all we did was change the angle of the ankle, so we brought the heels up and then the rest of the body fell into place. So that's very noteworthy (chuckles).
Now let's go ahead and unroll the mat, we're gonna open the mats back up, and for this class, you'll need a yoga block or a big book and a tennis ball or a small dense ball. We're gonna lie down now and at first you're just gonna lie flat on your back, and allow yourself to just let go and let your arms release at your sides. If you feel any discomfort in your lower back when you're lying flat on the floor this way or if you find that your chin is getting pulled away from your chest, then you can bring your head up a little bit and/or put something under the back of your thighs or just bend your knees and put your feet on the floor if you're having a day where there's a lot of tension through the back or the neck. And so while we are here, just allow yourself to release. Notice that the ground is supporting you, and take a moment and notice the parts of your body that are clearly touching the floor.
And then start to notice the parts of your body that are clearly not touching the floor. And then noticing if there are any areas where it's a little vague, or you're not sure. And now, with your hands, go ahead and slide them just to feel without having to move or change your body too much, just to feel that space between the lower back and the mat. Notice if one side of the lower back has more space from the mat than the other. Notice if it's one big curve and it's an even space, or notice if it's pretty flat.
You just, again, just notice what you find, and make a mental note of that. And now, while you are lying there again, allowing things to just release and just be and fall into place, gently start to make one leg slightly longer than the other where it feels like you're shifting one hip up as the other one glides down, and then you'll alternate. And again, while you're doing that, notice if your body creates lots of tone, if there's a lot of work involved, and ask yourself to keep letting go. So that quality of letting go, we often refer to it as like being floppy, that floppy feeling through the feet, often the feet are turned out when we are really floppy about the way we move. How much of that quality of being floppy and released and letting go can you maintain as you start to shift through your hips?
Notice if there is any discomfort when you're doing that movement. Does one side feel different than the other? And while you continue to do that shift below, notice if anything is going on above in your shoulders. Does it also shift up through and into the shoulders or not? And we'll just spend a little more time with this, so we really just wanna feel like we are moving without trying to move, which is very ironic.
And then exaggerate the movement a little bit more, so one leg will literally get longer than the other, unless that creates pain, always listen to your body. And again, notice when you exaggerate it, if it starts to create a little more shift up above, do you find more muscle energy, more effort or can you maintain that sense of being floppy? And then when you're ready, just let it all go. All right, so now we're going to turn onto our right side, and we are going to grab the yoga block and the tennis ball, so you're gonna lie on your right side, and stretch your right leg out, bring the tennis ball underneath your left knee, so your left knee is going to come forward, and you're gonna put the ball on the block, so this becomes your massage therapist. So you're gonna bring that top leg onto the tennis ball, which is up on the block.
Let the foot relax and be really mindful this area is full of trigger points, so you could startle yourself, that's the point, that's why it's called a trigger point, just be gentle with yourself while you're doing this, so you want to have that feeling of being heavy and letting go and then your top hip is just going to slide forward a little bit, and then it's gonna slide back, and you are basically just giving yourself a gentle massage, so you don't need to push down on it, or create lots of weight, you can let your head rest on your hand or on your arm, again, keep finding ways to hold yourself where you feel like it really requires very little effort. It's not a whole lot of work. And when you find that spot that kind of makes you jump a little bit, breathe, slow down, and maybe go into it a little bit more, and so again, like we talked about earlier in our conversation there with the girls, so much of this work is figuring out just how much and what's too much and what is not enough, it's like if you find that the rest of your body is, your teeth are bearing down and it's creating tension everywhere else, then it's probably too much, versus like oh, that's uncomfortable but I'm able to release and breathe into it and I can let go, and it starts to dissolve, and it sounds like we found a spot over here. (participant chuckles) And what's funny is that at first, oftentimes we start doing this and people don't really feel much until you like knead the tissue enough, it's like working with dough and the dough needs more air and more water. So once you find that spot, relax into it and let it go, and this spot is a trigger point in the fascial chain that has to do with walking, with locomotion with hip flexion, so when we spend a lot of time sitting, the front of the hips can get very tight and short, which we are all familiar with, right, and then we go to do our wonderful ab exercise and Pilates and all we feel is like a hip flexor, thigh workout, which also so it's like, if this is getting short and pulling forward, it's tipping my pelvis anteriorly this way, and it's shortening the curve in my lumbar spine, it's increasing the lordotic curve, so when we release down here, it's like this whole train starts to let go, and it starts to free up more movement and more space in the lower back and throughout the entire chain.
We'll just spend a few more moments on this side. And sometimes you find spots that are really quick to release, sometimes they are a bit more stubborn and they're gonna take a little more time, this is a wonderful thing to do even like after a hot bath or shower where your tissues are a little softer, especially if you've just getting out of, after a long drive or a plane ride or something, it's a great trick. And then when you're all ready, you're going to lie on your back again and we'll just move the ball and block off to the side, keep it near. Lie on your back for a moment though and just notice if there is the difference now between one side of the body and the other. And you might wanna feel with your hands again and see did it change the curve and the way that the lower back relates to the floor, it's kind of cool, right, it's like actually it did.
You might even feel the back of one thigh now is a bit closer to the ground than the other. And again, if you don't notice these things, it can be really subtle until you've done it enough where it's not that subtle anymore, right, so don't feel bad if you're not experiencing a big change. Let's do the other side. Exactly. And we'll keep that foot dropped and heavy, so you'll keep your foot on the floor and you can orient the block, turn the block so that it's going the length of the thigh, so that it's like perpendicular to your pelvis, and it's like a runway for the ball, so that you have a little more space on the block to roll the ball around, and funny enough, changing the angle of the hip will change the sensation around there as well, so when you're doing this stuff at home and you've got lots of time, you might wanna explore going from being more to 90 degree angle at your knee to hip and then lowering it down and seeing if that in fact changes the way it feels and the spots you might find, and when you find that spot, just be mindful of letting go, breathing into it, as long as it doesn't create a ton of tone up in other parts of the body.
And when you do find your spot and you wanna pause and release into it, notice if there are any referred sensations that travel throughout the body, sometimes the arches of the feet might feel sensation, sometimes there might be sensation around the hip or the low back, sometimes things can get itchy, other parts of the body might get itchy, again, we're stimulating lymph right, there's also lymph nodes in this part of the body, so it does a lot. And I do recommend finding your own spots and feeling it out for yourself before helping others do it, because sometimes it can be really tricky, sometimes this is a room of movers, and so they are pretty intuitive, but it's not always the case. I often find myself having to go around and helping people position the ball and figure out where they might find some sensation, something interesting. All right, I know you could stay there for a while, so I'm sorry to interrupt the fun, but when you're ready, we're gonna lie on our back again, let everything release, and notice yet again, does that change the way your body relates to the floor? You can go back and feel that distance between the lower back and the mat now, and it doesn't always finished balanced, like it's not, both sides are not always even, right, asymmetry is the nature.
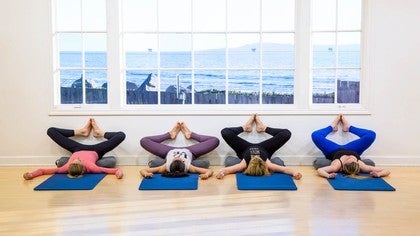
It's different, but you might find that in general the body has a little more contact with the ground after releasing that. All right, and now again, start to make one leg slightly longer than the other, keeping that quality of letting go, the thighs are heavy, the feet are plopped out, and we're just shifting, bringing one hip up and then alternating and noticing does that have any relationship with the shoulders? So now, go ahead and bend your knees and you're gonna bring your feet onto the mat, and you'll walk your feet apart as wide as the mat will let you go, and let's just move the yoga blocks out of the way, so that there's space for the legs. And we're gonna open the arms out to the sides with the elbow slightly bent and if that's too much pull on your chest for any reason, just bring them down, always find the angles where you're the most comfortable, allow both knees to rock to the right side, and notice how that lifts your pelvis and your ribs up off the mat, and then go ahead and let the outside leg, so your right leg initiates coming back to the center, bringing both legs back up to center and then we'll go and let them fall to the other side, and notice how you move, so notice what your tendency is. So again, your left leg now is gonna roll up and you come back to center, and we just keep rocking from side to side, can you encourage yourself to just kind of smoothly let go, so 'cause you can violently let go, right, (chuckles) where you're just kind of like flop down, versus letting go a bit but yet there's still a level of control, versus feeling like you gotta reach and move and go, right, so it's like again, finding that midway between I'm not just like mindlessly just gonna drop into place and I'm also not going to direct my legs and have all this effort involved, so it's, can we just find the ease where we are still aware there's still control, as we were talking about the contrology, but as little as possible, and notice how it feels, how does one side compare to the other, how does one side of the rib cage compare to the other?
And what I mean by that is do you find that when your legs go to one direction, the ribs are pulled away from the mat more so versus the other direction, you just kind of notice it. And the next time that you're back in the center with both feet on the mat, go ahead and pause there for a moment, and now this time you're just going to let your left knee come down towards the center, reaching your left knee across as if it wanted to move over the toe of the opposite foot and your right leg is, it might have to go a little bit but you're trying to keep it in place, so you feel like your left knee is really trying to come across in a diagonal. And then you'll let your right knee start to hug in towards the midline, and that will bring your left leg back into the center, and you'll do the same thing to the other side, where it feels like you're almost pushing off of your big toe on the left side to direct that knee and hip across while your left leg is kind of staying in place, as long as it feels okay through the groin, and then again, your left knee initiates to come in. We're exaggerating the pattern of walking, and there is a fantastic book called Somatics by Thomas Hanna that was one of my movement Bibles for a few years, and this is from one of his of the drills in there, he's one of Feldenkrais' students, so it is a very Feldenkrais approach of moving with very little effort to just notice what's going on, and it exaggerates the pattern of walking in your body. Bring your feet in just a little bit closer towards your body, and then a little bit wider apart, where they were, yeah, so it's as if you're taking the step and it's like we strike through the heel, goes through the pinky toe and then push off of the big toe, so once you're there, you're only on the big toe, and then when your knee comes back, brings your other leg back and then again, just think of directing that knee across and notice how it happens naturally.
So again, rather than feeling like you have to do this thing, if you just start letting one knee rock forward and then the other knee rock forward, it's also like a huge pelvic clock motion. It's just we're letting it travel down and up, right? Really let it feel like you want it to come across this way, yeah, so that it feels kind of, again, we've talked about elasticity, right, the entire body is elastic, at least we want it to be, and sometimes this will give you really nice little adjustments and again, just help free up some of the issues involved with walking and running, so that we are able to get more recoil and more bounce in those movements. And so notice what you're doing, right, we're just gonna do a couple more and just go inside and think okay, if someone asked me like, what am I doing? What are you doing, (chuckles) and there is no right or wrong question, it's just another one of those exercises, see how you're lifting your heel here, let it just kind of drop down, let it be more about this wanting to come this way.
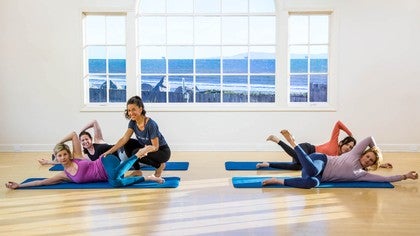
There you go, and then this one brings you back, yeah. And we'll just do that one more time to each side, and then we'll use that motion to roll onto our right side. And so when you turn onto your right side, you can slide your legs back up and together, and bring the knees in towards your body, and find the closest angle to 90 degrees from the hip to the knee, and I say closest because again, it's, what are you comfortable with, if you feel like you can't move and it's too scrunched up and too tight, then don't stay there, find a place where you feel like there's a little more comfort. You're going to take the bottom arm and bring it under your head, and just notice if your chin is tucked down into your chest, which is super common when we lie on our side, bring the head back, so that it looks like you are basically, your head's aligned with your tailbone, and then take your top arm, take your left arm and wrap it over the top of your head, and see if you can grab your ear on the other side, so can your left hand find your right ear? And sometimes it can't, and sometimes it feels like you are playing Twister and you have no idea where the red dot is (chuckles), and bring this over the top here, so when we go over the top, it just makes the tissues on the side of the body have to be elongate a little bit more, versus going behind the head, which is going to make the shoulder blade move into more retraction and in turn, start to send the spine into extension, so and that might happen anyway, but you're just as close as you can get it.
It might not literally get to the ear, but it's just an idea. So now, while you're here, you're gonna start to lift your head up and it's as if your left arm is picking up your head, you're staying on your side and you're coming into a little bit of a side bend, and then slowly come back down. And it might feel nice on the right side of the neck. Again, as much as necessary, as little as possible, so that we are not, we don't wanna overdo it with pulling on the head, keep it feeling good, and then notice your breath, so this arm can stay down now. And again, don't worry about controlling your hip, things don't have to stay in place, just notice how that movement feels, where does it feel?
What's getting involved to move when we do this? Are you lifting on an inhale or are you lifting on an exhale? And while you're moving, notice if your feet are holding themselves up off the floor, let them go. Keep reminding your body that it's lying down, and it's really interesting the way we're so switched on and ready to go even when we lie down, our tissues are still acting as if there's somewhere to go. Keep reminding your body the floor is supporting you, totally trust the floor.
We'll just do that one more time, and the next time that your head comes down, go ahead and keep your head down, and now this time, you'll keep your knees together, and you're just going to lift your foot up, so the top foot's going to come up, keep the knees together, that might lift the hip up, and that's fine, allow that to happen, and then let your foot come down, and notice the release, letting everything go, so when you come down, think of deeming the lights so to speak all the way off, and then slowly turning them back on, and if it feels appropriate, there is no discomfort anywhere, turn them all the way on, so slowly up to where it's the fullest expression of the movement and then slowly back down to where you've completely let go. So internal rotation is a really really big missing piece when we think about our everyday lives, even our Pilates repertoire, there isn't a whole lot of internal rotation, and that's a very important piece and as it pertains to the tissues of the pelvic floor, and because we really want to have our movements and such be integrated into our whole, the whole chain, all of the tissues as one, we're gonna combine this movement with the previous one the next time that your foot comes down, so if you release the hold of your head, go ahead and bring that left arm back up and around your head to find your right earish, and now as you're ready, both your head and your foot are going to come up together, and it's like we give our hug, we give our left side there a hug, a little squeeze, and then slowly release and come back down, really letting go of all of the tissues. We are just going to do that two more times and again, notice your breath. Find the squeeze at the top, and allow the breath to move in and out, so if you find that there are moments where you're holding the breath to try and make it synchronized, just let the breath keeping moving in and out, avoiding those holes in between the breaths. All right, the next time that you come down, let your left arm come all the way down, go ahead and lie back on your back, lengthen your legs out, just let everything release, and again, notice if one side of the body is different than the other.
Does the one side of the body maybe feel a little bit longer, or maybe a little more awake? And then when you're ready, you'll turn on to your other side, and we'll balance that out. And it's okay again when you don't feel things are different when things haven't changed, that's fine, that's what you notice, so you'll bring your knees back up, your legs are stacked, you'll take your right arm now and wrap it around the top of your head to find your bottom ear, and this time, on the inhale, start to bring your head and your arm up, inhale and then you move, exhale and slowly come all the way down, full release at the bottom, let it go. And again. Waiting for the inhale to move, and then exhaling to come down.
The next time that you come up, we're going to add the foot, so the knees will stay stacked, your head and your foot will come up together, and you give the side body a little hug with the movement, and then slowly come back down and let it release. Let's bring your knees up a little bit higher. Is that okay through the front? So it's good to get as close to that 90 degree position, just because that takes away the option of moving in other directions, right, if the closer, the more we close that joint, so to speak, the more, all you'll have is some side bending, it won't let your pelvis move back unless the groin is bothering you or your student in which case always, always respect what people feel. Really letting go with the bottom, and we'll just do that one last time.
And then we'll release. And now, this time, we're going to turn onto hands and knees, just turning right towards that mat, coming up onto all fours onto our hands and knees. And you can keep facing the center (chuckles), we'll just go with that, and then spread your fingers apart. So we talked so much about the arches of the feet. We also have arches in our palms, right, so spreading your fingertips apart to stretch the webbing really helps to, just again, we're talking about elasticity, about creating and getting that back into our hands.
We are gonna tuck our toes under while we are here, exactly, and then you're just going to push your pelvis back towards your heels, keep your hands where they are, and sit all the way back as long as it feels good and comfortable, and notice the stretch on the toes, and then push the toes into the ground to bring you back up onto all fours where you come a little bit further forward as long as the wrists are okay and you might feel a stretch, and then you're gonna push with your arms to sit back towards your heels, and we're just gonna repeat that a couple of times. So the idea is that when you are coming forward, your big toes have kind of sent you there, and when you are leaning back, your palms have sent you back, and we just keep rocking back and forth this way. If you feel like you want more range, just take a step toward with your hands to give you a little more space to move through. Really making sure that we are flexing into that big toe. It's often the site of arthritis and therefore there's pain when we do this, but if we don't do this, there is going to be more pain and less function.
We are going to do this one more time, and the next time that you're sitting back toward your heels, stay there for a moment and start walking your hands towards your knees. It'll lift your chest up as it'll straighten the arms, and now, push through your hands to roll back, and just kind of roll back over the toes, and then roll forward and roll over the toes again, and we are just gonna roll back and forth this way. So it's kind of a full body footwork if you will, rolling back and forth over the toes. Letting our body weight help us, the push from the arms, so that again, we're finding the way to do it where we're really, I like to think of it as like I'm using physics versus I'm using effort. So it's like if we just put the bones in the right relationship and push and roll forward, it just kind of starts to happen, and we get rid of all this like feeling of I've got to do, and I've got to control and conquer the universe.
That'll come. Just trust. (chuckles) And now we're gonna push back and stay there and now this time, let your knees separate, your feet will stay where they are, but your knees separate, and we're just gonna rock to one side, and that's gonna stretch the toes and kind of open the inner thigh and groin on that side, so it's like you want that knee to keep facing forward, and then come back to center where you started. Now your other knee is gonna keep facing forward and you rock to the other side, and just keep rocking from side to side that way, and again, the idea is like just kind of roll with it, literally make it light so it doesn't feel like there's a whole lot of work involved, you can keep your hands on the floor, so that your back doesn't feel like it has to do a lot of effort. And we really just start getting our ankles and our toes moving, and then coming back to the center, and now just rocking a little bit from side to side with the knees where you're allowing it to roll out to the pinky side of your foot on one side, and the big toe on the other side, and again, it might be a little uncomfortable, the metatarsal might be wondering what is going on?
If you're on a nice soft mat, maybe not so much. And then bring the knees together, bring the knees back down, keep the toes tucked under and you can bring them together again if they went wide apart, and start bringing yourself up slowly and when you're asking people to do this, ask them to do it slowly. If anyone were to have knee pain, which is very common in this position, if you roll up a towel and put it pretty close to the back of the knee, it'll help to decrease the angle at the knee, decrease the pain there possibly and still get the body weight, so notice how sneaky the pinky toe is, right? If you reach back, it's really common the pinky toe is trying to get away with not being a part of the situation, so you use your hands and you just help your pinky toes a little bit, and if that's really comfortable (laughs). You could hang out this way your next cocktail party, make it a thing, let your shoulders relax, and we'll come back to your parties probably, and now, imagine both of your knees kind of sliding forward and your hip bones kind of rolling back a little bit, not 'cause you're squeezing or tucking, really just kind of thinking it out, exactly, and and then there's that moment of like, oh, it's a trap.
Hi, it's so nice to be back here. What have you guys been up to? How was your holiday? Isn't it great? Exactly, there's a bit of that kind of vomit reflex.
(participant laughs) There's a lot of stuff that's really yucky, stuck in there, do you wanna hear about my trip to Costa Rica?
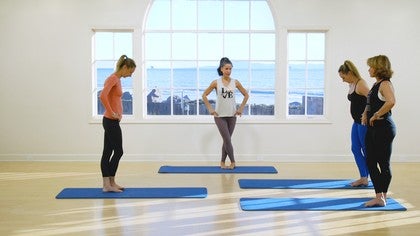
Let your arms come up the way we did in the beginning, does it feel a little different, maybe, yeah, I was about to say, maybe separate your feet a bit, a little bit different, and now we're gonna push back up to standing and we're gonna do one more drill for the feet now, so we're gonna really get into the feet a little bit more as if we hadn't just a second ago, but how long was that? Not even a minute, I don't think we were there even for a minute, and it sucks (laughs). It's a hot minute for sure, definitely a New York minute, all right, so now we are gonna lift all of our toes, fan them, and it really helps if your fingers do this. In a lot of times, they do it on their own, and then your pinky toe goes first, your second, your third, your fourth, and your fifth, and then you let it relax, and when you're looking down at your toes doing this, go ahead and lift all of them again, spread them, and from the pinky side going down and then the second and the third, the fourth and the fifth, notice how much space you can see between them, and so our goal is to see more and more of the mat, and more and more of the floor in between the toes, just do that one more time. We lift all of them, we spread them, notice the ankle, try and keep the ankles fixed.
They're sneaky, they'll want to start spinning out. Pinky first, your ring toe, your middle toe, your index toe, and your big toe, as if there were a thing, and then let it relax. And now adjust your big toe. Big toe's up, big toe's down. Big toe's up, big toe's down.
It helps to watch someone do it. You guys familiar with that book, The Monkey Neuron? If you watch someone doing it, it'll help you find it in your body, just a bit, and sometimes, you just gotta come down and block the other toes that wanna get involved, so you can feel it and create the pattern in your body, create that network, and then see if you can find it without that help. And then the big toe will stay down, and you'll lift the other four, and bring those down, lift the other four and bring those down. All right, and now we're going to lift all of them one more time, spread them, lower the pinky toe, and lower the big toes.
What? (participant giggle) Right? And then try and keep the three in the middle up, and bring the three in the middle down, and up, and down, and up, and down, and up, so again, in the beginning, this is how we get there. We hold it, we do it with the fingers and we go deep inside, and ask yourself, what am I doing, and you don't have to have a verbal answer for the question. It's a feeling question.
What's going on in there, how can I get that to happen without my other fingers, without my hands basically involved. Yeah. And then let that rest, it's funny how it warms up your whole body, right? And then take one foot and tuck it under and just stretch the ankle that way, and now we're gonna roll it, rolling out to the pinky side, roll back, and then come back around to roll forward, and just draw a circle with your ankle. And it might be all noisy, snap, crackle and pops.
When you go forward though, do try and really have that moment of like where you feel some pull, oh it hurts so good, right? And then rolling out, that one, that's a good one, not like the other one, that's like really painful (chuckles). (participant chuckles) Ah. And we haven't talked about it but all of the, all this protocol or like exercise ideas that we're really addressing what's going on through the pelvis are great for so many other things like this is a great drill for plantar fasciitis, which is pretty common, right, 'cause movement is a great anti-inflammatory. So with movement, we start to wake up our internal pharmacy.
Now, just put that foot down and feel the difference between one foot and the other. Isn't that wild? And then we'll do the other side. Hmm? Can I lift my middle toes?
You can lift your middle toes now. That's a fun thing to check in with, yeah. And you might find, one foot's not as exciting as the other (chuckles). Try and find that moment where you feel the pull from the metatarsal up the front of the foot, just do that one more time. And then we'll bring it back down, and let's step off of the mat, it's not, not as squishy, just to be on the hard, hard floor, you can just go to the side of your mat and with your feet about hip width apart, let everything relax and we're just gonna kind of dribble our heels here, where our legs are straight, and we're letting the rebounds travel up through the body, so at first it feels kind of like, ugh, ugh, ugh, like it would sound like that, keep your legs straight.
Now, keep doing that same movement, just go softer, like we are on rose petals and we don't want to bruise them but we still can feel the floor on the skin of the heel, so it's just like your skin wants to tap down. The trick is to kind of think more of your big toe metatarsal. If you shift your awareness and the energy forward there, your legs stay straight, everything stays stacked above, straight knees and vertical pelvis, which, sometimes means you can think of your pubic bone going forward, think of your heart, your face, so that it keeps you vertical, legs stay straight, go a little faster, ah. Down, down, down, down, down, down, down, almost done. And rest.
Ah. And then let's just step back onto our mat, just so that it's the way it was when we first started, take your feet wide apart now, and again, let's go back down into the squat. Notice if it feels any different, again, you can put your heels, your elbows rather, against your knees to help lift your chest, and again take a deep inhale while you're there, and exhale (exhaling). And notice when you are inhaling, if there is any awareness or shift around the pelvis. And then we're gonna press down through the feet, come all the way back up, and again fold up the mat, we're gonna do the same thing, just bring it forward, pinch it with your heels, and this time with the mat, go straight down in parallel.
So rather than doing it wide, we'll use the mat to help us go down in parallel and if you feel like, oh, wait, she didn't tell me that before, you need to roll your mat up higher, then just roll it up a little bit higher. Now, stay there and imagine yourself kind of leaning back a little bit more, so it's finding that feeling of shifting the energy into the balls of your feet and yet trusting the heels so that you can come a little more upright, and just breathe, and when you take a slower, fuller, deeper inhale, make sure your weight's back though, so you do want your weight on your heels, so yeah, (laughs). And that's part of it. That's usually my exit strategy. So hang out here and breathe.
Just take one more breath, there we go, and then when you're ready, you're gonna press down and come all the way up, and just step forward, don't worry about the mat, and just close your eyes for a second, go down into the soles of the feet, notice how the feet feel against the floor, notice your pelvis above, and while you're standing now, take a moment and notice where you might have tension, energy where you're holding stiffness that you can let go and you don't fall, or feel discomfort. And as you take a slower, fuller inhale, allow your belly to expand, and as you are exhaling, allowing everything to release down, crown of the head gently releasing up. Inhaling a little slower, a little fuller. As you exhale, releasing your physical body and the weight down, while the crown of the head is energetically pulled up. And on the following inhale, let your arms follow your breath, bringing the arms all the way up and overhead, look up at your fingers, get really long, your feet pulled down, your shoulders and hands pull up, inhale more, inhale more, let your belly expand, inhale more, inhale more, and then let it go.
Awesome, ladies. Thank you so much, thank you guys at home. (clapping)
Empowered Aging: Pelvic Floor Dysfunction
Comments
Hope to see more soon! :) thank you
Realmente se siente el cuerpo diferente después de aprender a soltar!
You need to be a subscriber to post a comment.
Please Log In or Create an Account to start your free trial.
