Description
About This Video
Transcript
Read Full Transcript
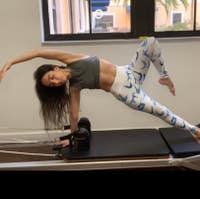
Hi. We are going to do a pelvic power reformer class is what I like to call it but we're really gonna be looking at the power of releasing right now in this work out. So I'm gonna hand each one of you this squishy blue ball and you're going to place it under your pelvis, so just go ahead and lift up. And so they're on two heavy springs, two heavyish springs but we want it to feel pretty light. So you're going to start off by bringing your knees into your chest, letting the thighs separate, and letting the knees fall into the body as close as we can get them, as long as it feels comfortable So that you're basically in a supine child's pose position is kind of the idea and we're just gonna take a few breaths while we're here.
Supine Lumbar Spinal Stretch
And so what we're doing with the ball is both elevating the pelvis so we're using gravity a lot in this class to help create a little bit of distraction of the lower back and also just thinking of if it's a long day, all of the movements that we do throughout the day where we're upright for the most part. So just introducing this idea of going into an inversion in a very, very gentle way. So while you ladies are here, go ahead and hold on to your kneecaps and just let your arms rest on them and gently hug them in as long as you don't feel any pressure in your groin and you might feel like an awareness around there but it shouldn't feel sharp or like your body is telling you like hold on, don't do this. And while you're here just take a slower, fuller, deeper inhale. Allow your belly to expand and as you exhale just kind of go in notice the parts that are clearly touching the mat, notice how much the back of your rib cage is touching the mat when you're in this position and allow it to continue to settle.So again we're just taking a few deep breaths here, also because when we're in this position with this much hip flexion it opens or separates the sitting bones from one another. It opens and separates the coccyx from the pubic bone, front and back and then taking the deep breath is like massaging these diaphragms. You might feel change in temperature in your feet, in your toes, sometimes tingling, sometimes itchiness. Those are just signs of the circulation, the fluids are moving. And so when you ladies are ready, keeping your hands on your kneecaps as they are, start to bring the knees in towards one another, move them away from your body, separate them and then circle them back in and around.
Circles
So we start to introduce a little bit of movement that's going to feel a bit wobbly. Allow yourself to be wobbly. Allow yourself to keep releasing back into the ground and notice your shoulders. So the shoulders are really sneaky and sometimes they'll push up into the shoulder blocks as a way to give you more stability. If you find that that happens just remind them that they can relax and sometimes you have to physically scoot away from them because your body just wants to keep pressing back if you're feeling them so just kind of notice that.And then when you're ready, circle in the opposite direction. And they're doing a great job of keeping their feet, again in that floppy feeling, the feet are turned off. Really make it feel like it's your arms guiding the movement and like there's not a whole lot of effort going on anywhere in the body and if there is that really it be more about the arm directing the leg versus the legs wanting to do the movement. And then again, we're going to reverse that direction. And the next time that they come back into the center, pause for a moment there, bring one thigh towards the body as the other thigh moves away and then alternate.
Hip Walks
So we'll keep the hands on the knees. So we still wanna be holding on. Did I hear a little pip pop over there? Love when that happens. And so keep both hands on the knees and bring one knee towards me, exactly.And then we're going to alternate that. We can keep it this simple if it's appropriate meaning you are, the choreography is not gonna create effort and distraction. We can turn this into a figure eight. So you'll keep one knee close to you, move one knee away and then start to separate them, circle them around in opposition. They pass through the center again and then they continue to alternate and when we're just introducing this movement pattern for someone it's very helpful to be here with them and help guide them this way.
Figure Eight
We want to be very respectful when we're cuing and helping each other in these positions because they are very vulnerable so it's great for the eyes to be on each other, right? Make eye contact. If their eyes are closed just keep your eyes on their face, even if you are curious to see what's going on or how the pelvis is moving just be really mindful that if it's not another instructor or a teacher training environment but more of a I've got a pelvic issue environment that we're really making eye contact rather then being all up in someone's personal space. And then reverse the direction and with the figure eight. Keep relaxing through the jaw, through the shoulders.So as the movement patterns become a little more complicated you're gonna notice that the tone in the body might start to rise. So just keep reminding yourself you're lying down, there's nowhere to go just circling the femur in it's socket in this position. And the next time that both legs come back through center, go ahead and pause, bring them back into your chest one more time. And now let your arms come down at your sides, keeping your legs where they are, notice if they've come in a little bit closer, if the position feels a little easier and now slowly start to find tabletop with your legs. So you want your toes just a little bit higher then your knees so you can just about see your toes there and now you'll keep your feet together and start to separate your knees and then well bring the knees together and start to separate the feet.
Table Top Hip Rotation
And then the feet come together and the knees separate and then the knees come together and the feet separate. We'll do this a couple more times. Keep the feet up just a little bit higher. Yep, and really notice that your moving. Notice how you're moving from your hip socket.The feet are just carried along. The next time that your feet come together, keep them together so that we're back in parallel. The knees and feet are both all together. So the shins are together and then we're gonna reach the arms up towards the ceiling. Again be really mindful of the shoulders.
Lateral Open Close
They're really tricky. We don't want them to push up into the blocks to create stability. We want to feel like they can relax back and down. And now with the arms up towards the ceiling, go ahead and do that same movement pattern. Your knees separate, your feet stay together and then your knees come together, and then your feet separate and your knees stay together.And then your feet come together. And again you might find that it gets a bit more wobbly. Allow that to happen. And the next that the thighs come together and the feet come together keep that there. This time with the arms up separate both legs, keeping them in parallel, they'll move apart and then slowly bring them back in together, and do that again.
And together, one last time. They separate and they come together. Now this time you're going to reach both arms out to the sides. Inhale. And as you exhale slowly bring the arms back up and towards the ceiling.
Do that one more time. Inhale in reaching the arms out and wide, exhaling slowly they come together. And on the next one only the right arm is going to reach out to the side. Exhaling. That right arm comes back up through the center.
Unilateral Open Close
They are both really great and steady. Keep alternating the arms, yep. Keep following your breath. And move your feet just a little, your thighs just a little further away from your body coming in a little bit closer to that 90 degree angle at the hip as long as it feels like it's not turning on a lot of hip flexor activity nor a lot of lower back activity. And see if you can sense the side of the body.So when the arm reaches out or when the arm comes back in you might find that it wakes up the opposite side or sometimes the same side. Everyone's perception is different. Notice what you feel. And the next time that the left arm is out to the side go ahead and keep it there. And we're going to keep that L shape in the arms now.
Windshield Wiper Arms
So notice the distance between your hands. Keep it the same and as you exhale, take the arms to the other side. And then inhale, exhale. Go to the other side. Awesome.We're gonna go a little faster. And switch and switch and switch and wobble and wobbling is great. And switch and switch. Let the ribs relax. Your head is heavy.
Maybe a little faster and switch, switch. Smaller when it's faster. Notice your knees. What does your body want to do? Keep breathing and going.
Switch, switch. Last four, three, two and one. Let the arms come back down. Let the arms relax. Let the feet come down and I can sense they're ready to come down out of that.
Pelvic Tilt
Let your feet come on to the bar now. (sighs) So let your feet relax on the bar and just start rocking your pelvis back and forth. 12 o'clock to 6 o'clock. So letting the tail bone really drop down. Sink into the ball and then gently roll back.Just kind of checking in with the back, noticing what happens. And then when you're ready you're going to use that movement to start to lift up into bridge peeling the spine up, pulling the carriage in. It's on kind of a light setting. Pull the ball up now and bring it up as high under your back as you can get the ball. Exactly.
Bridge
And now start to roll down around the ball. You want the back of your head and shoulders to stay heavy and you want to allow your pelvis to release down. And sometimes the pelvis won't touch the mat. That's okay as long as it feels okay. Sometimes this will give you that feeling of like whoa my back is tight.It might feel a little sharp around the breath. So if you take a slower fuller deeper inhale, just kind of notice what you feel like there. And now as you exhale you're gonna start to curl back through your pelvis sending your pubic bone towards your mat and your sitting bones towards the sky and really think of your ribs rolling back towards that ball. And I'm just gonna scoot your ball up a little higher under you. And then again start to curl back down.
So what we're doing now with the ball and the bridging motion here is creating new angles for the spine to articulate while on the reformer. It's a great way to include some of the stuff that we would include on the ladder barrel on the reformer and in a group setting. Yeah, so keep this feeling as, keep thinking of curling back. Even though your body is moving towards the sky, keep directing the energy down towards the mat. And what I really love about doing this this way is when the pelvis releases down, that beautiful stretch and release it gives to the front of the diaphragm, and also the amount of hip flexion that it increases here.
So we get more movement in the hip socket. So we'll start to curl back up. So she has more time to roll her pelvis around the head of her thigh bone because he pelvis was able to drop down further then it would without the ball there. And then as she's curling up, it helps give the spine direction so that she can feel like she really wants to send the back of her heart towards the ball rather then up towards the ceiling. So it just helps to change the way that we relate to a very familiar movement perhaps.
It's also creating a longer path for the entire hip flexor chains 'cause remember, the hip flexor originates up in the thoracic spine. So it's a, it's really nice that way. And it looks like you've been able to release a little bit more now with some repetition. So it's like again, the idea of pumping and creating more elasticity through the system. How are you guys feeling in your lower back?
Feels good when you come down? So the next time that you're down, you're going to stay down there and with your heels on the foot bar now at about six bones width apart we're going to start pressing all the way out to straight legs. Pelvis stays dropped and heavy and then slowly bend the knees and come back in. And just notice what that feels like there. So if you are experiencing any lower back discomfort when you do this because this might be a very different angle to do footwork in, just elevate your pelvis a little bit maybe with like a folded towel just to decrease the curves that you've got going in your spine.
Heels Parallel
Should the bar be up here or-- No, right there where it is. Yep. Yep because we still wanna feel like the back of the shoulders are heavy. They're definitely biased towards an extension curve but it's not so much 'cause then your neck would also be in extension. So you basically wanna have the ball like under the low ribs.And now the next time that you come in go ahead and bring your toes down onto the bar. And we're going to press all the way out there and we'll bring both heels under the bar and when you're there allow you thighs to relax and really think of the inner thighs spiraling back towards the floor. Does that feel comfortable? Okay. And then we'll bend the knees and come back in.
Toes
So, when we start getting creative like this if you're not used to moving your body this way, be slow and curious because you're not sure what you're gonna find. Even when you are used to doing it, not everyday is the same right? As we all know. So always go slowly and always check in with people before you ask them to do stuff just to make sure that they feel good about it. And so you might find when you take those heels under the bar that there's a bit of a release across the front of the body.Now the next time that your legs are straight go ahead and keep them there bringing both heels under to have that calf stretch and then rising back up onto your tippy toes and we're just gonna repeat that a few times. And as we lift and lower, notice the metatarsal on the foot bar. So when you're rising up onto your tippy toes. Notice that the weight might naturally roll into the big toe and if it's not so natural encourage it to roll into the big toe. And as we flex it kind of rolls out to the pinky side of your foot.
Tendon Stretch
So when you're flexing there might be more weight under the pinky side, when you're up on your tippy toes there might be more weight on the big toe. Just noticing that rhythm and spiral through the bones will help improve the spiraling all the way up through the joints. Allow the spring to help pull the heels under rather then feeling like your knee caps are coming up the front of your thighs 'cause you're trying to push them. So it's the difference between pulling your foot back to get the calf stretch rather then just kind of dropping down thinking of the inner thighs again rolling down and the weight coming through to the pinky side of the foot. Last time.Great. And then go ahead and lift the heels up. Bend at the knees. Bring the carriage all the way back in. Let's walk our heels back up and onto the foot bar.
Start to roll back up through your pelvis. Delay the ribs. Keep sending the ribs back towards the mat, back down towards the ball. Beautiful and curling up. We're going to remove the ball this time.
There we go and I'll take those for you. And then just start to roll back down. And once you're down let everything release. And notice how that feels. (sighs) Right?
It's like you just got a little longer. You just made some new space in your spine. And then allow your knees to rock from side to side. Just a good way to reset and settle everything. Alright.
And then when you're ready you're welcome to either roll up to sitting or turn to your side and make your way up to sitting. We're going to turn onto all fours now, facing the back and at first let's just use the carriage as a mat just to come into the quadruped position. So put your hands just behind the shoulder blocks and you'll bring your knees back onto the mat just to get into that quadruped position. So notice that your shoulders are over your wrist and your hips are right on top of your knees and as you're inhaling we'll start to reach the breastbone forward and up lifting the crown of the head and the tail bone as we do so really wanting to emphasize the moving coming from where you had the ball a second ago. And now as you're rounding, initiate from your tail bone as you did in bridging.
Cat Stretch
And so you kind of delay the movement to the crown of the head. And now again, your breast bone or where you the balls is gonna lead you forward. So you wanna feel like you delay the pelvis and then the tailbones up at the very end. And now keep your body up in fact and keep your heart up as your pelvis starts to curl under. So we create this wave through the spine and again when we delay one end, it's like we're gonna prioritize getting some more movement through the thoracic spine as we're going to the extension curve sending the heart forward and through.Keep the neck long and keep bowing in here. Keep going. Keep reaching that breast bone down. Then you'll let your tail bone come up and let your chin come up as well and now keep your heart where it is and let your tail bone begin. Beautiful.
Just see if we can get some new segments moving. Looking, yeah. Keep pushing through those arms. Lovely. And then again initiating from the back of the heart.
So see how your head starts coming up. Again when you're moving you can always pause and kind of ask yourself in this way what am I doing? What's going first? Where am I moving from? We'll just do this one last time.
And you got a deeper curve there. Nice. And then again, keep your heart where it is. Yes. And really prioritize your lower back coming in to the flexion.
And then your head will start to release. Beautiful ladies. So keep moving and when you're ready, you'll pause (chuckles). Alright, we're gonna open back up to that long neutral curve. That just kind of starting place for all things quadruped.
Reverse Knee Stretch
And now walk your knees forward and you'll bring them about a fist distance away from the shoulder pad. If you've got reformers that are on the floor, you can go ahead and use the floor. Because these are elevated, we've placed a moon box inside of the well here. So, you guys are going to bring your elbows onto the moon box. If there's any concern about high blood pressure, glaucoma, detached retina, you probably wanna instead put the forearms on the frame of the machine and not have the head so far under the heart.Okay. I'm gonna lighten it up now to one yellow which is one light spring. Okay? And we played with this idea a moment ago during their footwork and their bridging of having the pelvis slightly higher then the heart. Now the pelvis is more then slightly higher then the heart right?
So we're using gravity to help create a distraction here for not just the bones but the tissues, the organs, the fluids, the lymph, right? Everything starts to drain in the opposite direction. So, if it's appropriate you can stay there, take a few breaths. Start to send your body weight slightly forward into your elbows rolling the shoulders back and kind of pushing the floor away. Keep your head and shoulders right where they are and as you exhale start to glide the knees forward.
So you're gonna move around my fingers and it's just the one light spring that's kind of a bizarre place. Even if you've done a lot of reverse quadruped where you're up on hands and knees here, by doing it in the inversion, it's gonna change the strategy. So at first it might feel like, it's not, it doesn't go (laughs). Sometimes I have to just no spring just to get the movement pattern going and then add the light spring and then work up from there. So, keep the neck really long.
Shoulders rolling back and wide. And then slowly coming back (throat clearing) out of the tension. As you exhale to pull the knees forward, visualize your sitting bones spreading apart to bring the carriage in. And as your sitting bones are spreading apart it's like your pubic bone, it's like as if the tissues are wrapping around this way and then coming up towards the pubic bone. Beautiful.
Keep the neck really long. Just do one more. And then rest for a moment. Come on to your hands and sit back into a child's pose bringing your hips onto your heels. And just take a moment there.
Child's Pose
Notice what you feel. We're going to do one more round of that if that's okay. You guys feelin' okay?
Reverse Knee Stretch Variation
Okay. And so again we're gonna come back up onto the elbows. This time though you're going to bring your knees together. Walk the knees together and take the feet apart. So, as much as we can.There isn't necessarily a lot of movement there but we do wanna promote some more internal rotation here. And now as we're internally rotating we're also gonna think of rounding the lower back as we pull the carriage forward. So you can push down through the elbows kind of looking in towards the pubic bone and noticing where you're pulling from. So it's really common to pull from the shoulders. Think of almost leaning back a little bit.
There. And now exhale and think of curling your pelvis under. So I took away, there we go. Took away her strategy. Is this okay?
Yes. There we go. Where do you feel to Emily?
Bingo. (laughs) How are you feelin' it?
Yep. (Mandy exhales) Yes. Notice the vibration we find when we do this. Hang out. Go even slower.
Try and create more vibration. Bring your knees a little closer together. Little bit more. There you go. (exhaling) Yep.
So keep kind of leaning back in here and now go from there. Move around my fingers. That's it. Yep. Just 'til there, that's it.
(Emily exhales) Yes, right there 'cause I want her to stay finding the power from the pelvis right? Versus very, it's very easy to trick ourselves. Yes that's it. Beautiful. Keep the shoulders in the same place.
That really warms you up doesn't it? And when you're ready again, park it and child's pose. Also fantastic if we're working into forearm balances or hand stands, cart wheels, working up to those fun things, these are a nice way to start connecting the dots in a different orientation to gravity. Are your knees okay here? Alright, and we'll start to make our way back up (throat clearing) one more time.
Child's Pose
Coming up to sitting on your feet again I'm just gonna add some springs just so the carriages don't slide around 'cause they were on the lightest one. Now again tuck your toes under. Just as we had before in that class where we working on really releasing things. And we'll have our knees about hip width apart. Exactly.Check in with those pinky toes. Make sure they're not sneakin' off without getting into the action. Notice your vertical posture that you have here. It looks beautiful. Let your arms just kind of hang at your sides and now imagine you're gonna do a bridge that got married with thigh stretch.
Thigh Stretch
So you're gonna start sending your pubic bone or your tail bone rather forward curling up into a high kneeling position. Beautiful. And pushing away with the big toes. And then let the shoulders relax. So keep that feeling of staying really tall and vertical.Pelvis right on top of the knees and now we're gonna move from the knee. So we're gonna hinge back just a little bit as if you wanted the back of your thighs to come towards your calves. Push with your toes to bring yourself back up onto your knees. And again. So, so much of what we're doing when we're talking about any kind of pelvis restoration if you will and elasticity training is communicating the big toe to the sacrum.
So the idea is that your big toes push the floor away to propel your center of gravity forward. And the next time, how are your knees feeling?
Keep going back until your pelvis comes back onto your heels. So it's like hold on to that position until you have to set your pelvis back down. It hurts so good right? And now again, start to curl back as if you were going to bridge up into thigh stretch and we can reach the hands forward, start sending the tail bone under and once we come back up we'll hinge back as long as we can until the pelvis has to find its way down and we restore that kind of straight vertical position over the heels. This time we're gonna interlace our hands behind our head.
Elbows come forward and make it feel with your hands like you wanna pull on the scale. It's going to be under the hair even so that you can interlace your hands under your hair line. So under here. Exactly. Elbows are forward.
So with your thumbs and your hands you can tell these tissues to go up this way. Curl your pubic bone back and your tail bone forward so like we're bridging again. Curling this way to come up. It's a game changer when the hands come behind the head. Elbows forward, keep your chin up and then again start to hinge back.
Not too far back in the neck. Look down a little bit more. There you go. Yep. Keep coming back with your pelvis, yes.
Exactly. Thighs are on fire? Lean a little further forward. Right there. And last one.
Curling, curling, curling to come up. How you doin' over there Mandy?
Come a little further forward and it's funny how having the hands behind the head changes the line of gravity. Or our ability to find it. And then again hinging back. Think of your pubic bone going forward and up as you hinge back. And then once you've come back down you'll rest.
Untuck the toes and child's pose. Nice work ladies. Alright. And then when you're ready you can go ahead and start to make your way up to standing. Let's go ahead and step off into the center here into our little triangle vortex.
Child's Pose
And we'll just look down at the feet and bring them together so that they become one. Stand tall again with that vertical position so that you really feel your pelvis come straight down onto your feet while the crown of your head and the back of your neck is lengthening up. You have that feeling of like a divers belt on your hips. And now start to shift your body weight forward into your toes as you rise up. Really prioritize the big toe pressing down and then slowly bring the heels back down.
Standing Footwork
Lost. That's okay. And then again shift forward to come up. And slowly coming down. And you can come up faster then you go down and just kind of shift and lift.Keep that feeling through the crown of the head. Whoa. And then slowly on the way down. And now the next time that you shift and lift up stay up there. Put your hands on your pelvis and give yourself that queue.
So put your hands on your hips like you're givin' attitude. And then push your pelvis down and your toes are pushing up. Keep that feeling. We're going to bend the right knee, lower the left heel. Up and switch.
Up and switch. Up and switch. Up and switch. Notice if your pelvis stays level or if it wants to start dancing around a little bit. Spend a little more time at the top before you switch if you find that you wanna start doing the Cha Cha.
And if it's really challenging just keep it really slow. If you feel really solid in your pelvis after the work we just did go a little faster. So you've got to find your own rhythm. The whole idea is that we're able to keep all of the length through the spine. Notice the glutes, notice the jaw.
Let them relax and keep prioritizing the lifting up and down. Up and down. And I like to look around the back to look at the sides of the sacrum because I can really sense there if they're moving and they both look very solid. I don't know how they feel (laughs) but it looks like they're concentrating. Yep.
And faster. Up, up. Up, up. Last four. (fingers snapping) And three.
(fingers snapping) And two. (fingers snapping) Last four, three, two and rest. Let the arms go, let the eyes close. Take a second. Notice the weight down through your feet.
Notice that feeling of length up through the crown of your head. And then when you're ready we'll inhale. Reach the arms up and over the head and get really long. Look up at the fingertips. And then bring the palms together coming down through the solid center and let it all release.
Awesome. Thank you ladies so much. Thank you guys at home. Hope you enjoyed it.
Empowered Aging: Pelvic Floor Dysfunction


Comments


You are an excellent teacher! I appreciated your thoughtful and mindful cues, and all with such an intelligent progression for this class.
I’ve never done anything quite like this before. I’ve heard it said that we sometimes hold our emotions or angst in our hips and pelvis. Well, I’m a believer now. I have to tell you... after the pelvic work on the overball, I just started crying. Came out of nowhere. Well, not nowhere - from my hips/pelvis I suppose. Talk about pelvis power!
Thank you! Guess I needed this more than I knew. Both physically and mentally. Great release to start the week!


You need to be a subscriber to post a comment.
Please Log In or Create an Account to start your free trial.
