What's a Course?
You can now make playlists of select programs into courses!
1. Schedule regular emails to deliver the content direct to you.
2. Watch your assigned videos to focus on the course goals.
To take a course for this program, first select a playlist and then click the "Take as Course" button for that playlist.Description
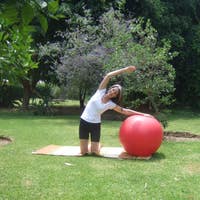
If you don't have access to a Parasetter®, Gia shares a list of alternatives that you can use at the beginning of the class.
About This Video
Transcript
Read Full Transcript
Hi, I'm Jia Calhoun and today we're going to do a class focusing on unwinding and centering and just releasing any tension that you had from the rest of the week. I'm using the para setter. If you don't have a pair of set or you can use a foam roller or a bolster, you can roll up a blanket or you can do this on the mat. You don't really need this, but I just happen to like it because I like the little divide in the middle for my spine and I just find this really relaxing. So if you do have a pair of setter, you're going to unwind your rib wrap and then you'll lie down on the pair center, making sure you're centered so that your spine goes through the center of it.
And then your head can be, I'm on this neck pillow, you can have it on your um, occiput, you can have it on your neck, whatever feels best to you. And then the rib wrap and take a deep inhale. And then as you exhale, you're going to wrap this around your ribs. So it's kind of tight. And then arms are just down by your sides just as you need, and just take a deep inhale and exhale. See, you're trying to breathe into this rib cage, rib wrap, filling up the lungs, and then exhale. One more plane. Inhale an exhale, and then going to bring your hands to your shoulders.
Open your elbows out to the side so that this feels like enough of a stretch for you. You can keep your hands here if you need more, you can start to open your hands away from your shoulders into like a goalpost position. It feels breathe here. Inhale, an exhale, starting to feel those arms get heavy on the mat. Inhale, try to open your chest an exhale. Inhale and exhale. If you want to close your eyes, feel free to do that. Should feel relaxing. Two more breaths.
We're gonna bring one arm up over your head all the way back as far as you can anyway. And then bring it back down by your side. Other arm will lift up, so you'll inhale as you lift up as you lower. Try not to rush through it. You want to take a nice full breath. Inhale, exhale, inhale. So if your arm only gets the here, that's fine. Just go where you can with your range of motion. Exhale, you'll find that one side's a little bit tighter than the other and lower. Maybe it'll get a little bit further each time. Reach and lower. Now we're going to lift both arms up again, go as far back as you can
So you're still staying connected to your center even though you're loosening up your shoulders.
So when to go back to the arm reach, you're gonna lift one arm up and that same leg is going to reach out so you can reach out through that heel, fine length on that side, and then pull everything back in other side, some inhaling as I push out and then exhaling to come in. Again, focusing on length of that side, trying to get a little longer each time and in other leg out, trying to make that movement as smooth as you can. If you're getting stuck on the mat, you can lift your leg a little bit. Just try not to hold it too much with tension
As you inhale, exhale to bring it back up for a little toe. Tap other leg lowers and lift back up. So you're trying to keep tension out of the upper body. Gently pulling your abs in and up.
Arms are gonna come up over your shoulders, shoulders down the back. Take a deep inhale here, and as you exhale, going to curl your head and chest down. Arms are gonna come down by your size and pump the arms here. So you'll inhale an exhale. Inhale, trying to keep the tailbone down into that pair of setter or whatever you're think. Inhale an exhale. Do three more. Inhale an exhale. So it's not a full hundred inhale since it's modified. And exhale, inhale and exhale and slowly lower down.
I'm going to move this head pillow because I want to do a bridge. So your head is flat. I'm still down by her side. When bring my feet and a little bit closer toward my seat. Again, I'm trying to stay centered. That's what's nice about this Paris header. So you're gonna Inhale here is he actually gonna roll up to a bridge. [inaudible] an [inaudible] at the top and axial roll down.
So you're trying to get your spine back into the center of the pair of center. If you're using a foam roller or something else that rolls, you can do this on the mat sometimes that'll roll away from you. I'm trying to keep the chest open and roll down. Feels very nice on my spine.
I'm going to keep my legs bent. I'm just going to bring them away from me a little bit. I'm keeping them hip distance apart if I need to. I'm going to grab my legs. We're doing a roll up. The arms are going to come up. Take a deep inhale. As you exhale, you're gonna roll up one boat at a time.
I did it without, so if you need to, you can grab your legs and help the top. Exhale, roll down new. A few with bent legs. Again, rolling up. The hard thing about rolling up on here and staying centered, especially when you get to the top, it feels like you're not quite balanced. One more at the legs. Bend rolling up and lengthen and back so you can stay there if you'd like. Or if you want to straighten your legs, you can with straight legs.
I'm gonna bring my legs together and flex my feet again. Rolling up a little bit harder. It's time, especially when I get up to the top and then roll back. I find myself kind of wobbly when I get all the way up. We're rolling up really pulling the legs together, lift and then rolling down. Trying to stay close to center as I can.
One more rolling up.
So my sit bones are right in the center, feels a little bit nicer to be lifted up and it gives my sit bones a little cushion while I'm doing my spine stretch. So feet are about as wide as your mat arms are gonna come forward. You're going to lift up off that pair of setter. As you exhale, you're going to round forward and reach, but and then roll up. So I can really feel if I'm coming off of my sit bones when I round forward, so I'm trying to keep my waist back as I reach the arms forward and then backup and reaching forward. Finding that nice opposition one more and round and then back up. Okay, I am that to the side. You're going to do sauce.
You're going to twist to one side, reaps that opposite hand toward the foot and software three to one and back up two wis and reach three two, one and up again. I can tell if my sit bones are moving so I can keep my pelvis anchored as I twist and up. Twist and reach. Three two, one. I'm still pulling my waist back and reached for three two, one and up last time. And three, two, one, add up, back to center. So they're going to go into leg, pull back.
We're gonna use the pair center for one more exercise and then we'll get rid of it. So you're going to turn it over. So the rounded side is down. And then I'm going to have my hands on pair setter. It gives me a little bit more height from my leg pull. So I like my fingers forward. If you want your hands to the fingers out to the side, you can do that as well.
Lays are going to be straight out, arms are behind you. Shoulders are down. We're just going to lift your hips up, find that straight line and then lower back down and lift up. And then lower down. Trying to open your chest just two more and lower down. I always have trouble with this one cause of my hyperextension but this extra height makes it a little bit more practical for me and lower [inaudible]. Well they're going to rid of the pair center.
I'm just gonna put it on the floor. So want to go into some sideline so you gonna lie on one side. Gonna we got two legs are bent. You can lie on your elbow all the way down. Whichever feels better to you. I'm going to come here. Do you want a space underneath your waist? Feet are in line with your sit bone.
Gina flex the feet. They're in line with your sit bones. Your top hand is just in front of your ribs. We're gonna turn the leg out, keep the heels together, and then turn the leg in. Bring the knees together. So heels come together and then knees come together. So each time you're passing through about hip height in parallel, so you turn out, turn in, just kind of mobilizing your hip. We're not trying to burn out the muscle, trying to move that leg a little bit, one more. And we're gonna come to parallel with that leg.
Are going to go into a circle, forward, up, back, forward, up and back. Two more in this direction. Trying to stay parallel with that leg. Reverse back. If it goes too high, the neo start to turn out and you want to keep the knee facing front
So heels come together, knees come together. So while I'm doing this, I'm trying to keep the hips stable so I'm not letting my hips rock back and forth trying to keep them stacked. I did two more sets turning out and in last one and then back the parallel, we're going to circle the leg front up, back and front two more. Again, stabilizing that hip at the top, hip and reverse back in around three, two, last one. Cut. So we're going to go into pigeon. So you're gonna have one leg bent in front of you. The other leg is going to be straight behind you. You want to try to square off your hips as much as you can, and then the flat back, you're going to lower your chest down.
So if you don't feel a stretch here, you can bring that front foot away. So closer to a 90 degree angle. Personally, I find the stretch really hard. My hips are pretty tight, so I'm going to keep my foot close to me and just keep lengthening your spine and squaring off your hips and breathing into that stretch. And eventually your hip will start to release pure pharmas.
Make sure that leg behind you is an out to the side to try to get it right behind your hip. And then squaring off your legs are squaring off your hips. You're gonna Flatten your back as you lower down the side. It's much harder for me than it used to be, but somehow the sides tighter on me. Now you're trying to get your hips as close toward the mat as you can. If you are further down than me, go ahead and bring the front foot out so you're closer to 90 degrees and he can just breathe into that stretch. I find this stretch is hard for me to relax.
I tend to want to grip and get out of it. So the more I can relax, the more I get out of it.
So you're going to stack your legs to the side. If you prefer the Z set, you can come to that. You're gonna grab the top ankle, one arm up to the ceiling. You're going to lift up and over towards your legs. Finding that length again when cracked and then lifting up, you're gonna reach away. Try to keep the hips stacked. It's again lengthening in the waist, using your obliques to pull you up and over. So I'm trying not to just sink into that side. Been lifting up, trying to still support myself with my abdominals and then back up one more time and over. And then coming up to center, switch your legs to the other side, stacking the legs, grabbing that top leg, reaching the other, like reaching the other hand up to the ceiling and over.
It feels good and up and away, keeping the hips stacked. So I'm trying to keep my legs contained as I'm moving my upper body so I'm not letting everything flail and away trying to match my breath to my movement and toward my legs. One last time. And I'm sitting up tall. So it's going to find a nice sitting position. If you like to sit criss cross applesauce, you can do that.
My hips don't like that. So I'm gonna sit with my legs hanging over there. Just gonna do a little circle with your shoulders around going front up to your ears and back. Just loosening up your shoulders one more and reverse back and around, trying to get as much range as you can so you can really let the shoulders go up by your ears, relaxing the shoulders. You're going to tilt your head to one shoulder. That same hand, you're going to bring it on top of your head and just gently pull it towards the side. And if you want more, you can reach that opposite hand out to the side so you get a nice stretch on the side of the neck. Now keep your head tilted this way and you're going to turn your head down toward the floor. Still keep that hand there and gently pull. The opposite hand is reaching away so it gets more of the back of the neck and then back up gently, and then tilt your head the other way.
Just the side. That same hand is going to go on top and gently pull. Reaching the opposite hand out. If you have something to hold on to you, that's even better, you can kind of give yourself some traction and then slowly turn your head toward the floor, reaching that hand back and then gently bring your head head up. One last thing, you're going to interlace your fingers both hands behind your head. You're going to lift your head up and then forward.
It's not just going to push your head down. You're another traction it out. To lift it up first and then push gently, of course, and then release your head. Relax. Take a deep inhale and exhale, and you're all finished. Thank you.
The Pilates Daily: A Class for Each Day of the Week: On the Mat


Comments


You need to be a subscriber to post a comment.
Please Log In or Create an Account to start your free trial.
