Description
During the class, we integrate Posture Arc – if you don't have one you could use a rolled-up towel or simply do the exercise without props.
About This Video
Transcript
Read Full Transcript
Hello, I'm Sally Anderson and thank you for joining me for a Posture Plus class. Let's work on rebalancing our modern posture. For the class, we need a posture arc and that will come in about a third of the way in. And we also need a TheraBand, which will come in a little later. Just set them to the side of the mat and we will start in quadruped position, please.
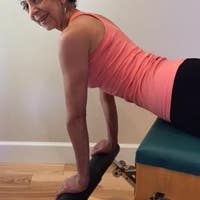
I have Jane and Andrew demonstrating for me. They'll go into their quadruped on the mat. And toes out. Body, nice and easy. Shoulders over hands.
Hips over knees. And I wanna keep just a little bit of pace and flow to this. Not too fast, but we won't stop and control too much. I want you to exhale. Round the backdrop.
The head in a cat stretch. Inhale. Move straight through the long line into your extension. Exhale. Initiate abdominals to scoop that under.
Let the pelvis come under. Inhale through the long line into extension. We've got four more. Exhale, scoop. Inhale, lengthen.
Now on that lengthen, send the sternum forward up the wall in front of your shoulders. Roll back. Head comes up. Scooped, come up and lengthen. We'll do two more. This one and one last one.
Scooping and the spine has started to move and mobilize. Come back to the center. Now think about just lengthening out the spine a little and going into our happy puppy. Let's go to the left and we'll just start by holding that position to the left. Our happy puppy shortens the left side.
Hip comes to the shoulder. I really want the head integrated, looking back to that hip. Come to center. Let's try the other side. Bring that around.
We just rotate like two rotating discs to come around. Open up the opposite side ribs and come back to center. Now a little more pace and go to the left. Look to the right. Look to the left.
Look. We're shortening the side we're looking to. Lengthening the side we're moving away from. Last 4, 3, 2, 1. Coming back to center again.
Just establish your center position. With the right arm, take it out for thread the needle. The arm comes out and up. Now pause for a moment. I want you to be looking to that hand.
A lot of the posture work we're doing, we're integrating the head neck. Now walk that hand through to thread it like a little spider walking away with the standing arm relatively straight. Not too much bend. Two more, this side. Look to the hand where it comes up and then walk it through.
Thread the needle. One more. Hand, shoulder presses back and walks through. Finish that one. Bring it back to center to the left arm.
Reach. Press back from the back of the shoulder here. Walk it through. Good. Two more. As is being demonstrated beautifully, pelvis kind of stays where it is.
The upper body gets the rotation open and through. Bring that hand back to your quadruped when you are done. And we'll pause here. Then I want you to just isolate the head neck. Make sure the head is in line with the C7 junction and we're doing little circles or stirring some soup.
Think about a paintbrush from the tip of your nose to the mat and just draw little circles with your paintbrush. 10 in the first direction. Just small and fluid. When you've done 10 the first direction, you'll do 10 the second direction. Good.
All right, and as you come to a finish, just pause. We are going to lie prone on the mat. Forward down on the mat. Arms will come out into a scarecrow position, so elbows in line with the shoulders, hands in line with the elbows. It's a very squared off shoulder position.
Foreheads down. And I like to just think about dropping the chest so it's nice and easy. Now we're going to pivot from the elbow. The whole forearm. The left arm first.
Pivot the hand forearm up and look to that hand. Come back to the center. The head is going to hover. Look to the right hand. Pivot and look past that hand.
Center. Now the trick is to try and get the forearm to pivot at the elbow rather than break at the wrist. Let's take the whole forearm in one longer line and look towards it on the right. Back to the center. And left.
Back to the center. Right. And we're going to do two more each side 'cause you can feel it starts to build. It starts to activate up around the shoulders. Get the external rotation and you start to get a little more range. It won't be big, but as you work through some repetitions, you get a bit more juice out of it.
Last one to the left. Last one to the right. Come back to the center and we'll have both. Leave those elbows there. Now as you pivot the elbow to bring both arms up, bring the head and neck up off the mat.
Sternum just coming a couple of inches up the wall and return. The arms lift at the elbows and brings the shoulders head up. We're doing nice work here. And four more. Arms, head, shoulders. Good.
And try to think about those upper ribs. Ribs one and two, just rolling back. Clavicles coming back over towards the scapula. And two more if I haven't counted poorly. And one last one.
Place that down. Leave the forward on the mat. Bring your arms back beside you into a dart position. Palms will be facing up to the ceiling. Forehead is down.
And I want you to initiate this movement from the head. The head will... Imagine a little marble under the nose. The head's gonna roll that marble out along the mat as it comes up into the C7-T1 junction. Shoulders lift, hands lift.
And that's as high as I wanted. I don't want it a high movement. And come back down. We're going to do four more like this. Initiating from the head, shoulders, hands.
Think long position. Very nice. And coming back down. Three more. Head, shoulders, hands.
And like to see them just sort of at the top of the thighs coming in toward there with the hands. Last two. Lengthen. Reach. Legs are long as demonstrated here. Long in line with the sitting bones.
Thinking more about the upper torso. Last one like this and return to the mat. And then we're adding. We're going to continue with the dart movement, lifting up into that long line dart. Now open the arms to the sides to a T position.
Palms down. Bring them back into your hips. Return to the floor. Four more of those. Just a little more endurance. You take it out, reach wide, draw it back in, bring it back down.
Three more. All about the upper head, shoulder girdle. Arms reach wide. Heads in line with the spine. But that may look like a little extension because you're coming out of that extended spine.
Just be careful not to get too high. Think length through that movement. Open in the front of the hips. One more for me. Lift.
Open. Back in and come down. Good. Pop your hands on the mat and sit yourself back onto your heels just for a moment. And then we're going to turn over onto our backs, into your pelvic girdle bridging position.
Feet hip width apart, lying on your back. Knees bent. Now I wanna start with elbows tucked in beside you, fingertips to the ceiling. And then march those elbows out just to the edge of the mat or at about a 45 degree angle. And open the palms to the floor, so we should be in a W position here.
I call these supine W's. Very, very clever name. Now pivot at the elbows again. You're going to tip the hands in, tip the hands out and feel like that draws the shoulders into external rotation. Tip in, tip out.
Just tip in and out. Good. We're just gonna do three more, just allowing the shoulders to move. And think about not holding onto the shoulders. Just let them move where they will at that pivot point of the elbow. And pause there.
Now keep this elbow angle and glide the arms overhead till the fingertips touch, leaving the arms on the floor. And they're just gonna glide back. Good. As you glide overhead, as I say, try to glide them on the floor. If your arms aren't meeting the floor yet, that's fine.
Just know that that's the idea is let gravity take the arms to the floor. Overhead. Fingers tip and the ribs, abs are trying to just gently stay connected to the mat. Avoid trying to force it and tuck the pelvis. Let the body be long, but you know that your breath is trying to draw down to the mat with the ribs, so use the exhale as the arms go overhead.
We'll do one last one. Fingertips over and back. And we're going to stay there. Now holding the arms in that W tucked in, I'm gonna bring you in just a little where it's tougher. We're going to do our bridging or pelvic curl.
Exhale. Curl the hips up to the ceiling, pressing your feet into the floor and try to find that W connected to the mat. For Andrew who just isn't completely connected in the bottom position, this is a chance to get feedback from the floor there. Exhale, uncurled down and working on keeping that connected to the floor. Good.
Breathe in at the bottom. Breathe out. Pelvic curl. If you'd prefer to lift, I'm happy with a lift and press up, but I do want the uncurl on the way down. Exhale. Allow the ribs to go first.
Mid back, low back, pelvis. I'll have four more. Breathe in at the bottom. Breathe out to curl. Find as much connection to the floor as you can.
And I know a little W position sounds pretty easy but it's not that easy. Good. Where someone's agreeing. Exhale up for number four. Breathe in, staying long with the knees over toes.
Uncurl back down. Last one here. When you're down, breathe into the pelvis. Breathe out as you curl up. Stay there in the bridge for me, Andrew.
Good. Stay there, knees over toes. Get a nice long breath in and then exhale all the way along the mat as you come down, lengthening tailbone towards the heels. And pause at the bottom there. Extend the arms out to your angled position. From that W, we're just taking the hands down in line with the elbows, so you're at a 45 degree extended arm now.
Keep the right foot on the mat. Take the left leg into puppy paw. That puppy paw is a vertical thigh, floppy lower leg. Now I want you to think of the little toe on the standing foot reaching out like a column out through that little toe reaching away and pelvic curl up on the single leg. Keep that column on the foot. Pelvic curl.
Lift the hips up. Nice. Keep the puppy paw. On the way down, exhale, uncurl ribs all the way to the mat. Pause. You've got three more. We won't do too many but keep that column on.
You'll aim to curl up. It might look a little more like a press 'cause a single leg pelvic curl is hard work. But give it that sense of trying to articulate through the curl to come up. We're up to number three. Lift knee over toes.
Long little toe in the column. Uncurl back down. And we've got one last one. Good. And Andrew's gonna hold for us. Stay there. We've got just collecting Jane at the top.
Beautiful. And then exhale uncurl all the way back down. We're going to change sides. Good. What's good for one leg is good for the other. Find that long column through the little toe coming all the way out.
This leg in puppy paw, where the thighs vertical. Perfect. And exhale. Up you go. We've got four this side. Scoop and curl.
Now just check that vertical thigh on the puppy paw leg. Uncurl back down. Good. You can also think about keeping the heel pressing or anchoring into the mat to help press you up, but also to engage a whole lot of hip extensor muscles. This long, little toe side should give you more medial hamstrings, so we are really drawing the body in toward the center.
But it also helps to keep that alignment of the leg. Keep the shoulders nice and wide and anchored. And uncurl back down. That's your four right? Yes.
Perfect. Stay there. Once you're down, place both feet onto the mat. Still hip with the part. We're keeping the feet apart as we go into knee side to side.
And we'll drop knees to the right first. Drop them across and then exhale. Abdominals initiate. Pull them back to the left. They drop across and center.
I'm gonna keep a little flow in this. Across to the right and center. Left and center. As you're going, I'll just let these two and let you go through some movements. Wherever you are, just keep moving side to side.
Doesn't matter which side you're on, the idea of the legs being apart actually gives you more of the FEMA rotating internally and externally in the hip joint. Legs together are absolutely perfect. I love that variation as well. But this is just working more through the hip joint and the spine. Good.
And whenever your even sides come back to the center and hold the legs in the center for me. Arms will come up above the sternum. I want fingertips even. Arms extended and they'll be just above the sternum, so not too high. Lift your head and shoulders a millimeter off the mat.
Just hover and go across to the right with the arms towards the floor. Back to the center. Cross to the left. Now legs pelvis are ideally staying put, but they'll have a little adaptation because of the range you're going to. Again, I'll let you keep going side to side, making sure you are just moving between each side.
Focusing on staying a little stable in the lower body and then we're gonna pick up the pace. You're going to come across and across. Good. Just use that pace for the moment. We're really releasing some thoracolumbar fascia.
Getting rotation of the spine. Probably getting fast out the door as we rotate up the mat. But last set one and make sure you're balanced both sides, and come back to the center. Place the arms down. head down and take a breath. Beautiful.
We are going to sit up and take our posture arcs now, please. Sitting with the arc placed higher on the mat, where it's going to end up under your thoracic spine. And if you need to spend a little time working out where to put the arc for your particular body, there is a posture plus tutorial that will work you through some of that arc work and positioning as well, so that could help you but hands behind the head here. And I might take Jane down over the arc a little bit more. Upper back.
Think about scapular on the top of the arc there for the moment and just extend back over the arc. Probably even a little more if you think that's your arc there. That's it. Good. Head back. If that's a strong movement on the shoulders or strong position, just bring the elbows in, armpits to the ceiling and make sure that you feel comfortable in the shoulder girdle.
To begin with, I like to leave the head shoulders back, take a few little breaths and allow those breaths, allow the exhale to sink the upper ribs back on the downward slope. Really wanting to open into extension. And think about the upper ribs, the shoulder girdle. Just getting weighted back. Head gets weighted back.
We're working on that reverse of the forward positioning that's so constant for us these days. Once we've done a few breaths, we're going into chest lift. I'd like the head to stay heavy in the hands and the ribs or upper abdominals be your focus point for the chest lift. Upper abdominals. Draw the ribs toward the pelvis.
Pause and then take the body all the way back over. I like inhale back and exhale drawing the ribs up. Chest lift to a long line, not too flexed. Inhale back. We'll do four more and keep the pelvis on the mat.
If you need a little posterior tilt to just lengthen your lower back, go right ahead. Otherwise just let it be easy on the mat. Exhale. Slide ribs to pelvis. Inhale. Lengthen the ribs. Shoulders back.
We'll have two more. Good. Ribs toward the pelvis but avoid... Just watch that the head doesn't get... He saw it too.
He felt it. Watch the head doesn't start pulling you up through those neck flexes. I want it to stay in the hands, throat open and the torso do the work. Go all the way back. Pause. We're taking this chest lift into a hula.
That's the rotation with the chest lift. And with the legs, we'll take a puppy paw on the opposite side. Let's just do. Pop that lead back down for a sec, Jane. We're coming up on the chest lift and rotating the torso to the right hand side.
And we'll puppy paw as we do it. Yes, inhale back through the center all the way over the arc. Exhale to the other side. Now that puppy paw sinks the femur into the hip joint and takes it back down. Again, I don't want too much over flexion or too much force.
I want it to be a long movement, where the obliques just draw towards each other. In actual fact, keeping it longer and less forced makes it work a bit harder. This is where we'll start to see some tremors of truth. And floated across to the right side and back through the center. Good. Trying to keep that pelvis just settled.
Last one to the left. Femur drops into the hip joint. Beautiful. And back down into your extended position over the arc. Leave the legs down.
We're just gonna use the hands to help the head come up into chest lift and all the way to sitting. And we'll turn onto our sides. Now we're going to send the arc down into the hip under the side of the body so that rib cage is over the arc. Good. Top leg is long.
Bottom leg is just tucked in, in a bent position with the foot under the knee there. That's a good guide for where to place that underneath leg. Top arm long along the torso. Bottom arm long underneath the head. We're doing a side lift, but I want you to initiate the side lift from the long underneath arm.
Send that arm out and up, and the head and the top arm come with it. The top arm gives you reach. The top arm reaches a way to help lift you up. Come back down. Good.
Bottom arm, palm up, and let this arm be the one that drives you up. The bottom arm lifts and that brings the body up into a long side lift. A little less with the neck. Think about the head being in spinal alignment there when you get to the top. And come down.
We've got four more. And this arm doesn't come too high. It's your driver. Full position and come back down. You've got three more.
Lengthen. I do like an inhale for the lengthen, but feel free to breathe as you need to. Everybody has different needs. Good. We'll have one more.
Lengthen coming up. Lower that down and stay where you are. We re going into some waving. The top leg bends, keeping the knee in line with the hip and taking that foot back off the mat. And I will have Andrew change his underneath arm position to go forward, which means we've got a deeper or more exaggerated side flexion of the neck in the down position.
And Jane will stay with her head on the arm, which is our starting position for the waving. The top arm is gonna reach to the ceiling. Rotate and then go over to meet the bottom arm. Comes back up to the ceiling. Rotates down and reaches away.
Good. Arm comes up, rotates and as it goes overhead, think about drawing this knee down into the mat for your abductor stretch here. Arm comes up, rotates, and as it reaches away, allow the neck to consciously relax and lengthen. And these upper traps get reached into a long position. Up to the ceiling. Rotate.
And as you can see with Andrew here, he has a more extreme stretch on the neck, particularly upper trapezius, as you get this reach away here. That's a progression or if it works for you, it works for you. One more. Arm up to the ceiling. The only other thing to note is knee down on the mat or you could support it with the underneath foot if your knee joint feels a little vulnerable. And reach that last one down.
Pause. Take this top arm to the floor and roll forward to bring yourself up safely and onto the other side. We'll flip over. Same thing. Getting that arc in under the hip.
Ribs opening over the top of the arc. You can probably come over it a little more there, Jane. Yes. Underneath arm long. Top arm long.
Underneath foot, tucked into the knee. And we're ready to go with our side lift. We have six. The underneath arm lengthens brings you up. Top arm reaches just off.
And wrap yourself over the arc again. And lengthened to come up. And wrap over the arcs. Just to spine alignment. We just want that long movement right through sacrum, through the spine to the head.
One long line when we get to the up position. Three more. Might have been two more. We'll do three more. What's an extra repetition between friends, right? Last two.
Head stays back. And one last one. Pause. Just stay nice and long. And then control that back down. Then set up for waving.
Top knee bends and we'll bring his arm forward for the progression version, and Jane will leave her head on the arm. The top arm reaches up to the ceiling, rotates in the shoulder socket, goes overhead with the knee, pressing down. Arm comes up, rotates, reaches away with the head getting lengthened down. Nice. Three more. Up, rotate, reach.
Up, rotate. Head relaxes. Two more. Up, rotate, reach, and exhale as you take the arm down. Reach away.
One last repetition and I hope you're enjoying that, and getting that length through the top side from the crown of the head to the knee as well. Like I say, tuck the underneath foot under if the knee feels a little vulnerable. Arm reaches away. Pause for a moment. Take the top hand forward onto the floor.
Roll onto that arm so that you come into that forward position to come up. And we're turning on our tummies. The arc is going to go under a high part of the ribcage. This is the one that requires you to find your position more. Shuffle around a bit if you need to, to find where you can manage being over the arc.
And if you absolutely can't manage being over the arc, just take the arc out. Hands under the forehead and do the movement without the arc. Equally as difficult. What we have here though is that the arc will expand the upper back. And then I want the head shoulder movement again.
Now Jane's keeping her hands under her forehead. Andrew's going to show the progression with hands behind the head. Even though it's a progression, it gives more feedback. Start with the head. The head presses up, and with the hands behind the head, it lets you head, head, head, come up.
Yes and then that's as long as I want it. And come back down. Five more. Elbows can come in and out as you need it, but use the head to really initiate the movement coming up into shoulders. Ribs in line with the spine.
Now I love what Jane's doing. Hands on the floor, giving you a little pressure into that extension of the head. Shoulders coming up, and fantastic. Now we're going to glue the hands to the forehead as she does that. Hands will stay on the forehead as the head comes up.
Head comes to the spine. Beautiful. There's three variations. You can choose you where you are at the moment. Feel free to go straight to the harder one if that suits you.
Or find a regression as you need. Let's do two more. You can never have enough back lifts. Good. Nice. And one last one.
And pause. All right, hands on to the mat to help sit you back into a rest position. And just take a moment. And then we're going to turn around and sit onto the arc, but bring the arc in and have your TheraBand handy. Bring the TheraBand up to nearby because we're only a couple of exercises away from using it.
We're gonna sit on the arc, where this gives us a little more ability to sit upright and work through a couple of exercises that you know well, spine stretch to start with. We'll do a preparation or a modification of spine stretch with arms on the legs. Arms are straight, connected to about the knees. Think about using the value of the arc to get you as upright as possible. Hands are straight on the legs.
And hands will be around about knee level as you prepare. From here, you're going to exhale, scoop and roll forward, allowing the hands to go to the ankles or anywhere on the shins that it finds you. Head is in line with the spine in a C curve. Breathe into the back. Exhale. Stack that spine up.
Rib cage over the pelvis. Get really tall. Crown of the head to the ceiling. Exhale. Deepen round the abdominals back into the open spine here. Inhale into that thoracolumbar junction.
Exhale. Stack the pelvis. Mid back, upper back shoulders. We'll do one more like this before we add. And exhale. Curl forward. Good. Head just drops into that continuous line.
Stacking back up and pause. Now we're going to add an extension using the arms, so exhale forward as you've just done, allow the hands to get to the ankles or shins. Then use the arms to start at the sacrum and take you out into a long extended line. Shoulders drawing back. Then reverse that, contracting through, stacking the spine back up.
Good. All the way upright and two more. Curl forward. Good. From here, starting at the base of the spine, the arms draw you out into a long back.
Pull that up and then curl you back through. Stacking the spine up. We've got one more. And really empty the air out of the lungs. Allow the upper back and ribs to open into a rounded position.
Lengthen into a long position. Get a little bit more juice out of that and then scoop and bring it back up. Beautiful. Now in that upright position, I want the right hand down to the floor, left arm up to the ceiling. And we're going into a side reach.
Just supported over to the side with the... Don't go too far. Allow that opposite sitting bone to be still on the arc. Bring that back up. Change sides. Left arm goes down. Right arm goes up.
Anchor the opposite sitting to your tuberosity. Bring that back up. One more each side. We're just using these for little range for our next exercises. The sitting bone goes down.
The side reach goes over. Bring that back up. And one last one. Lift. Keep the pelvis, the sitting position, the leg stable.
And coming back up. Now we're going into a rotation. The right arm will go back behind the arc into rotation and the left arm will come around to the outside of the mat. And think about the body being upright. As you just rotate the spine, turn it as you go through there and then back to the center.
We'll do that to the other side. Left arm goes behind the arc. Right arm, either beside the leg or onto the floor. Take that rotation around. Beautiful.
Shoulders back. Body upright. One more each side. Bring the right hand around to the back. Now you might be able to get it a little further around. Good. And center.
And last one comes around. Use that to send the sternum up. Shoulders open and center. We're ready to take our TheraBand. If you'll take the band in front of you, hold it generously wide to the legs, so you'll have a little bit of of leeway in it.
We're going into an overhead stretch or an overhead reach first. Start with the bend down and the spine lifted, and the arms come up to the ceiling. Now at this point, you are going to exhale and pull as wide as you need to, but aim for the back wall. All the way down. Then inhale. Bring that back up.
And on the way back over, exhale. You have two more here, please. Inhale up. Now think of dropping the shoulders, armpits forward, and yes, take as much stretch as you need to go over. You will get quite a deep shoulder stretch.
Rotate a cuff stretch. And just take it at your range. One more. Inhale to lift to the ceiling. Get a little bit more maneuvering.
Sternum, lift up as you go over. Yes, yes, yes. And return that. And hold. We're going to put that band...
Leaving our feet wide as they are, put that band around the balls of the feet. Make sure the band's kind of flat and I want it right up onto the balls of the feet that draw the feet into a little bit of dorsiflexion. All right, and from there, sit tall. Still working on that lift. Palms are down. Arms extended.
We're going into rowing. Elbows, pull back. Palms, pull up. And forward. We'll do 10. And exhale, inhale, exhale. Good. And just keep it nice and low.
You're just drawing the elbows down and in. And as you draw the elbows down and in, think chest up. And good. And then you get to focus on, once you've got that movement happening, the back of the shoulders, triceps. And what number are we up to?
Two left. Two left? I'm sure it wasn't two done. And one more. And then we're taking it into a rotation.
Arms forward. Go with the right arm first. Pull the elbow back and allow the torso to rotate. And center. Still from the back of the shoulders.
Body upright left. Center. Three more each way. Exhale. Pull and forward. It can keep flowing. Exhale, inhale.
And four, and three. Good. Last one to the right. And to the left. Beautiful. Good.
Just roll forward, take the band out and pop it to the side. We're going to sit off the arc and put the arc to the side of the mat where we can just grab it in a moment. We're just changing positioning. Into your supine position, as you would for a bridging your pelvic curl. Laying back down, then you're going to lift your hips.
Slide that arc under the pelvis because we're taking our legs into the air. Make sure it's supporting you under the pelvis. Good. Once you are there, bring knees into your chest. A little frog position would be nice.
Heels together. Toes and knees just apart. Now there's a couple of variations here. I'm going to say to Jane to pop her hands under the pelvis, which is going to elevate her pelvis a little. Allow her to be kind of a little more settled over the arc with less hip flexes. Andrew's gonna keep his hands down on the mat or the arc, just allowing the arc to do the work.
From here, stretch legs up to the ceiling. And I want them parallel or little bit neutral for scissors. Take the right leg away to the far wall, and the left leg to your face. In that position, I want the leg that's over your face. And then we'll alternate.
The leg that's over the face, I want to be the focus. That's gonna be the pull. Andrew's gonna do it with a little pulse, pulse and pulse, pulse. Jane's just gonna do a reach and up. You can choose your version.
Reach or add the pulse. Finding the range first is a really good idea. Then you get to do a little duh, duh, up, and change. Two up. One more each side. And last one.
Hold. Now turn the legs out. Externally rotate from the thighs. We're going out to openings. Legs go to the side.
Andrew's gonna add his pulse up. And I want Jane to find a reach with the legs and close. Again, you choose your version. Think about being turned out. Toes are wrapped out, yes.
And then every time the legs close back together, the femurs sink down over the downside of the arc. You wanna think about the torso being lengthened in the low body as well, not trying to keep it too tucked. Let's do last two. And last one. And hold back to center. Good.
Come back to our parallel position. We've got a bicycle. One leg will reach away to the mat. Reach. The other one reaches. Just keep that bicycle going all the way to the mat.
Reach and reach. Reach and keep moving through it as that works for you, allowing the pelvis just to be supported and elongated. Once you've done ten first direction, we'll reverse the directions. Watch your toes. Heels. Yeah, yeah.
Too many of us have chopped our toes off on the mat before. It's worth remembering. Last 4, 3, 2, 1, and pause back in. Hold onto your left knee and send the right leg down onto the mat, and just allow it to passively drop there. Let gravity kind of drop it into a hip flexor stretch.
We'll bend this one in. You can hold that wherever that feels comfortable for you with both hands and allow the leg to relax. We're just gonna do a couple of breaths there, letting the leg relax. Nice moment. And (exhales) nice moment.
Good. Now actively stretching. Staying in this position, I want you to reach the leg on the floor. Away with the exhale. Inhale. Allow it to relax. Two more.
Exhale. Actively reach it away. And if it feels comfortable, pull the opposite knee into hip flexion at the same time. Let everything relax. One more. Reach in both directions and relax.
Stay there. Good. Bring the right leg into the center. Change to the other side. We start with a few breaths, just letting the leg hang. Give it that sense of gravity, taking it into a longer unfilled position.
We're unfurling from all this flexion. And then we add the breaths with the forced extension. Exhale. reach that leg away. Inhale. Relax. Good.
Exhale. Work in both directions if that suits you. If not, just allow the reach of the bottom leg as much as feels good. Reach it away and relax. Excellent. Put both feet onto the mat for me and cross the left ankle over the right knee.
Then draw that right knee in for a hip stretch. Hands around the front of the shin if possible. If that doesn't feel good on your knee, certainly put it underneath the knee. But if you can get that little bit of extra leverage, we'll have three, maybe four long deep breaths here, allowing the hip capsule glutes. If you may feel it in your hamstrings, wherever is stretching, let it stretch.
Just allow that pull in from the bottom leg. Take it to where you feel like you are getting a comfortable stretch, and over time that'll just get deeper and deeper. When you've done your three to four breaths, place the feet down on the floor again and change sides. Cross it over, and then brewing that bottom knee in to be held. Good.
Draw it towards you as much or as little as you need. But with the elevation of that arc, I think you'll find that you get quite a nice deep position and stretch without having to force anything too much. Gravity is your friend here. Good. Last two breaths. Good.
And then when you are ready, place both feet back down onto the floor. Take the arcs out. Lift your hips. Take the arcs out to the side. And we're going to turn over for Cobra and a little bit of hip extension work.
Turning onto your tummies. Good. Now this time with the arms, it's not so much scarecrow, but it's tucked in a little. Elbows back in. Not quite the W. Just tuck the elbows to where they're about at the side of the mat and a little bit wider, so they're not too forced in wide.
I still want you broad across the upper back scapula. Now from here, use the forearms pressing into the mat as you take the head shoulders up into that back extension that we've been working on in the upper body. And then on the way down, lengthen the body forward between the hands. The head initiates like we did in the prone or the back lifts on the arc. The head, shoulders, arms press.
And then draw forward as you come back down. Two more. And use the arms to give you a little rollback of the shoulders. Sternum up the wall in front of you. And draw back down.
You have one more and we're going to stay in our cobra position. Head, sternum, shoulders, pause. Now just make sure your legs are parallel and the front of the hips are open onto the mat. And bend the left leg for me, please. Bend it to where the heel is above the knee and the foot is flexed.
And I'll have 10 lifts, please. Think of pushing up. If my hand was on your heel, you'd push it away. Push it away. Good. And I want you to keep that right angle of the knee.
Allow the sacrum to sit into the mat. The front of the hips open. And then lift from the upper hamstring into the pelvis here. When you've done 10, you'll swap to the other side. Good.
Nice positions and right angle in the knee. Dorsiflex foot. And you get that sense of you can have somebody give you a little feedback. It makes it a really nice feeling of how you get that work up. Good.
Little more bend there for you. Just 10 for me, please. Good. Don't forget to keep that sternum up. Forward an eye line up. When you've done your 10, take the leg out and use the arms to sit back into a rest position momentarily, because then we're going to tuck our toes under and sit on our feet.
I apologize in advance. Doing you the world of goods. We'll have differences in where people can sit. Andrew's gonna be able to put his... He's done this a bit with me.
Sitting back over the feet, getting a quite a deep stretch of plantar fascia and around the toe joints. It doesn't suit as well for Jane. She's having enough stretch there that it's still doing her the world of good. But we're not forcing anything. I'm really happy with that.
Again, you've gotta choose where you are at right now and then see how that goes further down the line. Good. From here, put your hands onto the mat and we're going up into a pike. Hands down. Your feet are already tucked under.
Send the hips to the ceiling. Take a moment just dropping the heels. Wrapping the arms around. Taking a little length in the body. And then soften the knees.
Walk the hands back to your feet. Pause then grab your TheraBand. And then just roll up. Taking the band in front of your thighs again for three more overhead. We did three seated.
We're doing three standing. The arms come up to the ceiling. Reach to the back wall as you broaden it going over. Back up to the ceiling. Watch these ribs a little.
And over. Good. Try to just make it go through the shoulder joint and not too explosive with the ribs. Not that that might be a nice stretch as well. And over. We've got one more.
Up and over. And reach to the back. Reverse that, bringing it home and hold. Good. We're gonna do a little arm work. If you'll just turn to the front, standing in the middle of your mat.
We will start with palms up. The band spread across the palms. And begin with just an external rotation, pulling the band apart. Good. And return. We've got six.
Just exhale. Inhale. And that lovely rotation work we've got happening in the mat now has a little load through that band. That's four. Is it four? Five-ish. (laughs) Six.
Now we're going to add a little. Open it and extend the thoracic as you reach the arms out on the diagonal. Wrap the elbows back in. Bring it home. Three more. Open. Extend.
Bring it back. Bring it home. Last two. Open. Extend. Back in with the elbows and home. Last one.
Don't get too high. And home. Good. Keep that band in the left hand and drop the long length of it onto the mat so that you could stand on the band. All right, then make sure you've got a reasonable amount of tension on the band.
Feet, hip width apart. You're gonna go slightly forward to the sideline for a deltoid lift. Reach it up and close. And two. Good. I want the upper traps, nice and soft, which Andrews are, and really think about engaging this delt muscle to lift the arm.
I want you to work that muscle. Put a bit of load into it. And it doesn't have to be... Oh, that's on. That's nice. Doesn't have to be high, so even under should height is plenty just to get that movement. Three more.
3, 2, 1. And then we're just transferring the band to the other hand. We're gonna do a cross pull. Start mid body and then take the elbow, unfold the arm, palm forward. Beautiful.
We're gonna get that palm forward on the way up. Elbow and then the upper arm extends as the palm comes. Stay there, Jane. Just that way. Yeah. And come back down.
And up and open. And down. Three more. Good. If you think about that first part of the movement, opening and wrapping the arm out, then the forearm just follows. Last two.
And last one. And change sides. Just transfer the band over the direction of it. Stand onto it, hip width apart. Take up that tension and slightly forward of the sideline.
And lift. Good. Keep that sense of those upper ribs are back now. Your head's back sitting over C7, sitting over the spine in the pelvis. Chest is open. And then we just activate these deltoids, but upper shoulder girdle muscles to give us some load.
And then the next step to this would be putting load as in hand weights. And then building the hand weights, so that we start to activate then strengthen. All those strategies of progressive load. Eight. When we've done eight.
We'll change to the other hand. Good. All right. And elbow palm forward. Wrap it out. Just don't get too high.
It goes on the diagonal. Yes. Good. I think we've got five or six more because however many we did on the first side, we should do on the second side. And I'm not quite sure how many that was, to be honest. (laughs) Balance that up, won't you? Good. Wrap this out.
Nice. We try just for the delts. Let the upper traps be soft. See you've got this. You've got this position now without having to lift from the shoulders.
And if that's your last one, let's just put the band back beside the mat. Turn to the side for me here. But what I want is a rise and reach. We're going to stand where the fingertips find... It's like a superwoman, superman position.
Just higher than the shoulders with the hands. Standing both feet hip width apart. Now rise up on both feet and wherever the fingertips land in terms of going higher up the wall, leave them there as you lower the heels away. We'll do four or five more. Feet rise, so we get a little balance work in here.
This is a functional finish position. Fingertips stay where they are. The heels lower away and you'll get a lovely long stretch of thoracolumbar fascia. We're getting balance. We're getting a reset of our positioning to go back into our daily life after the class.
I love when it challenges the balance. I'm all good with the... And I'll be doing it too. Wherever the fingertips are... A little bit of fun, right?
Wherever the fingertips are, you lower the heels away. I think one more will do. Let's hold. Let's stay there. Good. See, I was gonna do it too. And lower the heels down. And arms come down. You are finished, so I hope you've enjoyed doing Posture Plus with the posture arc and some variations without the posture arc.
Thank you to my lovely demonstrators and thank you for joining us.
Reach Movement Health: Posture Plus


Comments


You need to be a subscriber to post a comment.
Please Log In or Create an Account to start your free trial.
