Description
About This Video
Transcript
Read Full Transcript
Hi, I'm Diane Diefenderfer, and this is Laura Hanlon working with me today. I am going to talk about some details of pelvic alignment. More specifically, pelvic alignment during some exercises of leg and foot work. I think most often, people that are working on the Universal Reformer are going to start their program with leg and foot work. Maybe not always but I've chosen to do a few exercises today with a real eye towards keeping the pelvis in a neutral position so that the back is protected, and we're able to really fire up the transverse abdominal muscles, and keep the low back and pelvis in the appropriate place while also using the gluteal muscles and the hamstrings without tucking.
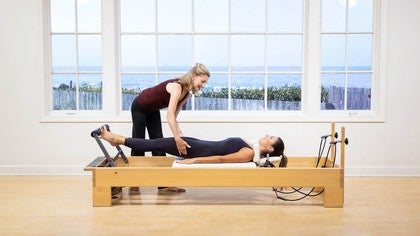
So there's some things there I'm gonna talk about. Laura's gonna demonstrate. All right, so we'll start with her bringing her feet to the ledge and yes, good, taking a nice position here. Breathe in and then as you exhale, she's going to roll down, ideally one vertebra at a time until she's beautifully on the carriage. So right here, we wanna have that lengthened spine.
Not forcing it into the bed, nor having an arched back. So already, I'm looking, cuing her to have her pelvis in a flat neutral position as though there's a ruler line across her low pelvic area, hips and that is flat. The navel to spine, which we all know that beautiful cue. But also the pubic bone anchored to the sacrum. All right, so, Laura, go ahead now and put your feet in just a easy prehensile.
So with the feet elevated, it's pretty much foolproof, not always, but that the pelvis stays neutral. So that's super important. All right, so then the exercises, we'll start with prehensile, which is with the feet nicely wrapped over the bar. I could go into greater detail about this, but that's not particularly what this tutorial's about. But just briefly, when I worked with Romana, she had the feet high on the bar for the prehensile exercise with a nice opening of the bones of the feet.
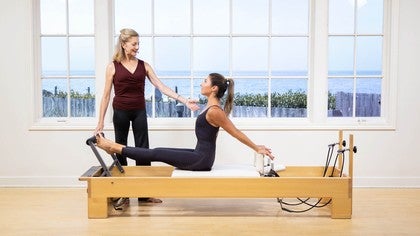
All right, so we're gonna work with that one, and then I'll show another version that Ron Fletcher taught me. So go ahead, Laura, press your carriage all the way out, and stay there for me. Those toes are working in a prehensile grasp position. Bones of the feet are nicely opened up. Her heels are downward.
Her inner thighs are zipped together. But what I really wanna focus on today is that she's neutral. Incorrect would be to arch the back and then what's more... Relax for a moment. And what's often happening in the course of leg and foot work in trying to use the glutes and the hamstrings, people will often tuck.
And this is really common and let's go back to neutral. And the whole issue is that you can keep the pelvis in neutral and still engage the hamstrings. Let them go soft for a moment. So now they've kind of just gone outward a little bit, and it's what I call no one's home. So let's go, click in there, engage, fire.
Tuck, show the tuck, not correct. Back to neutral pelvis, navel to spine. Pubic bone to sacrum and the back of the thighs. Glutes engaged, beautiful. So there's your beautiful position.
Take a breath in again, please, exhale, bend. And let's have you do a few of these looking at the body. Go ahead, inhale and exhale. She keeps her feet nicely wrapped over the bar. Of course, we look at knee and ankle and foot alignment.
Nice and again, that pelvis is in a long flat position. But she is definitely firing her glute muscles and hamstrings, nice. All right, let's do a few of the other ones. So Ron Fletcher liked to have the toes a little bit lower on the bar. Definitely still working that metatarsal grip or grasp.
And then the same exercise, press out once please and stay there. The heels can come deeper. And if you are teaching or aiding someone, it's a wonderful little treat to pull on their heels, as long as you do it carefully. Keeping the prehensile action of the toes. And let's do a few reps here, Laura, to show that.
Nice, so it gives great strength to the toes. Whether you're a dancer or a person who walks, we need to have flexibility in our metatarsals, excellent. And back to the pelvis, it's neutral. And she is firing the glutes, excellent. All right, let's go to the heels on the bar.
So super high, I like to have, as I said, really high point on the heel, rather than, go too low for a moment. Yeah, so if she's high up on the bar, she runs the risk possibly of slipping off. But if you have gripper socks, or a good heel hold on your bar, you should be fine. A really firm flexion of the feet, so you really activate the tibialis anterior. Now, use your glute muscles, hamstrings, excellent, to press out and come in.
So again, I wanna say this, the back of the thighs, glutes are engaged without tucking. Excellent and she's really pushing into the heels to go out and to come back in. So it's not a matter of getting there, and then deciding to fire this. It's using that back of the thigh action all the time. Excellent and her pelvis is flat.
She could have a tray of champagne glasses, and she wouldn't spill a drop. Nice, one more, beautiful and pause. We'll do one more, we'll go to our Pilates stance. Or in dance class, first position. Bowls of the feet nicely on the bar, about at the second toe.
Heels touching and the knees are in a gentle V position, turned out. Turn out coming from the hip, excellent. All right, go ahead, press out on this one, Laura, and hold for a moment. Once you're in the turnout, you're certainly using your external rotators, which is essential, it can't do it without it. So here again, show a tuck.
Maybe lift your arm up for a second, yeah. So here, she's tucking, definitely firing this, but now she's got that pelvis in a rounded position in the back. So eventually, it's gonna tire out her hip flexors. It may strain the low back. And for dancers, it's really not a good idea to be in a turnout position with a tucked pelvis.
So I really make a big deal out of this one. Go ahead, plie or bend, yes, thinking of dance. So stretch out. Ron Fletcher use to say this is a plie machine. That's for dance people, not everybody's a dancer.
But that's exactly what you're doing. Flexing or bending and extending and lengthening. She's gentle in her extension. Working the quadricep muscles without jarring the knee. Beautiful and the pelvis is neutral, yay.
And the back is flat without force, good, excellent. So do you feel your seat muscles working? You do? She does, I think we're good. All right, excellent. And bring yourself to parallel, hug your knees and rest.
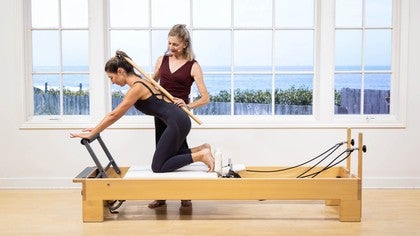
Good, okay, we're gonna look at one more aspect of leg and foot work, which is running in place, which is often done at the end of the leg and foot work section of a Reformer program. Or often at the very, very end of an entire workout program because I love how it takes the client off the bed, or takes you off your bed. And you're walking out the door with good alignment, and good awareness of where you are. So going back to that, we'll have Laura back onto the high-heel position. Nice weight on her second toe, so she's neither pronating.
That's supinating (laughs) or pronating, winging inward. Good and I didn't mention, she's on three reds and a yellow spring if that is helpful for your information. All right, so again with that eye towards the solid, stable pelvic area, using the low abdominals without arching or tucking. More can go wrong in running in place. So not only could there be tucking or arching, there could also be shifting or twisting, or different things could happen.
So let's have you press all the way out, please, inhaling. And then as you exhale, lengthen, become very streamlined. You're long, yet taught. And now you're ready to take a breath in and begin. (inhaling and exhaling softly) So that's our typical breath, good.
And I'm standing here as her teacher really looking at that great alignment of the knees, the shins, the ankles and feet. But more directly what we're talking about today is where's the pelvis? So again, the hip bones are completely even, both in this direction and on the plane. Again, I'm saying she could have a ruler line here, and it wouldn't tip. I like the image of a tray with champagne glasses.
Yes, not spilling a drop. She's using the glutes to have that nice lift under the seat. Yeah, I hate to do this, but do it kind of sloppy for a minute. Not using the seat. Not using the belly so much.
It's hard to do it wrong if you're a practiced, professional person. Good, make it even worse. It just gets all over the place. And so we wanna really maintain.. This is a whole body program, it's not just about running, yeah?
So go ahead, let's clean it up so you feel better, and go back to your nice neutral pelvis. Really tight right above the pubic bone, using the TA. Beautiful, nice. And I'll have you finish. Give me your heels, those calves deserve a nice stretch.
Take a breath in and slowly bend your knees. I'll give you a little extra stretch for the achilles tendons and calves. Good, hug your knees to your chest and good. So I hope that's helpful and you'll be mindful of how to have good pelvic alignment. Use your gluteal muscles, hamstrings, and enjoy your leg and foot work, thank you.
Exercise Breakdowns & Tips: Tutorials with Diane Diefenderfer
Comments
You need to be a subscriber to post a comment.
Please Log In or Create an Account to start your free trial.


