Description
Please Note: For this class, you will need your Overball or Whole Body Pelvic Health Ball to be inflated less than halfway, as it will allow for the right tactile feedback for your pelvic floor.
About This Video
Transcript
Read Full Transcript
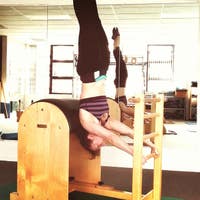
Hi there, everyone. I'm Claire Sparrow, and today we're going to do a release Pilates class with a softball. Now this softball is looking a bit sad, but that's okay. It's the way it's meant to be you need your ball to be not even half inflated to give you the right feedback for your pelvic floor. So this is specifically for you if you know that you have a hyper tall neck, pelvic floor. So you need to release it.
We're gonna start sitting on the ball. So you place the ball underneath your pelvis You can have your legs crossed. You can have them straight out in front of you, whatever's most comfortable for you to be able to sit upright and tall. And if you would like to, you can even close your eyes for this first moment. We can feel the ball underneath your pelvis.
And sometimes when we get that first initial feedback, we can tense up a little bit. So during this time, can you yield and let go and relax to the ball. When you feel yourself starting to relax, You can begin channeling your breath every inhale down into the ball. And every exhale is gonna rise up from your pelvis we can imagine it like helium rising. And as that helium rises, it lifts each vertebra of your spine.
All the way up, lifting the crown of your head towards the ceiling. Inhaling deep, drawing that breath down into your pelvis down towards the ball. And you're feeling that increased capacity of your breath You're feeling the motion of your pelvic floor. And we're getting the feedback here to your pelvic floor right from the get go so that your brain and your pelvic floor start to communicate with one another. You know the area you need to release.
One last breath here with the feedback of the ball. And then slowly let light come in through your eyelids, blinking them open. Well done. Take the ball out, and this is when you really notice the impact of the ball. So sometimes it can feel like your bottom is really big now, which is okay.
That's normal. You've got much more feeling and sensation there. Your breath is going to be able to move there even more, which is what we need to help to release the excess and unnecessary tension that you might be holding in your pelvic floor. So to capitalize on it, we're going to do something called progressive breathing. So for progressive breathing, we're going to increase our counting of our breath by 1 each time. So we're gonna inhale for 4, exhale for 4, and add 1 till we get to 8.
Again, you're welcome to close your eyes as we do the counting. So do a cleansing breath to prepare yourself. And then we inhale 2, 3, 4, exhale. 234, inhale. 2, 3, 4, 5, exhale.
234 5 inhale, 2, 3, 4, 5, 6, exhale, 2, 3, 4, 5, 6. Inhale, 2, 3, 4, 5, 6. Inhale, 2, 3, 4, 5, 6, 7, XL, 2, 3, 4, 5, 6, 7 inhale. 2, 3, 4, 5, 6, 7, 8, exhale, 2, 3, 4, 5, 6, 7, 8. Well done. Now, breathe naturally freely. You'll feel now there's more capacity more depths, more motion to your breath, which is key to the good communication with your pelvic floor and being able to release that Okay. The good bit starts now.
We can lie down. So you're going to lie down. You're going to have your knees bent, and you're gonna place your ball underneath your pelvis. Let yourself settle into the mat underneath you, into the ball underneath you, and bring awareness back to your breath. Letting the inhale flow through your nose and the exhale flow through your mouth. Let your hands rest on the front of your pelvis now.
We're going to do our pelvic clock movement initiating with your tailbone cooling forwards and down over the ball and your tailbone curling back and up towards your pubic bone and your pubic bone rises. And we're gonna keep motioning in that forwards and back direction led by your tailbone. So imagine that there's elastic attached to your tailbone and it's being pulled and then released. Pulled away from you and then released. Continually giving the weight of your pelvis to the ball as you do the motion.
Let's make this our last one. Come to center. So you're not going to be completely in either direction, you'll find a happy middle point, and then we'll go from side to side. One hip bone rising, one hip bone falling. You can keep your hands on your pelvis or rest them by your side. Bring your attention to your sacrum where it meets the ball.
Oftentimes, we end up moving more or leading more from our lower back. And I really love you to lead from your sacrum and your tailbone. Giving to the ball, yielding with every movement. Let's go straight now into Circular movement with your sacrum. You can imagine that your ball is almost like it's filled with water and you're moving the water with your sacrum with your sacrum and your tail. So don't forget that leading away with your tailbone.
We use the image of the elastic pulling it away. And then we can revert our circle so we can go ahead and go the other way. Give your sacrum to the ball, motion, the water, around inside. Let's make this our last little circle. Go ahead and come to the middle point and pause there. Now we're going to adjust the ball by moving a little touch over to the right So you're gonna have your ball under your right bottom and your right leg is straight.
Let your left bottom just drop off to the mat. So we're now only feeling the feedback of the ball to one half of your pelvis. We're gonna go ahead and push down on the left foot to roll yourself across into the right bottom, into the ball, and yaw and open the front of your hips. So this is one of my absolute favorites. It's called pelvic yawning, and we keep repeating that movement.
The feedback of the ball gives us an extra little flavor to the movement because it's helping us to release the tension of the muscles that pull across the inside of your hip to your pelvic floor that can also be part of the hypertonic problem with our pelvic floor. So as you roll into the ball, give into the ball. Even I have to remind myself to give to the ball. And then equally on the way back, melt and give back again. So you're melting into it.
And I know I'm not alone. You will feel the same thing. Your glutes want to squeeze and tense. Let them go. Let them go. It will really help you with your ability to have a good functioning pelvic floor. We'll go ahead and do one more.
I know you're loving these as much as I am, but we do need to do the other side. So make this the last one before we do it, scoop the ball out and then compare. Our nervous system absolutely love to be able to compare. Isn't that a funny feeling? And then we'll go ahead and place the ball underneath the left side of your bottom, your left leg straightens and your right bottom just rests down.
Go ahead and press down into your right foot and reach your knee forward. So you're opening yawning open the front of your pelvis and then melting. So it's almost like a 2 for 1 here because we get the opening pieces. We roll over. And then as we term, we get the melting and yielding of those muscles deep inside your hip and those pesky glutes yielding to come back. So finding the image or the word that works for you to help you to let go does melting work, melting back or oozing or yielding and then are yawning to open.
Let's go ahead and do one more. And melt back. Great. Bend your knees. Take the ball out.
Have that moment to notice here. How does that compare? Hopefully, we've got 2 even bottoms now. We're now gonna place the ball behind your ribs. So we're gonna say about brass strap height or thereabouts. You can be up a bit down a bit to find your comfortable spot. It shouldn't make your brow furrow. You should be able to go, oh, that feels really good.
And be with that. So the first part of this movement is thoracic wave. So you are just gonna let your rib cage your sternum gently wave from side to side. Maybe it feels like a figure 8 or an infinity sign. And again, like we said, with your pelvis, can you give the weight of yourself to the ball? And then if you've got that Figurate going, you can reverse that.
If you're moving just with a side to side, you can keep going. Sometimes as we're learning something new, we can hold our breath. So just check-in with yourself. Are you still breathing, letting your breath move all the way into your pelvis and out of your pelvis, and then let that settle. Have your palms facing the ceiling and your arms a little bit away from your body.
This is going to be like chest expand So you're rolling your head one way, and then you're rolling your head the other way. If you can have your palms facing the ceiling and really spread your hands like starfish, that gonna allow you to open up that little bit more in the upper chest front of your shoulders. This is so important because our muscles up here, our upper respiratory muscles can get tense, short, polar heads, forwards, and compress forwards and down impacting our palvert floor. So we really do need to work on releasing that as much as releasing our pelvic floor itself. Bring it back to the center roll to the side, scoop your ball out, pop it to one side for right now.
Feel how your body drops into the mat a little bit more. You've got more capacity to breathe into the back of your body too. So let's use that. Hug your knees in towards your chest. We've now dropped into the back of our body. We've got a stable place to be, and we're gonna do a little bit of movement with our thi bones, with our femers, you're gonna have your feet together and your knees open, and then we're gonna switch.
Bring your knees together and open your feet. Keep switching from one to the other. So we're kinda queuing here feet and knees, but what I really want you to think about is actually down here at your sit bones at the base of your pelvis. As your knees open, think of them closing, and as your feet open, think about your sit bones opening out. So that's where your attention is.
You're leading the movement by opening and closing your sit bones. I know it's a kind of funny idea But because our pelvic floor muscles attach to our sitting bones, as well as our pubic bone and tailbone, we can help to tease them out a little bit. And it's so important that we do last one, and then bring your knees together let's do some circles here. So instead of circling and rolling your lower back into the mat, I want you to keep your lower back quite quiet because if you keep it quite quiet, you can focus on stirring those thigh bones in the hip sockets. And opening up.
You might have heard me say it before. Your femurs are like the puppeteers of your pal floor. So the more you can move them, the more dynamic we can get with our pelvic floor. So we're changing direction there as well. So make sure you do change direct opening your sit bones, feeling the base of your pelvis, your pelvic floor yawning open. I do love that image of yawning.
And what's quite funny is if you, oh, yawn yawn, you will feel that you can yawn open your pelvic floor as well. There are brilliant connections between what's going on up here and down there. Okay. That's plenty. Rest there. Place one foot down to the mat and then the other. We're gonna go ahead and take the ball and roll over onto our side now. Place your ball underneath your waist.
So it's going underneath your waist and it's going to support thing. And if you feel you need a cushion, you can put a cushion under your head also. Before we open the book, we're actually gonna slide forward, you're really rolling into the ball and then rolling back before you open your book. Reach your hands away from each other and then roll forwards again. As you come forward, let your tummy melt into the bowl And each time you repeat this book opening, you can go a little bit further reaching back but also a little bit further reaching forwards. Can you almost lie on your tummy here?
We'll make this our last one. They are yummy. Great. Now we're gonna fold our arm under our heads here. We're gonna do a little bit of movement with our legs now. We're gonna do fire hydrants.
So we'll flex your feet underneath you, hand on your hip, and then stand into your bottom leg so that your top leg lifts up. And then float it down. What I want you to notice is what's happening with the ball underneath you. Are you squishing the ball? As you lift your leg up, or can you keep the air pressure just the same? So to do that, it means our sit bone those famous sit bones again, we need to think about your sit bones opening.
So all and when we're lifting our leg and opening in this way, we're holding on so tight into the back of our pelvic floor. We're having to use our back. We're using our spine and side bending. So can you really be strict with yourself? Use the ball and be strict with yourself here. Stand into the bottom leg.
Open your sit bones. We can also use our breath again to help So inhale your leg up and exhale your leg down. Inhale your leg up. Ex held down. We'll go one more time inhale up and exhaled down. And I did fit because we are gonna lift again.
You're gonna stay there though this time. So you've hovered your leg, you're in that fire hydrant, and then you're gonna kiss knee to knee and then come back up. So the knee comes down and your heel comes up, and then you just return to your fire hydrant. Now pop your hand on your bottom, and you're gonna really think about inflating your bottom into your hand every time like a balloon is inflating into your hand. Again, like we said before, it's so important that these muscles know how to lengthen out so they're not always pulling on our pelvic floor. You can feel they have to lengthen to do this. Let's just do one more.
Brilliant. And then rest your leg down. We're gonna go ahead and do both those things on the other side. So coming up to sitting, take yourself over to the other side. Remember that the ball needs to be underneath your waist and a little bit to the front. Take your arms out in front, rest your head down. So we roll forward first.
Enjoy that roll and then rolling back, opening. Open your arms away from each other. The bottom arm's going down and forward. And then rolling back each time. Go a little bit further.
Roll your tummy. Can you lie almost on your front And then yawning open across your collar bones. So can you feel your middle fingers reaching away from each other? Look all the way behind you. Forward, we're gonna do one more. Rule into your tummy. Let it go. Let it hang out.
And then yawning open. We'll look at the view, and then coming all the way back. Wait. Support your head. Give yourself a little pillow with your underneath arm and then hand on your hip. Flex your feet. So you're anchored.
As if you were in squat position, really. And then we'll do our fire hydrants. Send your bottom leg down for your top leg to lift. So we've got our 2 different measures here where noticing the ball, are you pushing down into the ball and moving your spine? So check-in with that. And then think about your sit bones, opening.
If you can coordinate your breath, it's gonna be inhale at an exhaled town, inhale up an exhaled town. Really standing into the bottom leg is gonna help you. So even although you're just lifting, it feels like you're just lifting this leg, your bottom leg's moving away relative to that top leg lifting. Really great job. We're gonna do 2 more.
You're gonna make sure you're breathing, even if it's not in time. And then we're gonna lift, and we're gonna hold here. So then we do our dip. So you've got knee to knee and then hover Take your hand onto your bottom and then really feel yourself expanding into your hand. Imagine inflating a balloon.
That sensation, we've all inflated a balloon at some point where you feel this skin of the balloon expanding. Can you think of your bottom in the same way that you're expanding into your hand? You can use your inhale to dip your exhale to lift. We're gonna do 2 more. I know I feel it a bit more on this side too. It's good for you.
That's why we're here. Last one now. And then you're gonna rest there. Great job. We're gonna lie in our tummy now. And we're gonna use the ball underneath your pelvis just like we did lying on your back.
But this time, it's going to be under your pelvis on your front. So you rest your head down on your hands. When you've rested your head down, bring your awareness to your breath. Allow the weight of your pelvis to yield and give to the bowl. Your legs are reaching long behind you, but not with any great effort.
You're not squeezing or clenching to be there. We're relaxing into it. We're gonna start to rock side to side. Just your pelvis, the rest of your body is quite quiet as you walk your pelvis. And then we're gonna go to the center and go forward and back just like we did lying on your back.
And as we do this, we are releasing the tension down through the abdominal muscles that light the glutes, they can be affecting the ability of your pelvic floor to work optimally. Let's go into a circle I absolutely love these circles. It can be really great for relieving any lower back tension as well. So as you're circling, can you imagine increasing the distance between the hip bones at the front? Pubit bone and your belly button.
So you're increasing that distance and then change direction. Melting into the ball, and rest in the middle. Go ahead and scoop the ball out. We'll pop it to one side for right now. Take your legs wide so they're gonna be as wide as the mat and rest your head. Keep your knees low.
And we're doing knee bends, bringing your feet together, almost like you're gonna clap your feet, and then bring them down. Bring your feet together, and they might not quite touch that. That's okay. The goal is just to get them as close to each other whilst staying as low as you can. How low can they stay?
This is helping to really all pin up through the front of your pelvis, through the front of your hips, Once more, and release there. Now this one's a bit funky because your knees are gonna be in. Like, you're kind of not need and then spin your feet out and knees stay as closely connected as they can as you spin your feet out to the side. Knees in spin out. So with each and every exercise that we're doing today, we are releasing not just the pelvic floor, but all the influencers. We all know about influencers.
Well, our pelvic floor has influencers. So we have been releasing them all one last time here. Great. And now we're gonna look at releasing your diaphragm. So our diaphragm influencer, place your ball on your lap And your knees are as close together as you can.
Bring your head to the floor hands to your feet. If for any reason you feel dizzy or uncomfortable with your head on the floor, you can just fold your arms here or use a pillow. The ball is giving really useful feedback to your diaphragm. It's helping you to release at the front and breathe into the back. When you do this particular release, it can feel a bit weird or a bit Mildly yucky, but it shouldn't feel painful.
So if it feels painful, there's a little bit too much pressure then you're definitely gonna do head on your arms. And then each time you join me in this class, you can explore the different positions because each time it might feel a bit different to you. Okay. Well done. Let's take the ball in front. So it's underneath your breastbone. So it's just under your chest, and you're gonna have hand to either side of your shoulders with your elbows pointing up towards the ceiling. If you can have your legs long and straight behind you, that's fantastic.
If they need to be a bit wider for your comfort, that's okay. Think of your second toe. Where is your second toe? And it's your second toes that are gonna be reaching back. We're gonna do baby look.
So you're gonna pull on your right hand and look over towards your right fit and then back to the center. Pull on your left hand. Look over to the left. Now your chest is just gently pushing the ball around as you go and you're reaching your second toe. So I've I'm turning left, I'm reaching my right toe. And as I look right, it's my left till.
So the front of your hips and the front of your pelvis is opening. Let's just do this two more times. Looking all the way over, can you see your fate? Ah, then rest there. Bring yourself on to all fours.
We're not gonna use the ball. We're gonna be here in our all fours position. I always say when we come to all fours, your head is higher than your pelvis. If you're looking through your hands, your head is definitely not in line with your body. So let's bring up so it's higher than your pelvis.
You're gonna take your right leg out to the side. It's a bit like, the fire hydrant that we did before. And you're gonna rock your bottom back and then bring it forwards. Rock it back and bring it forwards. Go ahead and tuck your toes under on your left foot so that you can get a little more deeply into the back of your left hip.
Then when we come forward, you're gonna go to the side, to the center, then to the back. Well done. So we're going to the side, to the center, and back. So we're doing a tiny little sequence. Tiny little sequence, opening up through the inner thighs. Remember those influencers, your inner thigh muscles are also a little pesky when it comes to hypotonic pelvic floor.
This is your last one. Really nice. Then we'll switch to the other side. So first of all, when your leg is out, your toes are pointing behind you. And we're just doing a few of the rocking. And it's not unusual to feel different from one side to the other.
I definitely they feel different one side to the other. It's one of the reasons that I got into working with pelvic health in the first place as I started to see in so many women differences from one side to the other. Tuck your toes under same thing This just helps you to deepen in. Remember that inflating the balloon idea, you can think of that here. And then we're gonna add in the side movement.
So we're just taking this little sequence to the side to the back, to the side, to the back. Your hands are helping to push and pull you back and forth. Your breath is free and easy. Let's make this the last one. And rest there. Go ahead and return to sitting. We're gonna use this last moment now to check-in with ourselves.
How do you feel? Maybe close your eyes. Take some cleansing breasts here to notice the increased space, the ease that you have here, the ease and just sit ping, how much space there is in your hips, in your pelvis, softness in your abdomen, which is so important, we're in a relaxed state And then slowly, opening your eyes. Thank you so much for joining me in class today. I hope you had fun with your slightly sad looking ball. Well done today, and I look forward to seeing you in our next class.
Beginner Mat Workouts: 30-Minute Classes


Comments


You need to be a subscriber to post a comment.
Please Log In or Create an Account to start your free trial.
