Description
About This Video
Transcript
Read Full Transcript
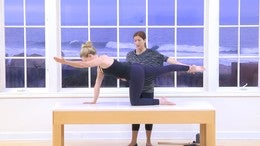
Okay, we're back with the sacred ILIAC joint intervention. Now we've done the assessment with Shelby and just to reiterate, she has left sided sacred Iliac joint pain. We did rule in that it is a secretly act problem. She has a nerve component as well with leg pain down the left side that comes on in sitting and with stretch of that psychotic nerve. And we're going to try to uh, do uh, treatment or um, uh, an exercise intervention that will help you with rebalancing the pelvic musculature and getting you out of that pain. So let's do it.
All right, so we're going to start with the laying on your back and I want to refer you back to number, uh, 2037 tutorial that I did with Amy havens. I'd like for everyone to watch that for the mat work that we did and for the technique that I'm going to do here. I'm going to do this briefly with her, but I went in a little more in depth with it, with the tutorial number 2037 with Amy. So I'm going to do a muscle energy technique, which is just facilitating your muscles to restore the balance to your pelvis. Okay? So I'm gonna have you bend your knees up above your hips and then I want you to push your right knee into my hand and left knee into my hand.
Push and pull in opposite directions. So what I'm doing here is facilitating the right glute and the left hip flexor to bring balance back to your pelvis. Okay? And again, great. Okay, come down. Now the way you're going to do that is to place your right leg over the stick, left leg under the stick, hands on the stick as if you're trying to break it, push and pull into the stick with your legs. And you're not trying to engage your abdominals, you're just trying to push and pull into the stick. You actually don't want to engage your abdominals cause you're actually trying to move the pelvis and rebalance the musculature around the pelvis.
And then you can also explore different, um, positions of the knees apart. Pull apart five times and generate as much pull as you can.
All right, very good. I want to take that off and then we'll take a yoga block and put it between the knees and pulled together. And she's usually feel a little shift in the pubis with that sometimes. And you can, is that painful to your inner thighs so I can make sure the boxes more in a more civilized position. Good.
And I want you to hold onto that knee.
So right now I see a shift to the right, which don't fix it or anything, just be, and just do it rolling down. And do you see the little Shimmy when she rolls down? So peeling up, I'm just giving it a little traction here and then rolled down and little shimmy. Right. Okay. All right. Now Peel Up. I don't want you just to shift your pelvis like a typewriter back and forth. You do know what a typewriter is, right? Okay. You're pretty young. Okay. Now come back up and stay hovering and then shift. Do it again. Yeah, that's it. So she has more shift to the right for sure.
And then, so now I want you just to focus on shifting to the left and again, shift left and is there pain at all? No. Okay, good. All right, now shift left, stay and then release, then come back down. Excellent. Okay, so definitely some rotation there as well. Alright, so we're going to work on getting a little more activation there. So come back up. Stop here. Right, stop right there. And then I want you to lift the right leg up in the air and you hold that. Go ahead. Now roll down. Okay. And again, peel up [inaudible] much better.
And then so if I give her more ability to construct that left glute and then roll down, she corrects the alignment. Better get her pelvis shifts over onto that side. So instead of telling her, hold your pelvis over there, I just tell her to lift this leg and that's going to facilitate the glute on that left side. Okay? And come back up. Much better. That's it. And then back down. Excellent. Good job. All right, now no pain with that. Okay, now bend the knees, come back down. Alright, we're going to get rid of this shit over here. All right.
And then let's do legs springs. Let's see if we can get things out of the way here. Let me go ahead and take this down. Excuse me. It's always good not to drop the trapeze on your clients. Okay. Now I want you to put your foot into this spring.
All right, and let's just see when she starts. I want her in a neutral position. So let me get my hand under there and then come back down and just bend that knee and just relax for a second. I want to see if she's in neutral. All right. Extend the leg out and then lower down to floor and I want to see if she can do hip extension. Come back up and again, hip extension without rotation through the pelvis.
If you can go ahead and then all the way up and around. Biggest circle you can do without changing your pelvis. She's doing a beautiful job with this. This looks really good. Where do you feel the work? A, I feel a lot of work in the hamstring. Okay, great. Okay, now I'll come back up and we'll take that off. So leg circles like that. I'm also, if the leg is straight, the opposite leg is straight. That's sometimes easier too, for, for you to do.
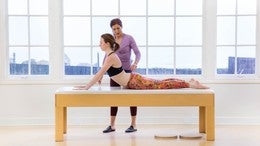
Okay. And the next exercise I wanted to do was, uh, going on to all fours facing that way.
And then come forward. Yeah, she does a really good job with that. I'm not seeing poor control with that at all. That looks really good. All right. Go down to your elbows and I'm going to hook up the trapeze table safety strap. I want it basically the lowest point where the spring is just barely on tension at the beginning of the movement. So right here, so it's not too stretched out to start with and then crawl forward another couple of inches. Yes, that's good. All right, we're going to put that left leg up on the bar and I want you to see if you can press the bar up toward the ceiling.
Now you're going to have to pull the bar towards you a little bit and then press it up. And let's just, I just want to see what she does for starters and then come back down. Okay. And then again,
And now go ahead and do the right side and let's just see what that looks like.
But then you should not see any movement of her pants upward toward this blue line. Okay? So watch this so you know that she's extending their right. So maybe a yellow spring would be better. Or sometimes I even do no spring. I've got my spring assortment over here. Let's give her a yellow spring and see if she does better with that.
And then again, I want to see those two lines stay in place as she lifts.
Push into my hand, and now lift wonderful bats when I'm talking about much better. So if I want her to fire her glutes more, I just give her a little assistance or a little facilitation gun. She's, she's not super great there either. So, all right, one more time. That's the right side. Remember, this is the good side, which I don't like to say good and bad actually, but all right, now let's do the left. Okay. So I'm almost immediately when she initiates she arches. So again, that idea of ribs to pelvis connection, tailbone draws down as the leg goes up.
Great. Yes. Much better. It's hard for you, but not, but she's not moving here in the lumbar. Okay. Now take your left hand and bring it out towards the windows. Can you do that and just have it kind of low. Now lift that left leg back up to the bar. You're going to shift your weight over. Can you do that? Okay.
That's, Yep. Okay. Now pull down into the mat with your left hand. [inaudible] and then lift the leg. Yeah, I don't like that. Okay. That did not help. Okay, we're gonna try the other line. Oh, their arm. So take your arm on the outside of the mat and pull into the mat with that right arm. So that's going to facilitate her obliques and abdominals. Okay. Ready and lift. Good. Okay, that's good. So if you can't get a client to facilitate their abdominals, a lot of times it's good to give them a resistance in their arm or leg to try to turn them on. All right.
And then right here she's got those two stabilizing factors. Good. Okay. Excellent.
Now our next exercise is going to be on the floor on the outside of the table.
Scoot back just a little bit so you get a lot of support and I want you to just to do a full squat and see how things feel and I want it to be as deep as possible. All right? How does that feel? Okay, let's do the right one. Bring your feet all the way together so you don't just have to shift so much. Now let me look at her alignment, her pelvis alignment and ribcage align. That looks pretty good. All right, now sit down and stand ups. Basically sit on the floor and stand back up. Okay, now left.
I'm going to give her a little assistance with that. So can push against me.
Beautiful. That gives her a little leverage though, right? So you can feel that witness. I'm going to do that same thing on the other side and let's just see what happens. Okay, let me get on this side so you can see. Yeah. Say No big deal at all. So gluteus Medius, um, and did not help with facilitating that action. So I'm going to give you that, that support against and put that foot down. Left foot extends. All right, let's see if we can get to at least eight to, so in order to do the right intensity of strengthening for her, I need her to be able to at least do eight repetitions. So we'll give you credit for three on that one. Okay. And Four.
And if you need to bend your arms, please do so. That's what this springs are there for. And Five. Yup. She's starting to fatigue
So that was a little bit too hard for her at this point. So we would definitely go to another exercise at this point. But what I want to do is show another exercise to get more stability from a different direction.
So I'm going to have you stand inside the loops facing outward. And then I want you to be in a parallel position and come all the way out with your arms straight. So you lean into the springs and then little hug, a tree position. So a elbows slightly bent. Good. All right. Now do you feel like you're getting enough support to stay upright? All right, now come forward just a little bit more. Stepping forward just a little bit more and lift your big toes jack so I can see. Notice what happens when you lift your big toes.
Did you feel the femur rotate externally? Little bit. And that actually, that actually facilitates a little more external rotation over here. So I want you to keep a little bit more white to the outside of your foot. Okay. All right. Now open and clothes. Good. And Open and close. So you can do variations here. Salute up here. [inaudible] no, your elbows are going to go underneath [inaudible]. Yup.
You have to switch your hands. Yep. And then hands to the forehead. And I was going to be more challenging, right? To really support there. And I want to make sure that she's got that good rib cage to pelvis relationship, the rib cage just stacked over the pelvis. Okay. Now what do you think we're going to go to next? I want you to stand on your left leg only and see if you can balance there and then do the salute as well. How does that feel?
Is it painful? No pain. Okay,
Back to the previous position and step forward with your right foot toward me and punch outward. [inaudible] straight out like that. And then come back and then step together and then take it out again. [inaudible] and step together and take it out.
And I'll keep the pelvis centered when you just do that one again. Do that one again. She went like this. The pelvis shifted quite a bit. So I want you to keep right. Keep a little more weight through the middle of that leg. Shift your pelvis to the left a little bit more right now while you're in the position. Come Out, shift your pelvis to the left just a little bit more. Great.
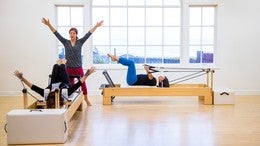
Yes, that's good. Okay, and then come back to center and again, shift the pelvis to the left. Go out and back to center. Good. Okay, now other side. Let's see. Yeah, that looks way better. Good. You are. I'm liking it. One more. All right, very good. Okay, now we're going to go to the other pieces of equipment. Great. All right. Now we're going to use the chair for a standing leg pumps forward lunge and other exercises that be great for pelvic stability.
First I want you to stand in front of the chair with your hands gently resting on the handles and let's look at the position of the pelvis and great. All right. Now just take your hands off of the handles and balance and step onto the pedal with your right foot. Okay. And just see what that looks like and then put it down. Okay. And come up and step back down.
All right, lift your hands off the pedals and just place your foot on the pedal, your right foot. Um, take the pedal, take the foot off the pedal and step back down. Just want to see what that looks like. Okay. And then left foot and back down and right foot and back down. All right, I'm going to give you a cue now. I want you to hold your right pelvis down as you lift the right leg onto the pedal.
And same thing on the left. Hold that left pelvis down as you step onto the pedal. Good. All right. Now the thing I saw her do is rotate her pelvis. So I'm going to have you press into my hand right here and lift up.
And then step down and let's do the left side. All right. Bring the pelvis back into my hand just a little bit and take the ribcage over the pelvis just a little bit. There you go. How does that feel? What feels better? Super key point right there.
She's using more of her abdominals to press the pedal down and I didn't say use your abdominals. That's the key is that the brain doesn't know what the muscle names are. Basically, if I can put body in a position where she has to use the muscle group, I don't have to say use it because if I tell her to use it, it may be too much. I don't know how much tension that's going to create, so I want to have her brain decide how much tension she needs to create. To make that happen. Beautiful. I like that. Okay, very good.
Step down. And now let's step onto the pedal with your right foot. Push it down, step onto the pedal with your left foot and climb up with your right foot onto the platform. All right. What I like about the high chair is that it has a back to it and she can't translate the knee too far forward. So I'm going to just watch how she does that now and have you placed your hands on here and you can, you're gonna have to bend your elbows when you come up so you can bend your elbows and place your hands on and just climb that for me. Okay? So I'm not, I'm not loving that, right?
So what am I not loving about that? The pelvis is hiking up on the right. And so I want you to think of keeping your right sit bone aiming towards your left heel as you go up. Good. So great to teach a dancer because they do exactly what you ask, right? That doesn't always happen in US pedestrians. So good. Wonderful thing about the research is that research has shown that in EMG studies, this is actually the best exercise to facilitate gluteus Maximus, which is what she needs and she's getting assistance from the springs because if I were to have her do this without springs, likely we will watch it too.
We can have her do it but likely she's going to really hike and compensate. Okay. One more time. Go all the way up and step the left foot onto the platform. Okay. And then switch sides. I want to see what happens on the left.
Placing your foot in a comfortable position and then gradually we'll take the springs down as she goes. But sometimes it's depending on how, how high the pedal comes up in relation to the platform because the chair is often um, the pedal is often very high in the Combo Chair and in the one to chair the pedal is very close to the platform so it's easier for people that have less ankle mobility. I think she's doing a good job. She's basically giving herself the cues that she needs. And I like the position of ribs over pelvis. Is there any pain here at all? Okay. All right. Now what I'd like you to do is take your arms and reach them straight back and take them off of here. And just like you're sleepwalking, they don't want you to stay vertical for right now.
Bring the ribs over the pelvis. Right. Okay. Come down. That's hard, right? I wanted to stay vertical for one set and then I'm going to let her tilt her torso forward. Tilting your torso forward. It's going to activate more glued and staying vertical with the torso is going to be more quad. Okay. And take the pedal all the way to the top if you're able to. Okay. Yeah, so she compensates there. So keep your hands down.
I could in some other chairs, I could add another spring if I, if she needed to. So I'll probably have to bring her to a combo chair and add another spring with this because she needs more assistance. So I'm gonna let her use her hands to press down, which is nice because she's going to facilitate or her abdominals with that. Yeah. So she can give ourselves some assistance to do it properly. And that's the main thing about [inaudible]. It's, it's making the body do what it needs to do with the level of assistance that it needs to perform correctly. So we're trying to keep her in correct.
Buying mechanical alignment, giving her the assistance that she needs so that she can strengthen gradually without compensation. Okay. Good. That looks great.
Just hinting at the hips and now go, what do you feel they're more glued. Yay. Okay. Textbook. Right. Alright, hands behind your head. Let's see if he can do that and go up. Okay. She starts to cave in on this side. All right, so go ahead and put your hands down. I don't want to let her do it that way. Give her assistance so that she can do it properly. Go ahead. That's nice.
Bring your head back a little bit. There you go.
That's it. Yes. That's the word. Great job shall be one more. Okay, and come down.
Now we're going to take the springs off one of them anyway and be happy about that and I'm going to have you lie down. All right, now we're down to the floor for single leg pump. Frog lying flat frog. Lying flat is usually an external rotation, which I really want to work her more in a parallel alignment and let's just see if we can pull this down. I have one spring on the high notch and I'm looking at the feet. And right now she's pronating in both feet as she's pulling the bar down, which is just something I noticed and then we'll talk about and then come back up. So she pronates the feet. That's going to allow the knees to cave inward.
It's going to allow the femurs to internally rotate, which is not her friend. So I want to have you put a little more weight to the outside of the foot and then wrap the toes and push down. That's it. Very good. Now hold the pedal down and then lift your heels. Great. There you go. So that'll keep her out of that pronated position. Now keeping that position, take the bar up and I'll, I'll help assist you as I need to and then press down.
So I like her spine and pelvis position. I'm going to check to make sure lumbar spine is not changing. Great. That looks good.
Now lift the right leg to a tabletop position just to get it out of the way. And then pull the left leg down. Very good. All right. Lift that heel of that left foot and stay there. Lift the heel. There you go. And then take it up and press down.
Stay there. Lift the heel and up and down. Any pain with this or just lots of work? Lots of work. That side of the left calf that normally bothers me is that you're feeling a little bit. Okay. The side of the calf that bothers you. Is it nerve pain? It's nerve pain. Okay, so what does that telling us? Right? That's the load is too much for you. And then I'm going to have you pulled together like this and now pull the bar down.
All right, now we're going to take the body up into a bridge, so if he can peel up into a bridge, hold that and then see if he can slowly bring the pedal down. I'm going to give her some support and then take it back up carefully and exhale to press it down or ribs to pelvis. That's it. And then come up and press nice. Stay there and then see if he can lift one leg and then take that pedal up and down. One more. Gotcha. I'm going to give you some support. Push it down, push it down. That's it. And back up again and then roll back down all the way down.
Awesome. What did you feel on that one? Just a lot of work. A lot of challenges, but not pain. Okay, great. Um, because what I could do, I, I often don't do a ball between the legs. I could have you bring a ball between the legs to do the exercise, but it's really when single leg was happening and you can't really do a ball with single leg. So I would just give some resistance here. Um, I could put a theraband around the leg and tie it to something strong. Like if the trap table was right next to you, you could tie it around the trapeze table and then get the, the adductors to help with that. Um, but you're just always trying to find ways to rebalance the muscular system and instead of saying, relax this right, work the opposite muscle group in order to rebalance your muscles so that you're not overusing the external rotators and underusing the internal rotators or the abductors and abductors. Right. Does that make sense? Okay. Okay. Now coming up into the air with his foot just for a second, I want to just see what's happening here. Flex the foot
I don't want to make it more systematic. Okay.
Looks good. I like it. All right.
And I want to watch how she does that because I want to see if the pelvis drops on one side. When she does that, she did a good job. We'll also look at her, do that on the other side. I'll have her come down and up. So just doing that step up again, that facilitates functional control. Bring your foot as close to the edge of the platform as possible of the carriage as possible. What I want actually is if we had a platform, I would use a platform because that would get her feet more hip with the part. And just by being in that narrow stance, you're going to facilitate gluteus medius. So if you're there at home and you're putting your hands on your pelvis and just having the heels of the hands on the pelvis and kind of pressing in, that's where your gluteus medius is.
And if you're standing with your feet apart and you are just in a relaxed posture, they won't be on usually. And then you could shift your weight from side to side to turn one or the other on as you're standing on it. So it shifts to the standing leg. Then that Gluteus medius turns on shift to the other leg. Then that one turns on. So it's the stability of the pelvis muscle. So if you're standing with your feet all the way together, try that shifting side to side. Boom, it's on immediately when your feet are narrow. So, um, I can make this springs or set the springs up so that I get immediate gluteus medius to fire very quickly. Um, but you know, for right now we'll have it on one red spring.
She may go more than that or less than that based on what I see here. So I'll, I'll decide that once I see her move. Okay. You can take your, keep your hands there. That'll be fine. Take a breath in and then just stand in a nice length and spine, lifting the rib cage off the pelvis and then as you exhale, slide the legs apart and go as far as you can without any pelvic movement. Okay. And then come back to center. I want you to see if you can keep your pelvis level as you do that. So gliding apart. It's interesting cause one legs moving, one libs legs on a stable surface and I want to make sure her rib cage does not shift right to left and again, exhale, sliding apart.
And how does that feel as far as work? Is it pretty easy? It's not extremely difficult. Okay. When you say it's easy, let me try a yellow spring cause what I want to do is kind of highlight her, her faulty movement strategies to see if I can challenge her and then get her to, yeah, so then she hikes up on this left side, which means her left glue is not holding that pelvis down. Okay, so let's do that again. Go ahead. Oh yeah, so that gets too much. And then she starts to shift up and forward on that left side. Now I want you to anchor this side down. I'm going to try one more and then I'm going to bring it back to the red spring.
Okay. All kinds of compensations. She's hiking on one side. She's arching. If you could see that, I'll show that. Show that from the other side in a moment. So let's leave her on the red spring. She's got good control with that one. And that's how you decide. It's like you want to challenge the person but not challenge them so much that they start compensating. Great. That looks really good.
Okay, so you do about eight to 10 reps here. All right. Now what I want you to do is bend both knees and stay vertical and your posture. So she's doing just a parallel play. Yay. And then I want you to put your foot more to the outside of this and lift your toes. Yeah. So I don't want her foot hanging off cause that's going to encourage pronation.
And I want you to put a little more weight to the outside of your foot here. Lift that big toe. Great. All right. Now push out again both like straight. Yes. So we're going to start with like straight here.
That's it. And then try to think of being under a low ceiling and you're going to go back and forth. Yes. [inaudible] now both legs are moving. Yes. The left leg will straighten all the way out. [inaudible] almost. Yep. Okay. And then stay still and just push your left leg out. Excellent. That one I love. That's my favorite.
Great job that really gets that left glute to start working. All right, now tilt your torso forward. I'm going to increase the spring tension because she's going to be stronger in this position. So I added a blue spring. So now she's on a red and a blue tilt forward like a skater right now. Push out to that left leg being straight.
Lift through the big toes. I want to see if, if I challenge add doctors a little bit. Does that bother her knee? Cause she did say that she has knee pain too. So let's see what happens. Go is why did you can without moving the pelvis
Great. Now I'll turn around now we'll get to see the what's going on from the backside. All right, now let's watch her step up onto the platform with her left foot. Okay. Still so without assistance, remember she had the assistance of the springs earlier without assistance. She arched the bat quite a bit and hiked the left pelvis.
So that means she's still needs assistance with her movements and take her back to the red spring one red spring, both like straight this time, lift the toes so that you've got a little bit of weight on the outside of your feet and then press away. Great. And so we do the whole series on this side as well with the left leg being the stable leg, right? Like being the moving leg.
Just a little bit. Bring the ribcage over the back of the pelvis. That's not to do with her pelvis position or pelvis position is good. It's the rib cage migrating forward a little bit that cra creates that upper lumbar extension. All right. Now keeping that position. Now push the right leg out to the side.
All right. Now tilt forward. I'm going to add a spring and let's look at that and then pressing out to the side.
I'm going to put her on a yellow spring and see what happens here with the Ab ad Dr. Work. That's a d doctor. Work, lift the toes and then a platform will be better to have her whole foot in contact with it and then gliding apart and pull back together. How's that feeling? You're okay with that? Okay, and just notice that when you start to externally rotate, which you would think as a dancer, she has a lot of external rotation. She actually doesn't, which is really smart that you chose modern dance. I lift up through the pubic bone just a little bit as you right now. Did that make things worse or better as far as how that feels in your pelvis?
Okay. She said better. That works better. Now the other thing is she's been in her knees a little bit now, so keep the knees straight and think of a spiraling outward as you come back to center. Yes. And then there's the glutes. Okay,
So w which would be on this side, um, I don't see a huge issue with that. I do see, again the same, same issue with the glutes being unlevel here. So if she were to lift this heel a little bit, she lift the heel a little bit, then the glutes would be more level. But I think that it has to do more with the soft surface, other reformer. Okay. Now I'm going to hold this hand and I want you to see if you can come down with control. Okay. Okay. So she hiked up just a little bit. Um, so you know what you need to be working on. Right.
As far as pelvic stability in the left glute. Um, so do you feel like there's something new that you learned from this or any revelations as far as what you need to be working on and what's not working correctly in your dance practice? Absolutely. Okay. As I'm moving, I'm compensating and shifting more one way or the other. And it's, it's so small in my newt that when I'm really focused on it, um, it is better. Um, and then I don't get that little twinge of pain in the back. Okay.
Make sure that she doesn't challenge herself too much to let that left pelvis hike up because that's going to pinch that nerve. Right. That she has the issue with the nerve pain. So I'm always thinking of keeping that nerve space freed up so that she doesn't get that extension and pinching. I would work her slowly into extension. You notice I didn't do any lumbar extension work today so I'd work her slowly into extension so that she can tolerate that and and be able to maintain that control. And that has a lot to do with abdominal strengthening too. So something like the, the swan kind of preparation with the three part extension that I showed in the thoracic strengthening tutorial will be perfect for her to really get her to be able to extend without hyperextending and the lumbar cause she tends to go there and that lumbar spine quite readily.
She also doesn't have a lot of flection in the lumbar spine. That's something else that I'd want to start working on as well. So it's a, it's an everyday is it a little bit different focus? I would check in with her to see how she's feeling and then see if there's some other place that I need to work on that day and you know, address her issues that are of concern that day. Cause sometimes with the pelvic problem, every day is a different day. So you have different relationships and different, you know, pains and aches and things that are provoking it.
And the more she's aware of these things, the more she can help me understand where I need to go with her. Her strategy for improvement. So I hope that was helpful to you and look forward to seeing you on the next one.
The Teacher's Corner: Common Back Problems


Comments


Silke
You need to be a subscriber to post a comment.
Please Log In or Create an Account to start your free trial.
