Description
Check out Elizabeth's tutorial Create Connections for more in-depth insights on deep core activation.
Looking to explore more connections? Check out these additional classes by Elizabeth Larkam:
Biotensegrity in Motion
Allegro 2 Flow
Awakening Your Body-Mind
About This Video
Transcript
Read Full Transcript
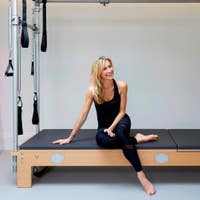
Welcome to Pilates anytime. I'm Elizabeth Larkham, so happy to be back with you to create new, strong connections. The bravo reformer from balanced body is making its debut today. The Polywood frame has over 256 plastic bottles, so it will work so well for us. Let's set up the reformer.
You'll be using the box on every single exercise and the vast majority of the exercises use no springs. So take all the springs off. Put the headrest up and put the long loops over the risers because you won't be using the loops or the cords for these exercises. Now measure the distance that the carriage can travel from the footbar side to the riser side, and then make a tape mark for yourself right in the middle of the frame, and then you'll know exactly where to position the box. The middle of the box goes with the middle of the frame, so you have equal opportunity to slide to each end.
Now for the first exercise, it's important to have the level of the box be the same level as the carriage. You may use mats for this, or you could use a foam roller. So position the box in the middle of the frame, the foam roller on the box, and then line the carriage up, everything's in the middle all organized. Mount the box or the foam roller and check to feel see and notice that the back of your pelvis, your sacrum is going to be anchored on the roller and your ribs shoulders and head on the carriage. Initially, have your bent elbow upper arms on the carriage, keeping your pelvis steady on the mat or on the roller, start to shift.
It's a lateral translation of your ribs with respect to your pelvis. The reason we're doing this is that all the exercises coming up require you to be organized at the midline with your thoracolumbar junction and your sacrum sacrum S2 being able to organize equally right and left. Keep your right foot firmly planted on the box and cross your whole left thigh over the right thigh. Now your left sitting bone doesn't have a floor on the ground so who you're gonna call? Your new strong connections for your abdominals, low in your pelvis on the left side, uncross the left thigh and cross the whole right thigh over your new thigh.
Keeping your left foot firmly anchored you need a ground force, a context from which you can shuttle your pelvis translating laterally side to side. But wait, there is more. Anch your tailbone, your pubic bone down to the carriage, And now it's open kinematic context for your pelvis, settle the back of your ribs, the back of your lungs down onto the carriage. A little bit of this goes a long way to finding some kinesthetic blind spots that encourages you to make strong new connections. Now we do the whole project again without the ground force of your arms.
Keep your feet firmly planted, push your left foot shift to the right, push your right foot shift to the left. Keeping your right leg firmly planted, cross your whole left thigh over your right thigh, keep the roller steady, uncross your left thigh, cross the new thigh on top, Reminding your pelvis to stay level and steady. Now buckle up because this next one is, potentially scary. Settle in the center, uncross your thighs, press your sacrum, down into the roller, and you could just imagine a small amount of motion from side to side. And sometimes, imagination is sufficient because a little bit of ground force can send you off the roller.
Put your feet down, nod your nose downward, make your way up from here. Now we're going to take the other side of this. So leave the roller, stand up, walk around. This time, it's your thorax, your shoulder girdle your head that's on the roller, your sacrum, your pelvis, it is on the carriage. Whoa.
Your pelvis is anchored, your palms are on your thighs, keeping the rollers steady, slide the carriage side to side towards the risers and towards the foot bar. This requires a new connection of your abdominals from ribs to pelvis to feet, keep one leg firmly planted, cross the other thigh on top. You could remind yourself to keep a long distance from ribs to pelvis. Don't hip hike here. This is a lateral translation, uncross one thigh, cross the new thigh on top.
And this always sheds light on the differences between sides sobering but significant. Now bring both knees to your torso, and here's a hint drive from your right sitting bone to your right heel and your left sitting bone to your left heel. Engaging deep core control tissues that you might not have met before. Plant your feet, take your arms, palms up to the ceiling. Pressing with your, one foot, shift your pelvis away from the foot that's pressing.
Keep this lateral translation going. Shifting side to side, each leg gets a turn to be on top. And when you refine When you start your class by refining the trunk control required to keep your thorax and your pelvis volumes organized, there's nothing you can't do for the rest of the class. Land your feet. Bring yourself forward and up.
And as marvelous as that has been with the roller, we're done with the roller now. Just hand it off to? Your favorite producer, that would be Nicole. Let's change the orientation of the box now so you can prepare your shoulders for all the weight bearing that they're going to do in quadruped. Bring the box on its edge.
And then perch on the box with your palms on the carriage behind you. You could have the idea that you're smiling the upper lobes of your lungs, that you're smiling your upper ribs, slide your ribs the whole volume of your thorax from side to side. Keeping the lift in your upper ribs, your upper torso so you have a modicum of upper thoracic extension. Now slide to the risers turn to the footbar and slide more to the risers. Each time sliding the carriage a little bit further behind you looking over your shoulder Come through the middle, slide the carriage to the footbar, you turn to look at the risers over your shoulder and continue sliding the carriage coaxing more and more rotation on top of translation and extension.
Now we alternate sides, rotation and slide, rotation and slide. Turn each time you look further back behind you over your shoulder for more of these because it's sort of fun and kind of interesting to do also, and it'll serve you well for what's coming. Now for your next event, you're ready to start in on quadruped abdominals. For this, you're going to need your knees on the box and your bent elbow forearms on the carriage. Put the box so that you have the large surface area up and climb aboard knees on the box, bent elbow forearms on the carriage, aiming your palms towards each other.
You have options with your ankles, tops of your feet on the box, or dorcey flexion so that the soles of your toes are tucked under sliding your ribs towards the footbar and towards the risers. Initially, keep your pelvis fairly steady, keeping your hip joints directly above your knees. Now shift further and shift as far as you can go to the foot bar so that the riser knee comes up and shift as far as you can to the risers so your footbar knee comes up. Shift anchor, lift hover, shift anchor, lift hover. Now keep one leg high in hip extension while you slide side to side.
Keeping your hip joint directly above your knee Continue the rhythm of the carriage. The new leg is up. Draw your low front ribs up to the ceiling. Twice more of these. Extend your elbows, change the lever length, plaster your palms wide at shoulder width, slide the carriage far to the foot bar, initially you keep both knees firmly anchored on the carriage.
Then shift anchor, lift hover, shift anchor, lift hover, two more of these aim your inner aspects of your elbows towards each other. Keep one leg high in hip extension as you slide side to side. Suction the pads of your fingers onto the carriage. Keep your rhythm going and change knees. Last two end, keeping the light from your sternum, your manubrium directly between your thumbs.
You are well prepared now with your quadruped abdominals. It's time to go for the supine leg slides, which is your preparation for bridging. Slide the box away from the carriage. Let's say, oh, I don't know. You could get your ruler.
Maybe 10 inches would be good. And soon, you'll be lying on the box with the soles of your feet on the carriage. So center the carriage with respect to the box. Make sure that your pelvis, your whole torso and the back of your head everything has a floor to be supported on the box. You can start with your, bent elbow upper arms on the box and the pads of your fingers.
They can be at the front of your pelvis or at your sternum. Initially, the soles of your feet, they stay suctioned onto the carriage. This preparation is valuable because it you can finesse the glide, the spin at your hip joints, the rotation of your four legs, your lower legs with respect to your knees, and the mobility of your ankles that allows your feet to stay firmly anchored. Now having done this with both feet on the carriage, lift one leg up. This lifted leg is on vacation and the other leg, the carriage leg is able to go further in its range of motion Still keeping the soles of your toes suctioned onto the carriage.
Keep your rhythm going and change, give the new leg a turn. And yes, of course, It feels different than the other one, but that is life in the body. The differences between sides. Now, you've done your preparation with arms down, Take your hands straight up to the ceiling, palms together fingers interlaced. And now that you're no longer able to rely on the contact of your arms, your hands with the box, you can lay down a good habit for what's coming up in bridging.
Draw your heels to your sitting bones, press your toes away from your sitting bones. Draw your heels to your sitting bones and press your toes away. Heel leads in, toes lead away, heel leads in. This cue of drawing your heel towards your sitting bone, it currents, making a current of air, current of water, a current of muscle, a current of fascia, currenting from your sitting bone to your foot, which you will need in bridging, which is coming up right now. Plant your arms down on the on the box. Lift your pelvis straight up. You are up in a bridge.
Now it's necessary to recruit a lot more fibers. However, you are well prepared to do so toes push away, heels draw towards your pelvis, toes push away, heels draw towards. Keeping your pelvis lifted. Keep one foot on the box and the other leg is on vacation, steering heel to sitting bone and toes away. Keep your rhythm going, put one leg down and carry on with the new side.
Eventually, in your near future, you will do this bridging without armed support. So be grateful that you have your arms now. Land your pelvis, land your foot, make your way up from here. It is quadruped time again. This time you'll need the box on its edge, suitcase style.
So that the canvas strap of the box is lined up with the center point of the carriage. Now you'll have your bent knee shins, your feet on the carriage, and your hands over the side edges of the box. So you can take good care of your wrists by having the heels of your hands on top and your fingers over the edge. These are close together, touching, aligned with the center of the canvas strap, and the light from your sternum is directly over the strap between your hands. Aim the inner aspects of your elbows towards each other.
Push with your riser hand and slide the carriage to the footbar, push with your footbar hand and slide the carriage to the risers. Check to feel see and notice that your knees are directly aligned with your hip joints. Your hip joints are above your knees. So there's no twisting going on. Nope. None of that.
It's just a side glide This is a glen o humeral joint motion, the head of your humerus, your upper arm bone, is gliding, lots of gliding going on in your shoulder socket. One leg stays steady on the carriage. The other leg is lifted high in hip extension. Look at the knee, your knee that's on the carriage and assure yourself that your knee is directly aligned with your hip joint. Pardon me, keep the rhythm going and change to the new side.
Your whole torso is moving closer to the risers and closer to the foot bar, closer to the risers, and closer to the foot bar. Bring your knee down now and let's go and add a twist to this. Your hands are still supporting you and you'll need to re arrange your knees. Bring your knees close to the spring edge of the carriage. You could measure one hand distance from the spring edge of the carriage.
Now move the carriage so that your knees are aligned with the shoulder strap. The reason for this is so that when you twist your pelvis, you'll be able to get your pelvis closer to the carriage and you won't be impaled by the shoulder blocks like this. Turn your navel your knees towards the footbar, sit your pelvis down in the direction of the carriage, aiming your gaze opposite where your knees are pointing Press with your hands, engage your abs a lot and bring yourself into flexion. Now twist, aim your navel towards the risers and then slide, bringing your pelvis closer to the floor, look opposite where your knees are aiming. Scoop in. There's a cue for you, a cue from the ages.
Scoop in with your abdominals. This is neat, navel to spine, and then rotate turning your naval towards the risers, slide the carriage, unfurl into extension gaze opposite your knees, exhale come into flexion, twist, inhale accompanies you into extension. One more each side exhale brings you to flexion. Inhale, you unfurl gaze goes opposite your knees as you bring the side of your pelvis closer and closer to the carriage, curl in round in, and last uncurling of here, extension with rotation. Naval to spine, gaze towards your knees.
And it's time now for the much anticipated bridging with no springs and no arms for support either. Reorganize the box so the box is perpendicular to the frame and you have enough room to support your pelvis, your torso, your head on the box. Your feet suctioned onto the carriage. Let's get right to it. Arms straight up.
Palms together. Fingers interlaced. Plant your feet, lift your pelvis up. You're up in a bridge. When you slide towards the foot bar, carry your straight elbow hands opposite your feet, pull back through the middle.
The carriage slides one direction and you watch. Your arms go in the other. Slide the carriage, add rotation, watching your thumbs and slide the carriage. Come back to the middle, One leg is on vacation. Let's just keep your arms steady for the moment.
There's enough to do while you focus on steering with your heel, your rear foot, and your forefoot. One more each way. Stay lifted in a bridge. Plant your new foot on the carriage and carry on. Your heel leads towards the risers. Your heel leads towards the foot bar.
You could steer with your heel That'll make a better sitting bone to heel connection, or you can have the idea that your toes bring you to the foot bar and your toes bring you to the risers. Hours of entertainment, bring your feet down and make your way up from here. You have successfully finished bridging, single leg bridging with no arm support. Let's return now to quadruped with the twist, with the rotation, and add another surprise element to that. Reorient the box, so the box is parallel to the frame, right up next to the frame.
And as before, you'll have your niche in feet on the carriage As before, your hands over the side edges of the box to take good care of your wrists. Bring your knees one hand width from the spring edge of the carriage. Align your knees with the canvas strap. Twist, aim your navel your knees towards the footbar. Sit your pelvis in the direction of the carriage near the shoulder block.
Now while you're here with your pelvis getting lower and lower to the carriage, you move into a posterior pelvic tilt and an anterior pelvic tilt tucking under and then tail bone back. Looking over your shoulder a long way from your knees, rocking your pelvis over your heads of your femurs Cokesing a lot more tissue tug and preferably glide between your pelvis and your ribs. Scoop in. Turn your naval towards the risers. Slide your knees to the risers, sit your greater trochanter down in the direction of the ground and start the tailbone back and forth and back and forth.
Anterior and posterior pelvic tilt. Being in the Pilates world, you are accustomed to pelvic tilting, but you've never met a pelvic tilt in this orientation. Now we go side to side twist, slide, and four times back and forth, and back and forth, and back and forth. And back and forth the new side awaits, twist, slide, and tailbone leads back and forth, and back and forth, last two end Last one, finish in flexion. It's time now for side plank.
So for side plank, You will reorganize the box rearrange the box. We need the large surface area up and the box aligned with the tape that shows you where the middle of the carriage is. Let's have let's say 12 or so inches between the box and the carriage. You'll come to lie on your side on the box. You're sealing knee shin foot.
They are on the carriage. You can have one foot up against the shoulder block. Your bent elbow forearm is on the box and your sealing hand is on the box as well. It's some preparation time now getting accustomed to the glide in your hip joint in your knee and in your ankle. Press down with your inner knee, your inner calf and your inner ankle so that you have a good ground contact with the carriage.
As the carriage slides back, look over your shoulder as if you could see your foot behind you and then your knee coming forward. Rotation of your ribs, your thorax. Twice more of these. Now bring attention to your leg that's towards the ground. It does a kick opposite where the carriage is sliding.
One foot moves back and the other foot moves forward. Last two end, Last one. Prepare now to press your shoulder into your elbow, into your forearm, to press your palm into the box, lift your pelvis up, and resume the motion your pelvis is off the box and you are in your supported side plank for more of these. Last two end, last one. Make your way up from here, squiggle around, the new side awaits.
You're almost off the edge of the box with your pelvis. One knee shin foot, the ceiling knee shin foot is on the carriage, and you are preparing. For the hip motion sliding back towards hip extension, and then flexion and extension and flexion. A company, the carriage slide with an oppositional, leg motion, you extend your knee, and then bend it and extend and bend. Two more of these.
Press your ceiling niche in foot into the carriage your bent elbow form and hand in the box and then while you're up. Slide the carriage opposite the direction that your floor leg is moving. Last to end, Last one. Come down here from the side plank. It's time now for another quadruped abdominal activation.
For this, we're going to bring the foot bar all the way down. It's true. The carriage has no springs or at least we're not using them. We're going to use the box as a platform for your forearms. Your elbows, wrists and hands, center the box on top of the footbar, making certain that it is well supported on each side and on each end. Now, slide the carriage towards the box, bring your knee shin feet on the carriage and your bentel both forearms, they are on the box. You have options with your feet.
If your shoulder blocks allow, you can slide your toes underneath the shoulder blocks. That'll give you some extra stability. Or you can just have the tops of your feet on the carriage. As you exhale, slide the carriage back, turning your palms down, and you have options of how far back you would like to go in hip extension and in hip flexion. It's true. You could accompany this exercise with lumb with torso flexion and torso extension, but for right now, for this first round, keep your pelvis, your torso fairly neutral. So you are respecting your lumbar thoracic and cervical curve architecture.
Bring both hands to one corner of the box, windshield wiper both feet to the opposite corner from your hands and as the carriage slides make use of the twist that you'd used earlier. As the carriage slides back, rotate ribs, shoulders, head neck and eyes to look over the shoulder closest to the close edge of the carriage. One more here, extension with rotation. The new side awaits, the new corner awaits, as the carriage slides rotate to look over your shoulder towards the side of the carriage, the side of the frame that's closest to you. Let's return to the sagittal orientation.
This time, you can accentuate torso extension. As the carriage slides back, lift your chest bone, lift your gaze, aiming your gaze up to where the ceiling meets the wall, and then as you come in, it's lumbar, thoracic, and cervical flexion looking back between your inner thighs. Inhale extension, gaze up underneath your eyebrows, exhale, flexion gaze down behind the cheek bones of your face. Twice more breathing in, and exhaling. You could accompany the exhalation with a low resonant One more of these because it may be unusual for you to in your pilates practice, but a low resonant stimulates the ventral vagus, nerve area which could give you an indication that there's less threat in the environment.
Both hands come to one corner, both feet to the other. As you rotate, accentuate extension, exhale coming back in, breathing in, and exhale humming. Now the new side awaits, the new diagonal, both hands to one corner, both feet to the other. As the carriage slides go further back into rotation and extension, and then come into flexion to look between your inner thighs, breathing in to look up up and over one shoulder, and exhale humming. We have some more moves now to do with this box, but this time we'll have the box the long box on the carriage.
Do bring the foot bar up to its, first location, and you'll need a blue spring on the carriage. So one blue will keep you attached to the frame. When you stand next to the carriage, line up your one foot with the foot bar and then jump the other foot onto the box. One hand stays on the footbar and the other arm goes behind your calf and underneath your thigh. Push with your footbar hand and slide the carriage towards the risers and towards the footbar.
As you slide the carriage to the risers, turn your torso, turn ribbed shoulders, head neck and eyes. Looking towards the calf of the box leg. The leg that you're standing on, that knee doesn't bend. Now externally rotate your leg, turning your toes, your knees away from your body towards the risers, sliding the carriage, and coming back in. Turn ribs, shoulders, head neck and eyes in the direction of the calf that belongs to the box.
Internally rotate spin on your heels so your toes aim inwards towards your footbar hand and slide side to side. You have two more of these. Coming up from here, your box leg will come plummeting to Earth, and you have a whole new leg, a whole new side to stand on. Walk around surely the new side will be different. We're sure of that.
Stand with your floor foot aligned with the foot bar. Your other foot is on the box close to the spring edge of the box. Your arm ducks under your leg, push with your hand and slide the box away from the foot bar and towards it. Turning, ribs, shoulders, head, neck, and eyes, in the direction of your box leg externally rotate, steering your knee and toes towards the risers. Rocking your pelvis over the femur head of your floor foot, spin on your heel so you aim your toes on the box in the direction of the foot bar.
It's an internal rotation from hip, knee, ankle, and foot. Making your way up from here Now, you have two new legs to stand on and walk around to the first side. And let's change the spring off on with the red, off with the blue. When you stand with your, facing the side of the carriage, your supporting foot leg, they are aligned with the shoulder block. Your hands are on the box and jump your foot onto the foot bar.
You have options. You could have your foot on the foot bar closer to you or in the middle of the foot bar or far forward. One hand on the shoulder block, the other hand over the side edge of the box, and here you are all dressed up for your spider woman or spider man appearance. The box moves because the foot bar knee extends. Tilt your sitting bones up to the ceiling, spreading your sitting bones wide and steer your foot bar knee over your second, third toes.
Now you have been in parallel, swivel so that your mid foot is on the bar, your heel is below and your toes above you extend your your knee, foot bar knee and bend it. Snugging your femur head right into your acetabulum in external rotation. Internal rotation now, steer your toes towards the ground, your heel above the bar, and your mid foot is snugged onto the foot bar. Aiming your sitting bones up to the ceiling and steer your sitting bones and your tailbone away from the foot bar twice more towards the risers. Make your way up from here.
You have another new leg to stand on. Gratefulful to have two most of the time. Standing with your floor foot leg aligned with the shoulder blocks. Jump your ceiling foot forward on the foot bar, get your hands organized, extending your ceiling knee and bend it. The leg you're standing on, that knee doesn't bend.
External rotation heal below the bar and toes above, aiming your knee over your third toe, internal rotation heal above the bar toes aim below. This one requires a little bit more attention aiming your sitting bones up and you're sitting bones away from the foot bar twice more now towards the risers. Making your way up from here Thank you so much for joining me for our creating new strong connections, adventures with the box, and the bravo reformer. Please do take a look at the tutorials that'll help you with your practice and with your teaching of this material. And as always, Leave me comments.
I would love to hear from you and am very eager to answer any questions you have. Thank you so much. Bye for now.
Intermediate Reformer: 40-Minute Classes


Comments


You need to be a subscriber to post a comment.
Please Log In or Create an Account to start your free trial.
